Orchestration using ECS and ECR - Part I
Intro
Orchestration means managing container life cycle from building them to deploying (which requires provisioning of appropriate compute resources, storage resources, networking resources), scaling, load-balancing and other tasks, while accounting for failures throughout.
While there are many orchestration solutions, we will focus on a couple of them: ECS by AWS and Kubernetes (local hosted solution and managed by GCP). While there is Elastic Kubernetes Service (EKS) by AWS as well, we will omit it here, as the ideas are the same.
Why should data science professions know such orchestration solutions?
- Pro: Get key devops features (fault tolerance, scalability etc) with low on-going effort. The deployed service will not likely break down.
- Con: There is a non-trivial setup cost/complexity.
Next, we will (a) deploy our model serving docker image to the AWS container registry ECR, (b) use ECS to deploy a container based on that image, and © set up a load balancer that mediates requests to the prediction model.
Elastic Container Registry (ECR)
- Sending the image to a model registry such as ECR is needed to access it at other places to create containers.
- ECR allows for better integration with the AWS platform, and works with EKS as well.
We will create a docker image locally (can also be done on EC2) and push it to an ECR repository that we will create.
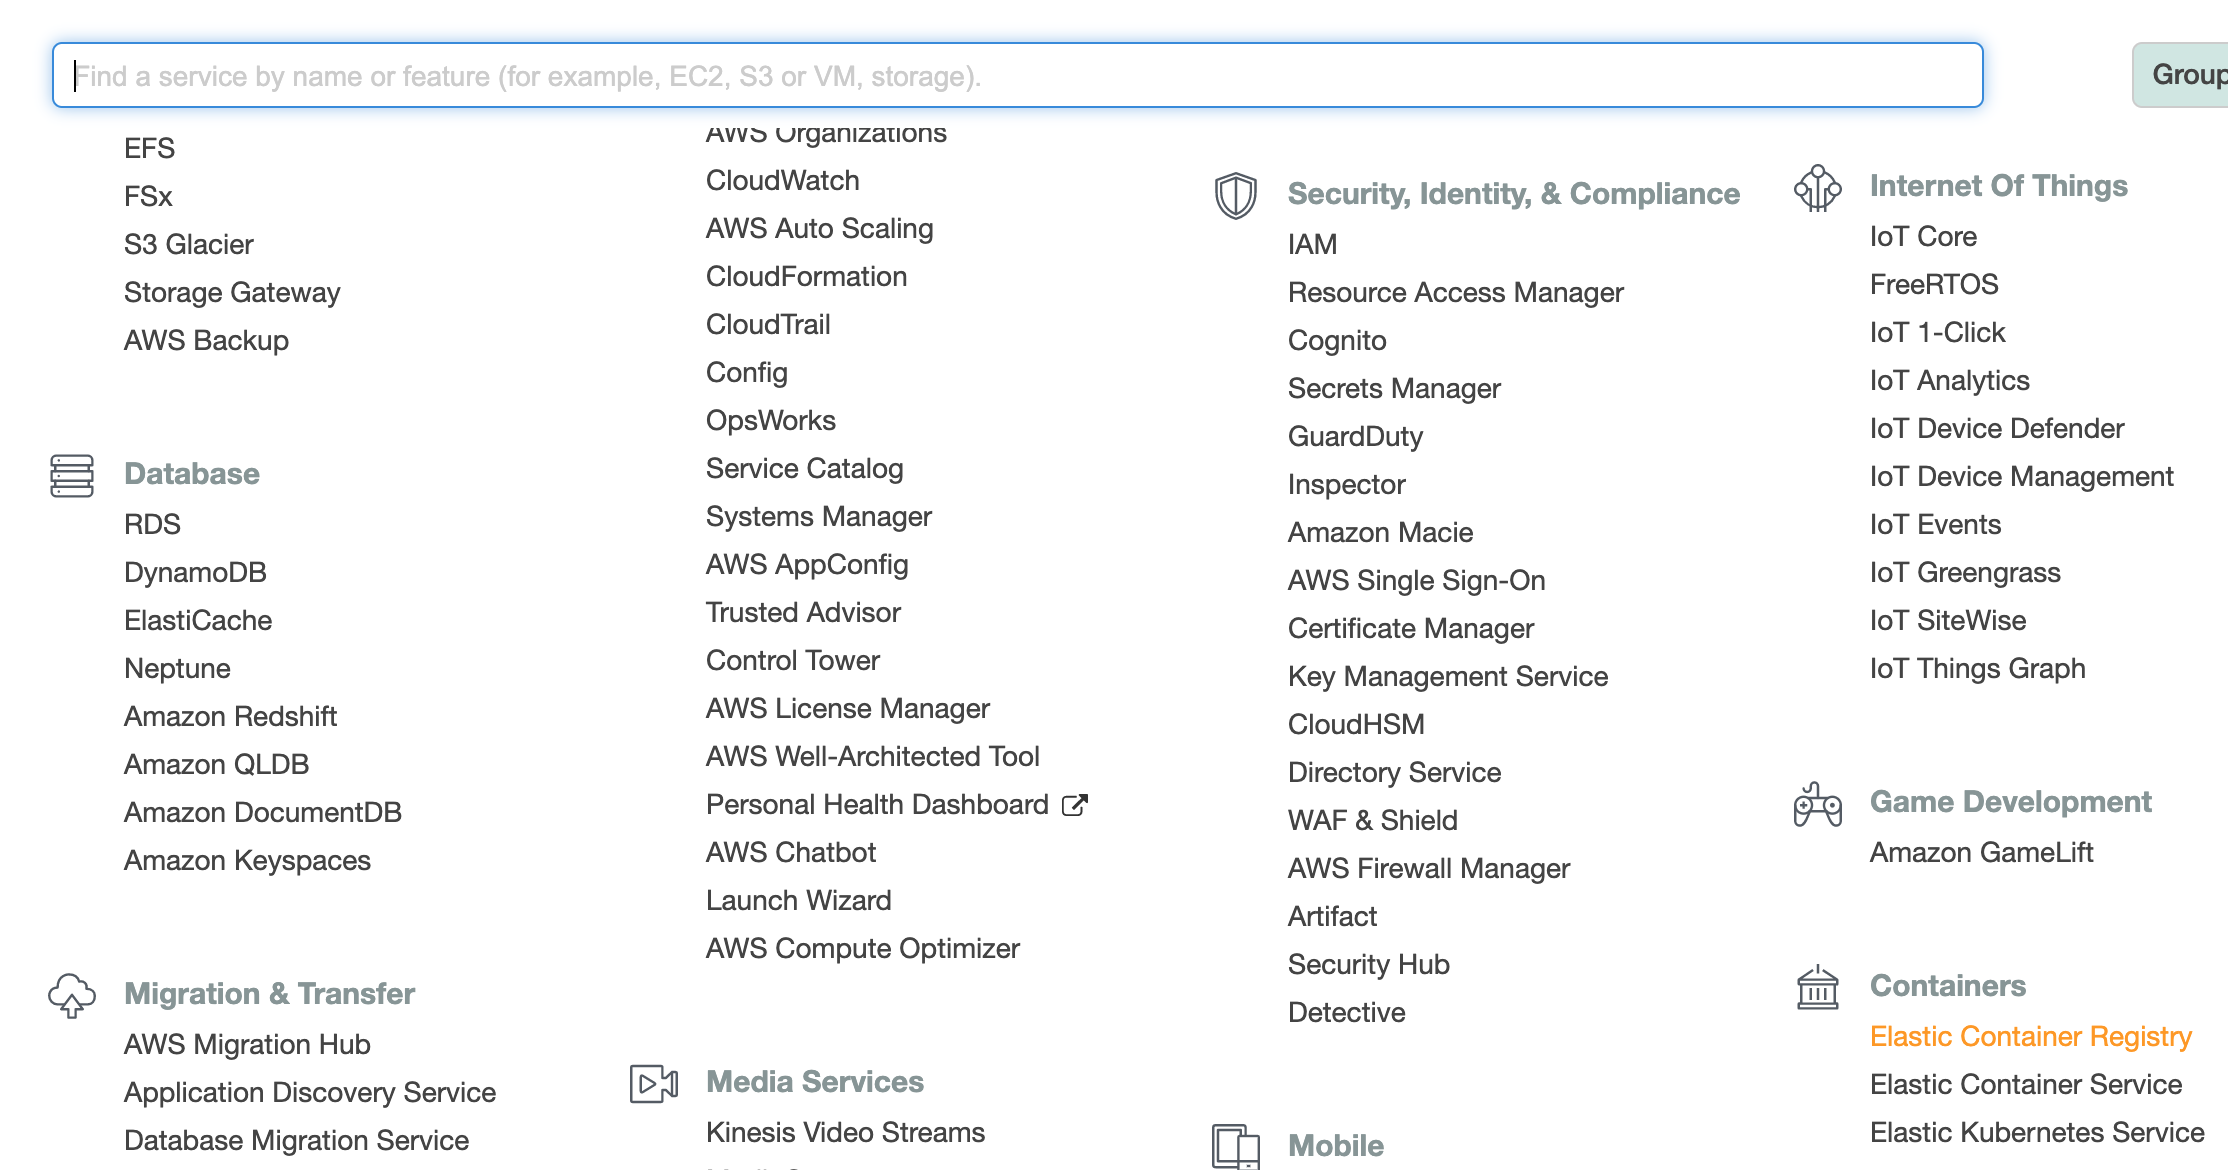
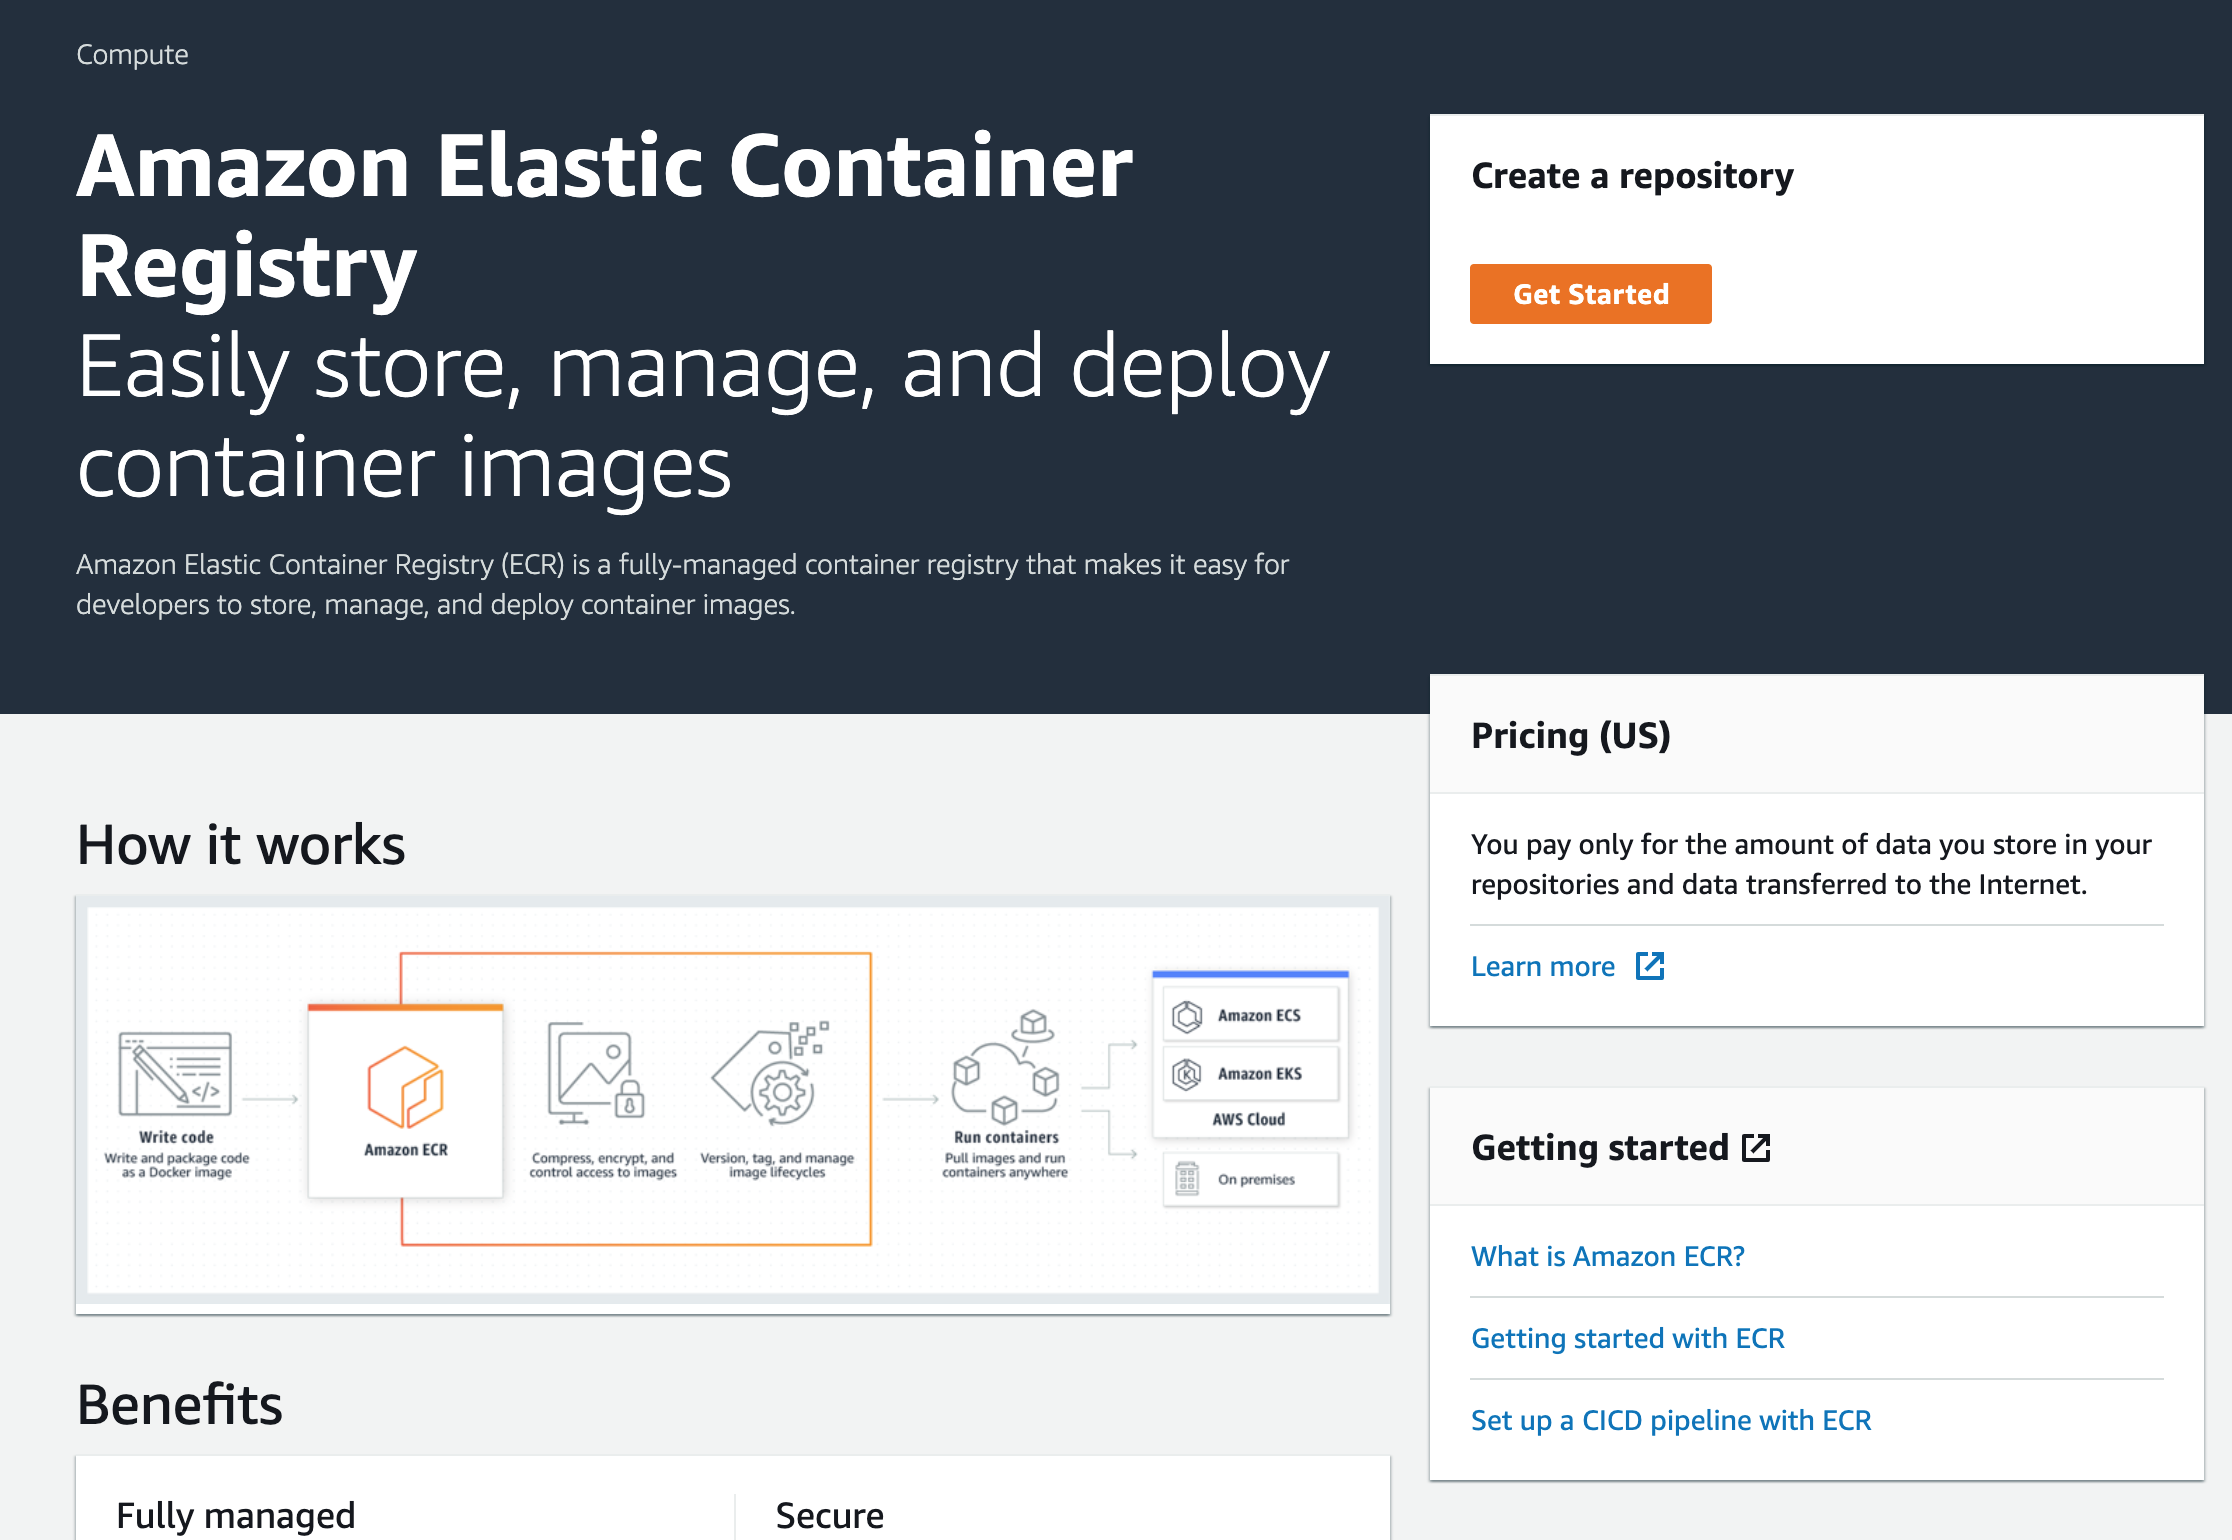
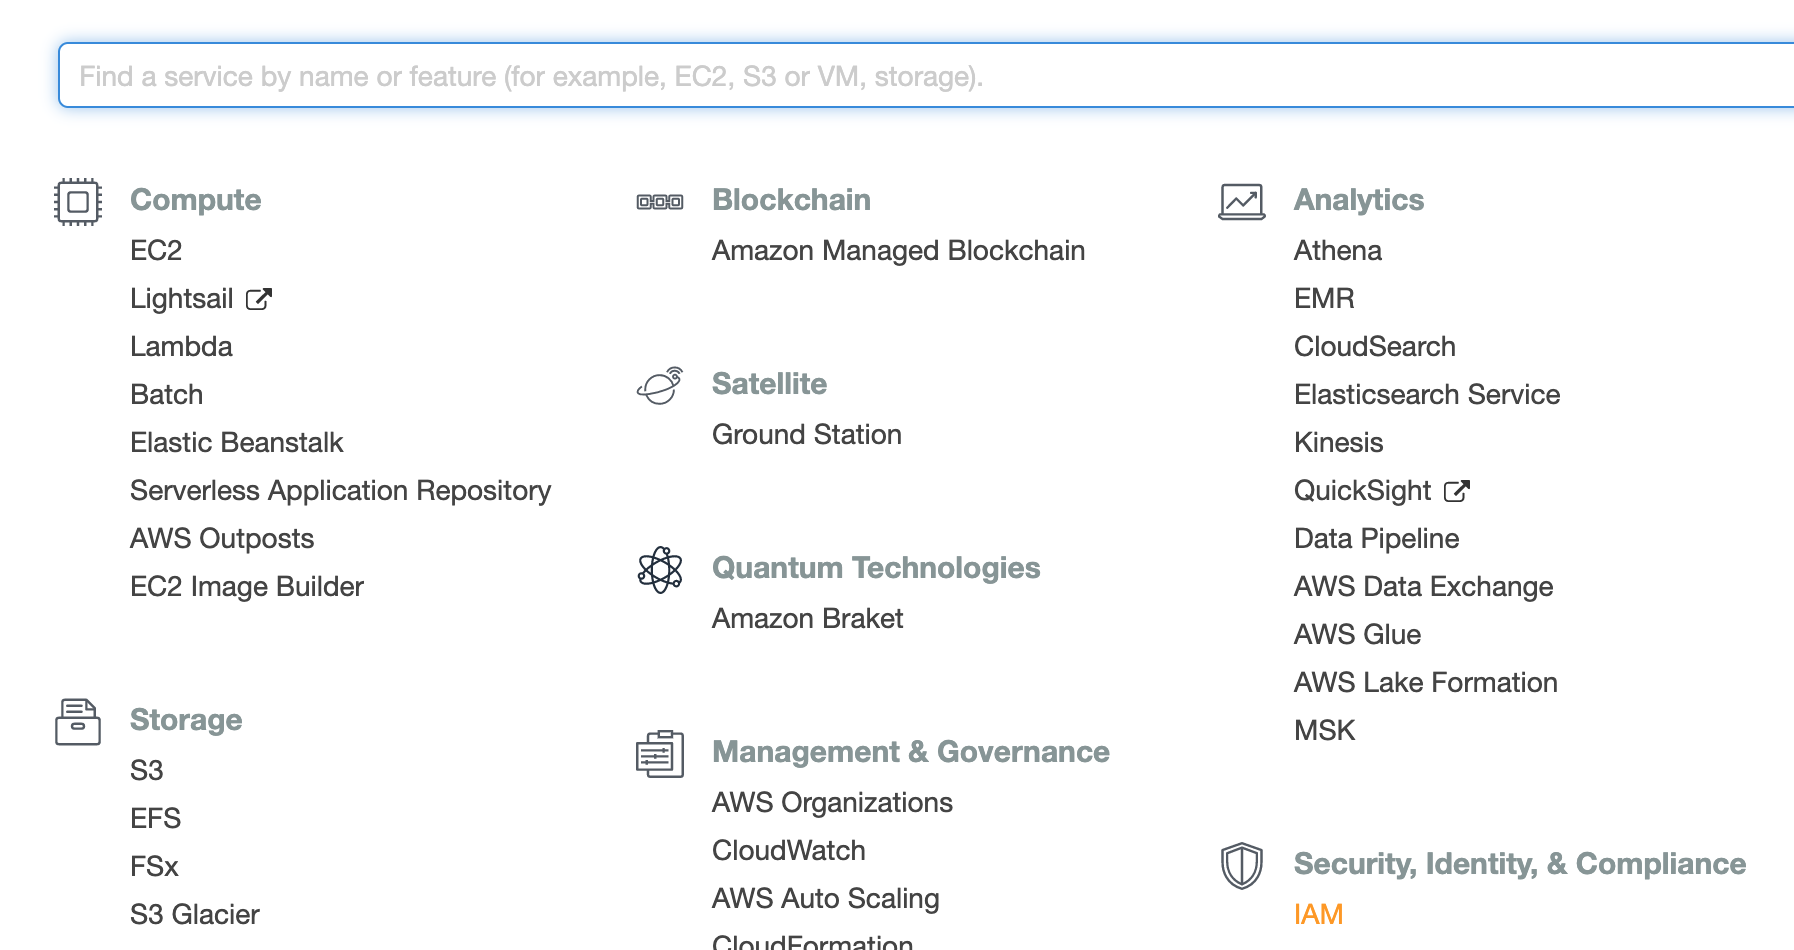
Navigate to the ECR link on the AWS console.
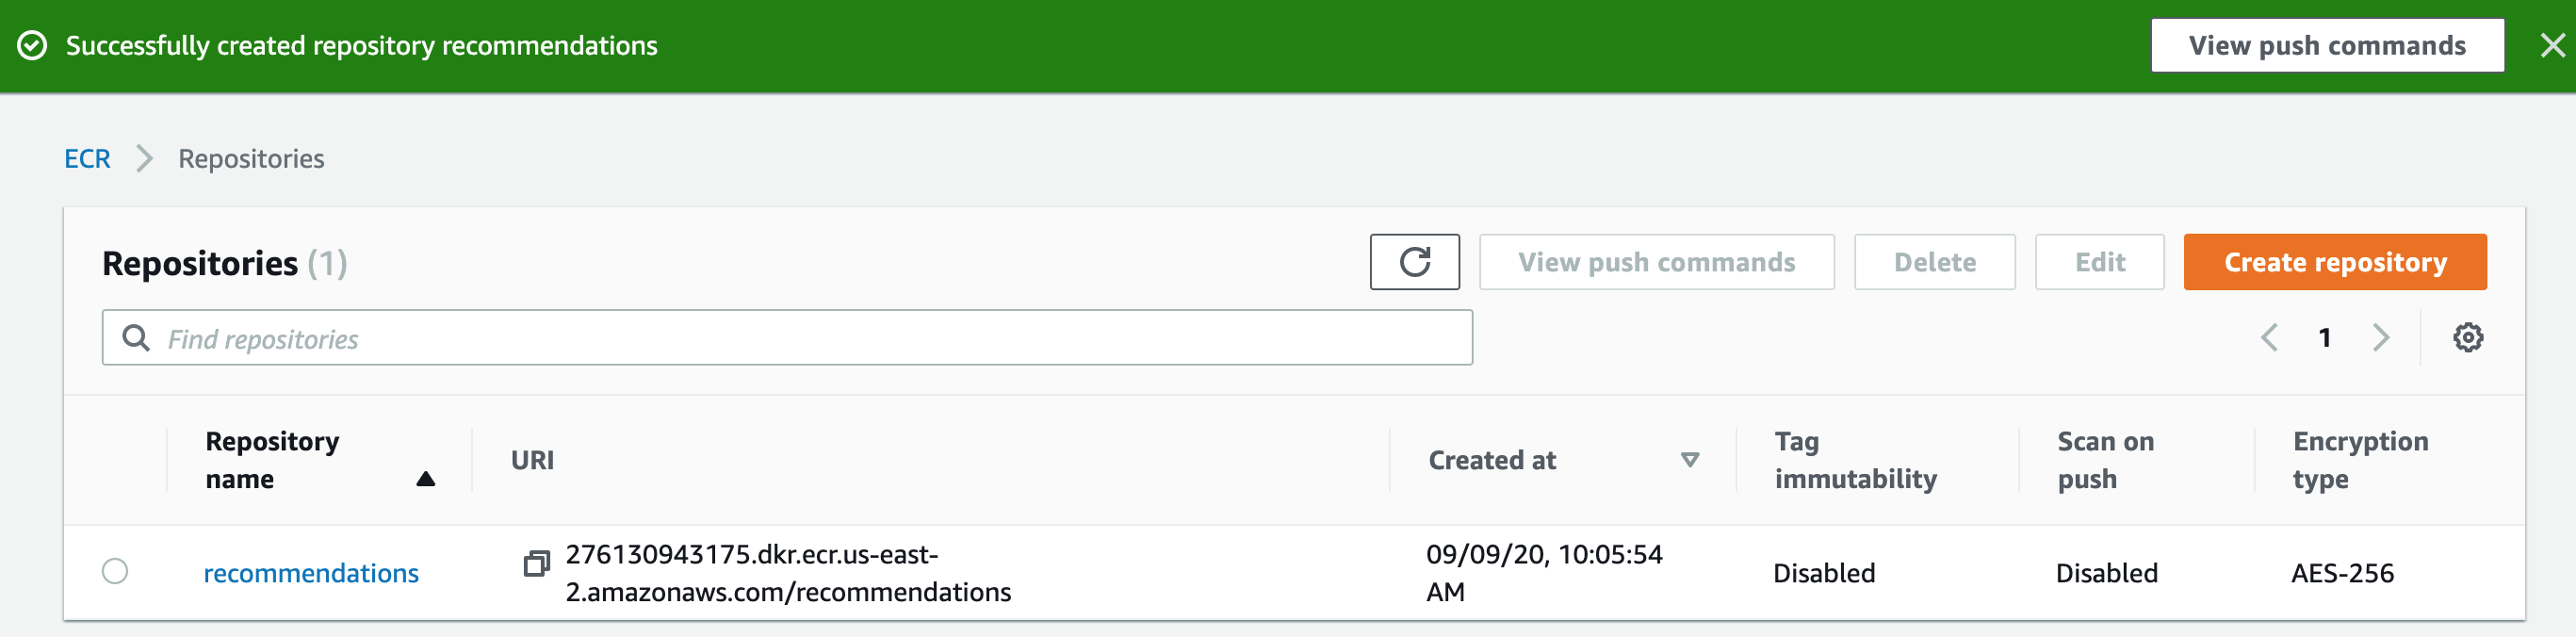
- Click create a repository ‘Get Started’ button. ECR can have multiple repositories and each repository can hold multiple images.
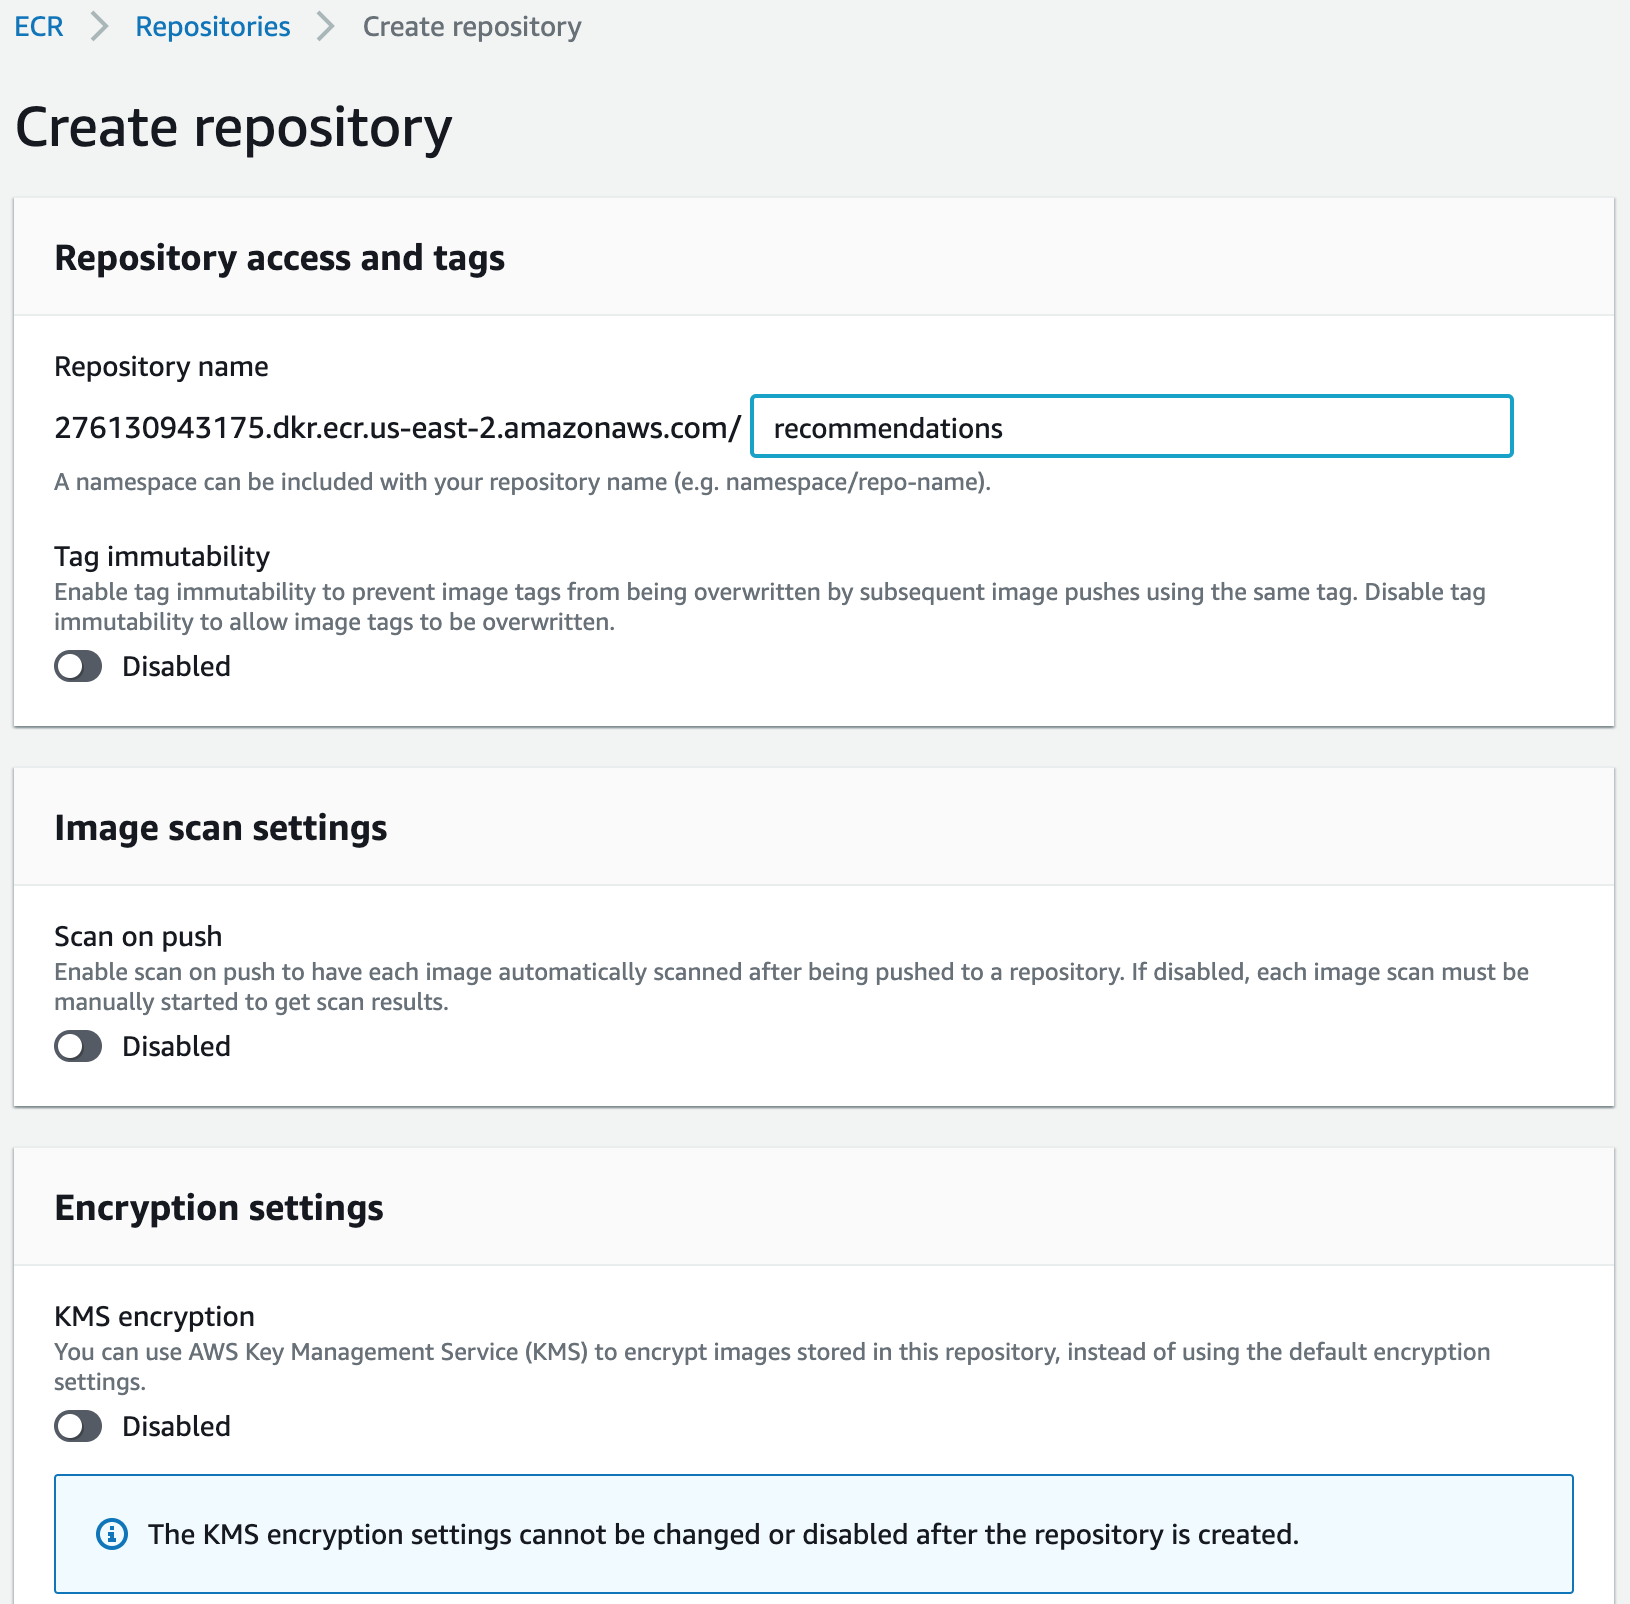
- Give a name to the repository. It will contain multiple Docker images.
- Review the current repository list.
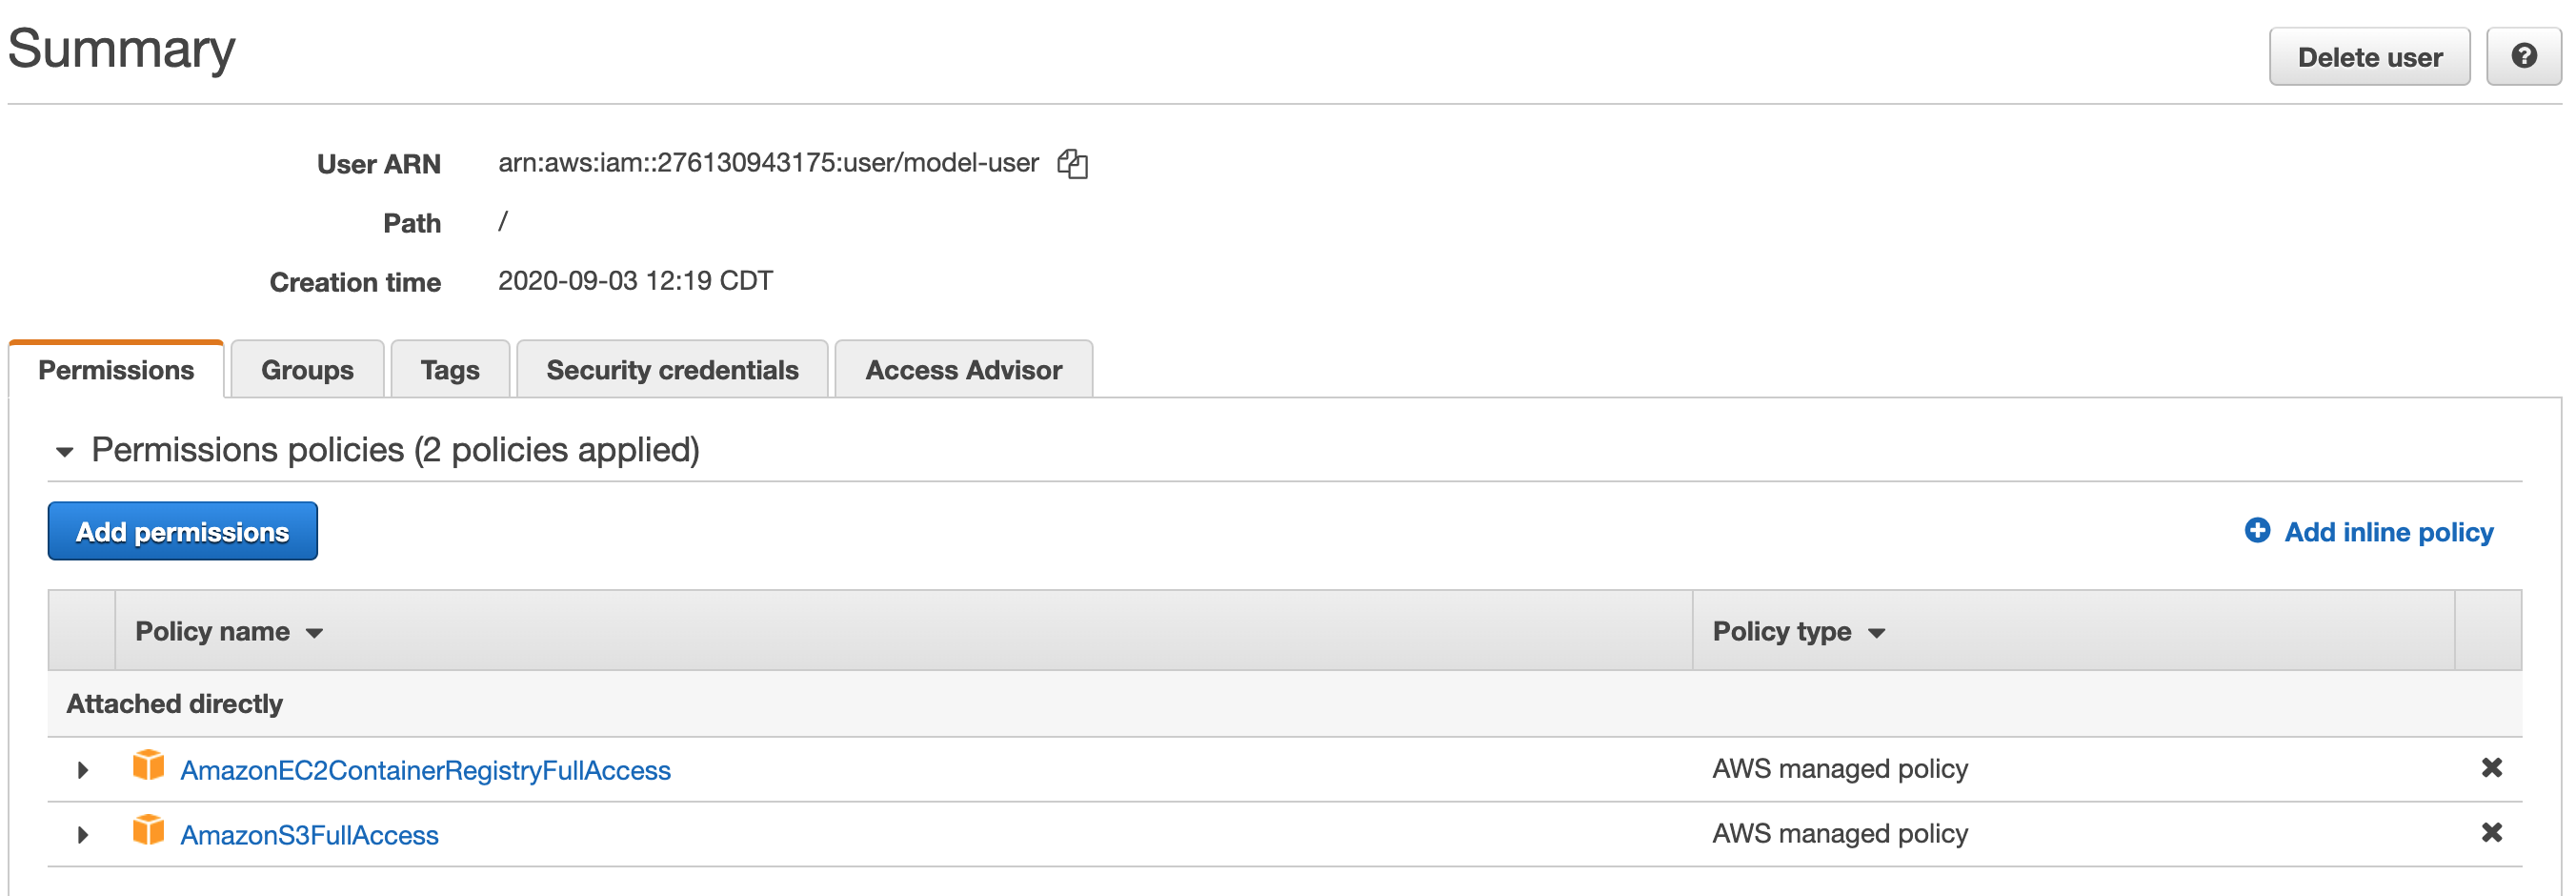
- Next we will allow the programmatic user we created for accessing S3 (we gave the user name model-user) to also manage the ECR repositories. Navigate to IAM as shown below.
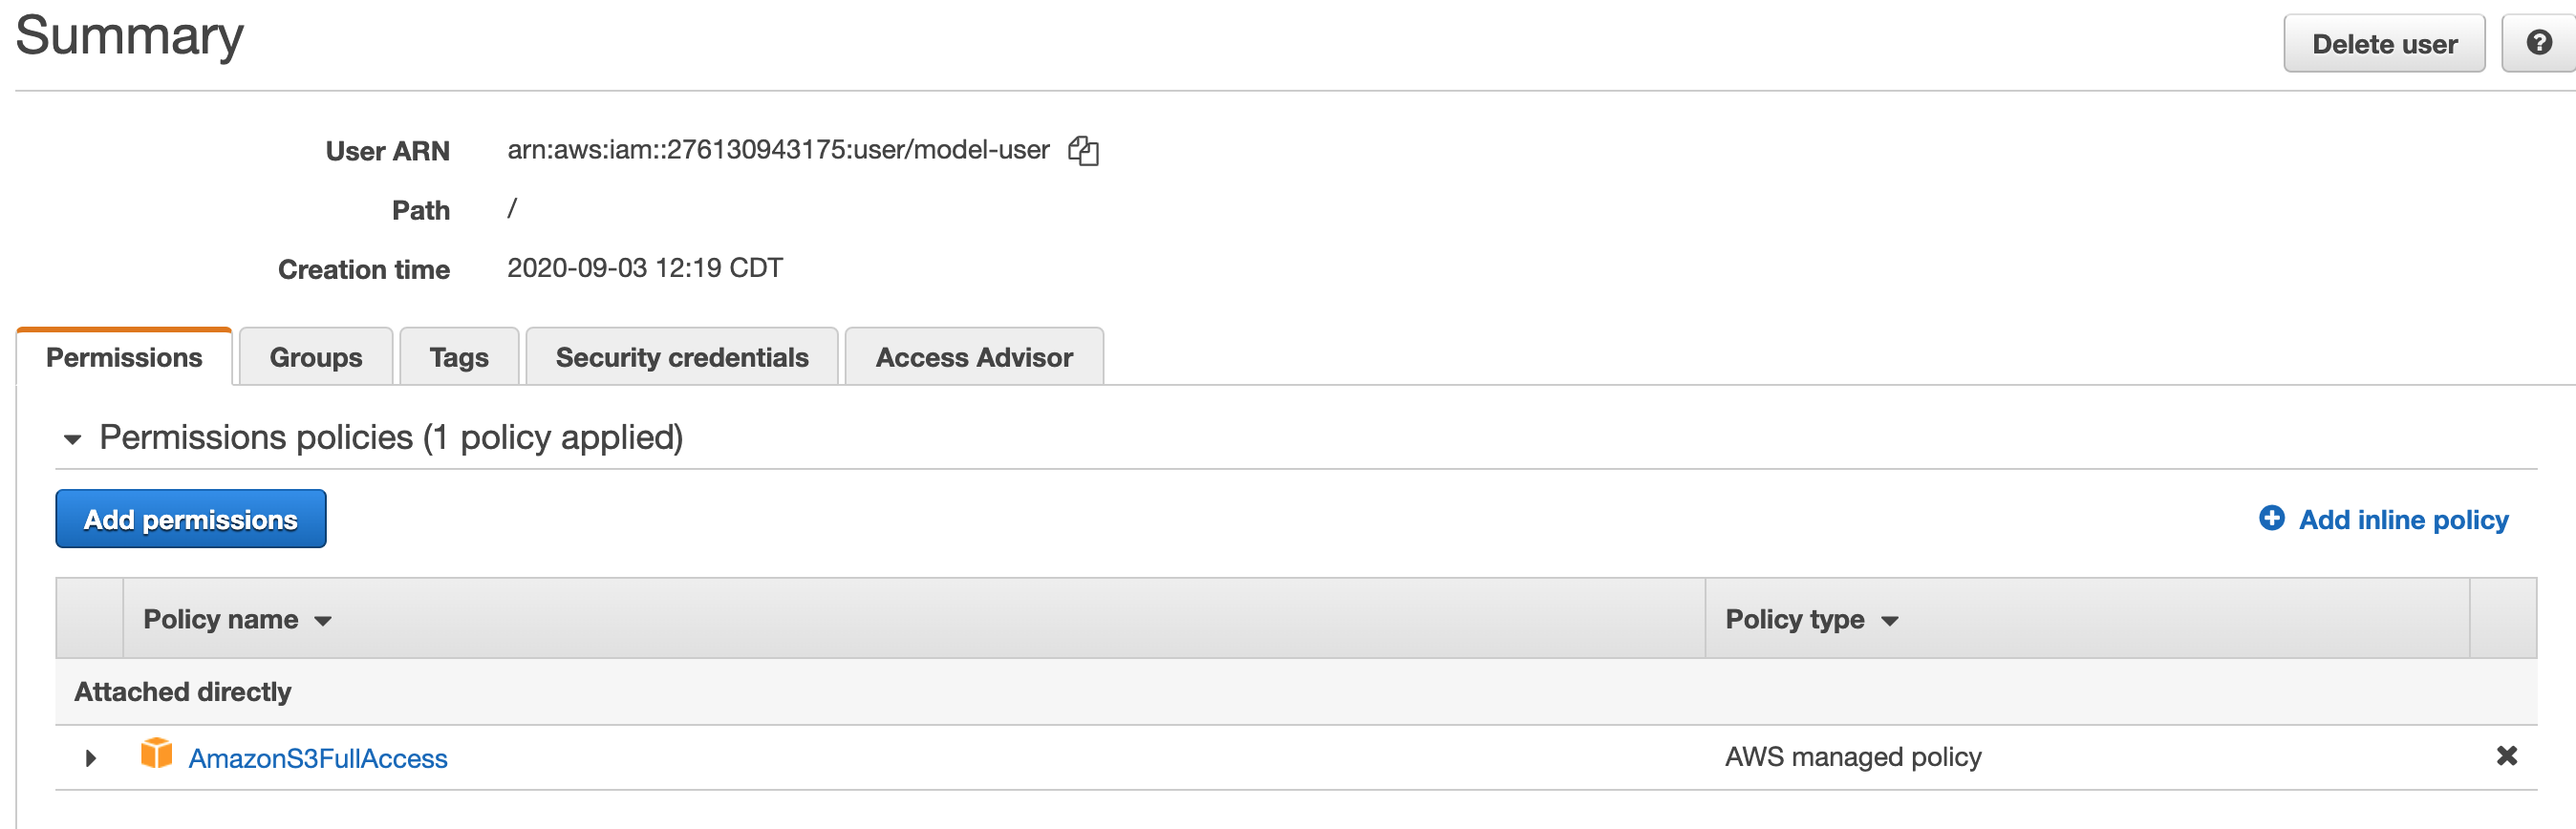
- Click on the user who we want to edit access controls for.

- Currently this user had S3 access (not relevant for us).
- Click on attaching existing policies and search for
AmazonEC2ContainerRegistryFullAccess.
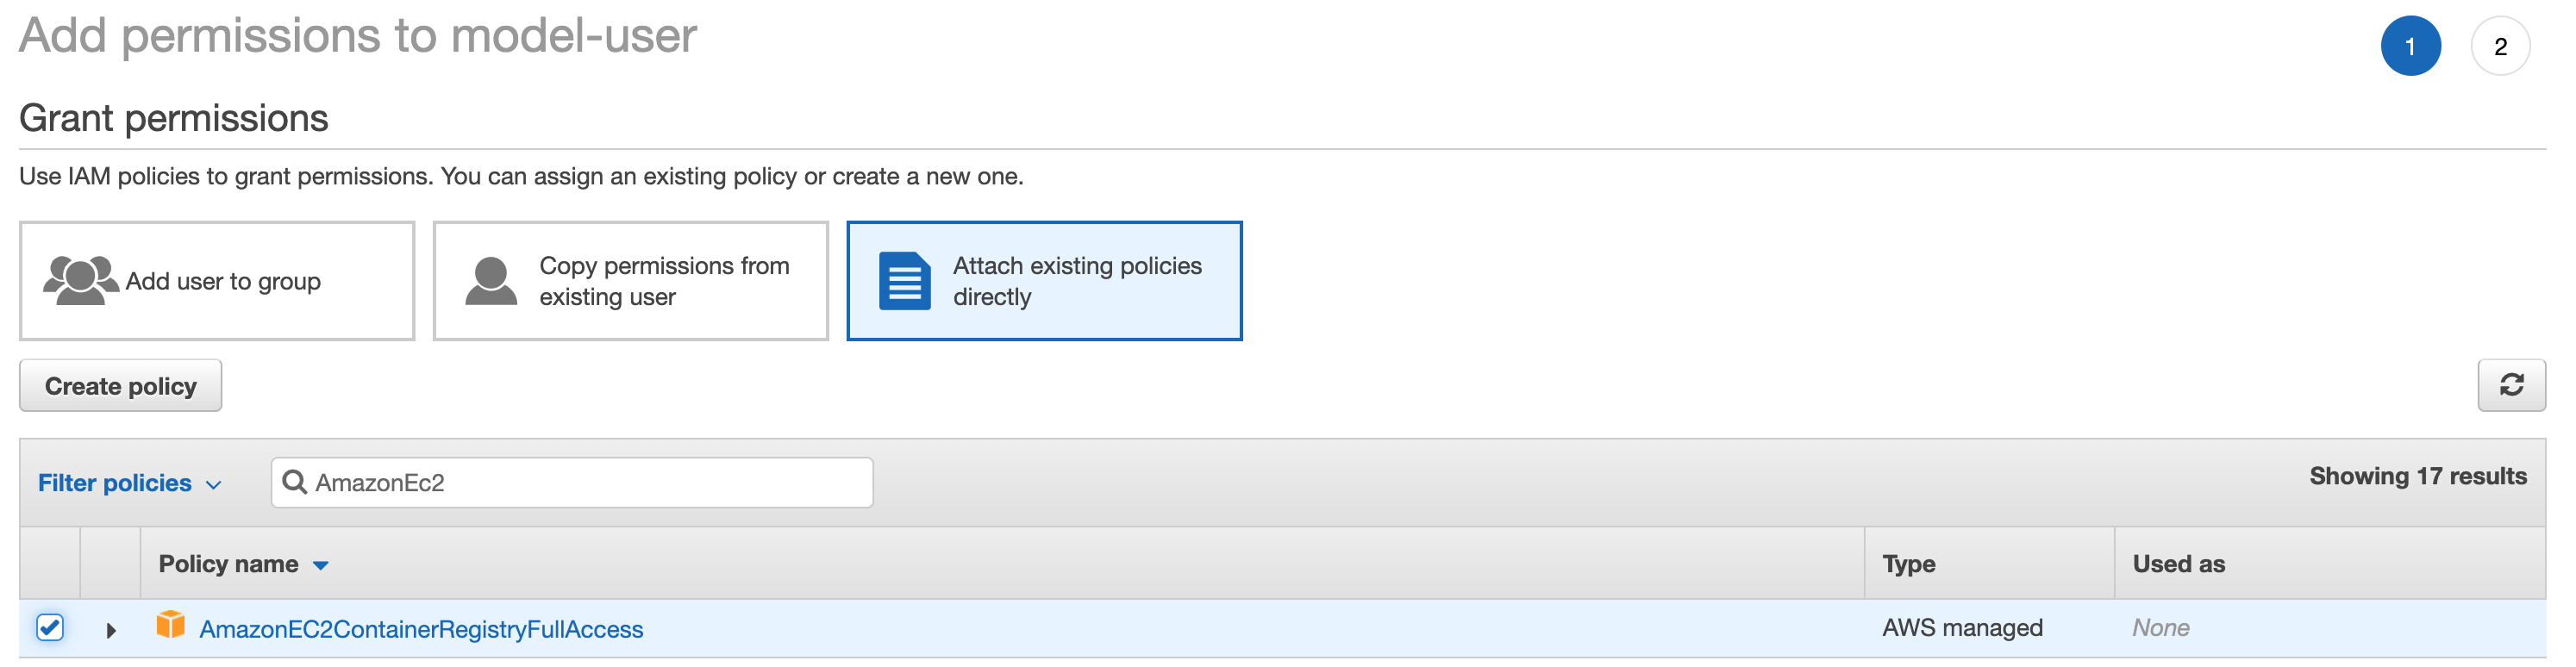
- Review your policy choice and proceed.

- You can see the summary of permissions that this programmatic user has.
Creating the Model Prediction Docker Image
We will use the following flask app that uses the pytorch model to serve recommendations:
from surprise import Dataset
import torch
import pandas as pd
import flask

class MF(torch.nn.Module):

def __init__(self, n_user, n_item, k=18, c_vector=1.0, c_bias=1.0):
    super(MF, self).__init__()
    self.k = k
    self.n_user = n_user
    self.n_item = n_item
    self.c_bias = c_bias
    self.c_vector = c_vector

    self.user = torch.nn.Embedding(n_user, k)
    self.item = torch.nn.Embedding(n_item, k)

    # We've added new terms here:
    self.bias_user = torch.nn.Embedding(n_user, 1)
    self.bias_item = torch.nn.Embedding(n_item, 1)
    self.bias = torch.nn.Parameter(torch.ones(1))

def __call__(self, train_x):
    user_id = train_x[:, 0]
    item_id = train_x[:, 1]
    vector_user = self.user(user_id)
    vector_item = self.item(item_id)

    # Pull out biases
    bias_user = self.bias_user(user_id).squeeze()
    bias_item = self.bias_item(item_id).squeeze()
    biases = (self.bias + bias_user + bias_item)

    ui_interaction = torch.sum(vector_user * vector_item, dim=1)

    # Add bias prediction to the interaction prediction
    prediction = ui_interaction + biases
    return prediction

def loss(self, prediction, target):
    loss_mse = F.mse_loss(prediction, target.squeeze())

    # Add new regularization to the biases
    prior_bias_user =  l2_regularize(self.bias_user.weight) * self.c_bias
    prior_bias_item = l2_regularize(self.bias_item.weight) * self.c_bias

    prior_user =  l2_regularize(self.user.weight) * self.c_vector
    prior_item = l2_regularize(self.item.weight) * self.c_vector
    total = loss_mse + prior_user + prior_item + prior_bias_user + prior_bias_item
    return total

def get_top_n(model,testset,trainset,uid_input,n=10):

preds = []
try:
    uid_input = int(trainset.to_inner_uid(uid_input))
except KeyError:
    return preds

# First map the predictions to each user.
for uid, iid, _ in testset: #inefficient
    try:
        uid_internal = int(trainset.to_inner_uid(uid))
    except KeyError:
        continue
    if uid_internal==uid_input:
        try:
            iid_internal = int(trainset.to_inner_iid(iid))
            movie_name = df.loc[int(iid),'name']
            preds.append((iid,movie_name,float(model(torch.tensor([[uid_input,iid_internal]])))))
        except KeyError:
            pass
# Then sort the predictions for each user and retrieve the k highest ones
if preds is not None:
    preds.sort(key=lambda x: x[1], reverse=True)
    if len(preds) > n:
        preds = preds[:n]
return preds


app = flask.Flask(__name__)


#Data
df = pd.read_csv('./movies.dat',sep="::",header=None,engine='python')
df.columns = ['iid','name','genre']
df.set_index('iid',inplace=True)
data = Dataset.load_builtin('ml-100k',prompt=False)
'''
Exercise: remove the above dependency.
Currently it downloads data from grouplens website and stores in .surprise folder in $HOME
'''
trainset = data.build_full_trainset()
testset = trainset.build_anti_testset()

#Parameters that are needed to reload the model from disk
k = 10 #latent dimension
c_bias = 1e-6
c_vector = 1e-6
model = MF(trainset.n_users, trainset.n_items, k=k, c_bias=c_bias, c_vector=c_vector)
model.load_state_dict(torch.load('./pytorch_model'))
model.eval() #no need for gradient computations in this setting


# define a predict function as an endpoint
@app.route("/", methods=["GET"])
def predict():
data = {"success": False}

# check for passed in parameters
params = flask.request.json
if params is None:
    params = flask.request.args

if "uid" in params.keys():
    data["response"] = get_top_n(model,testset,trainset,params['uid'],n=10)
    data["success"] = True

# return a response in json format
return flask.jsonify(data)


# start the flask app, allow remote connections
app.run(host='0.0.0.0', port=80)
The corresponding Dockerfile is below. The key additional files in addition to
recommend.pyabove are:- movies.dat
pytorch_model
FROM continuumio/miniconda3:latest

RUN conda install -y flask pandas \
&& conda install -c conda-forge scikit-surprise \
&& conda install pytorch torchvision cpuonly -c pytorch

COPY recommend.py recommend.py
COPY movies.dat movies.dat
COPY pytorch_model pytorch_model

ENTRYPOINT ["python","recommend.py"]
The miniconda image above is from https://hub.docker.com/r/continuumio/miniconda3.
Building an image based on the above file and running our prediction locally can be done using the following commands:
docker image build -t "prediction_service" .
docker run -d -p 5000:5000 prediction_service
docker ps -a #check what all containers were/are running
docker kill container_id #after checking that the service runs, we can safely stop and delete the container.
docker rm container_id
If we run a container based on this image, the python file and others will be in the root (
/) folder and will be run by the root user. While we will not improve this here, it is better to run services as non-root users.
Sending our Docker Image to ECR
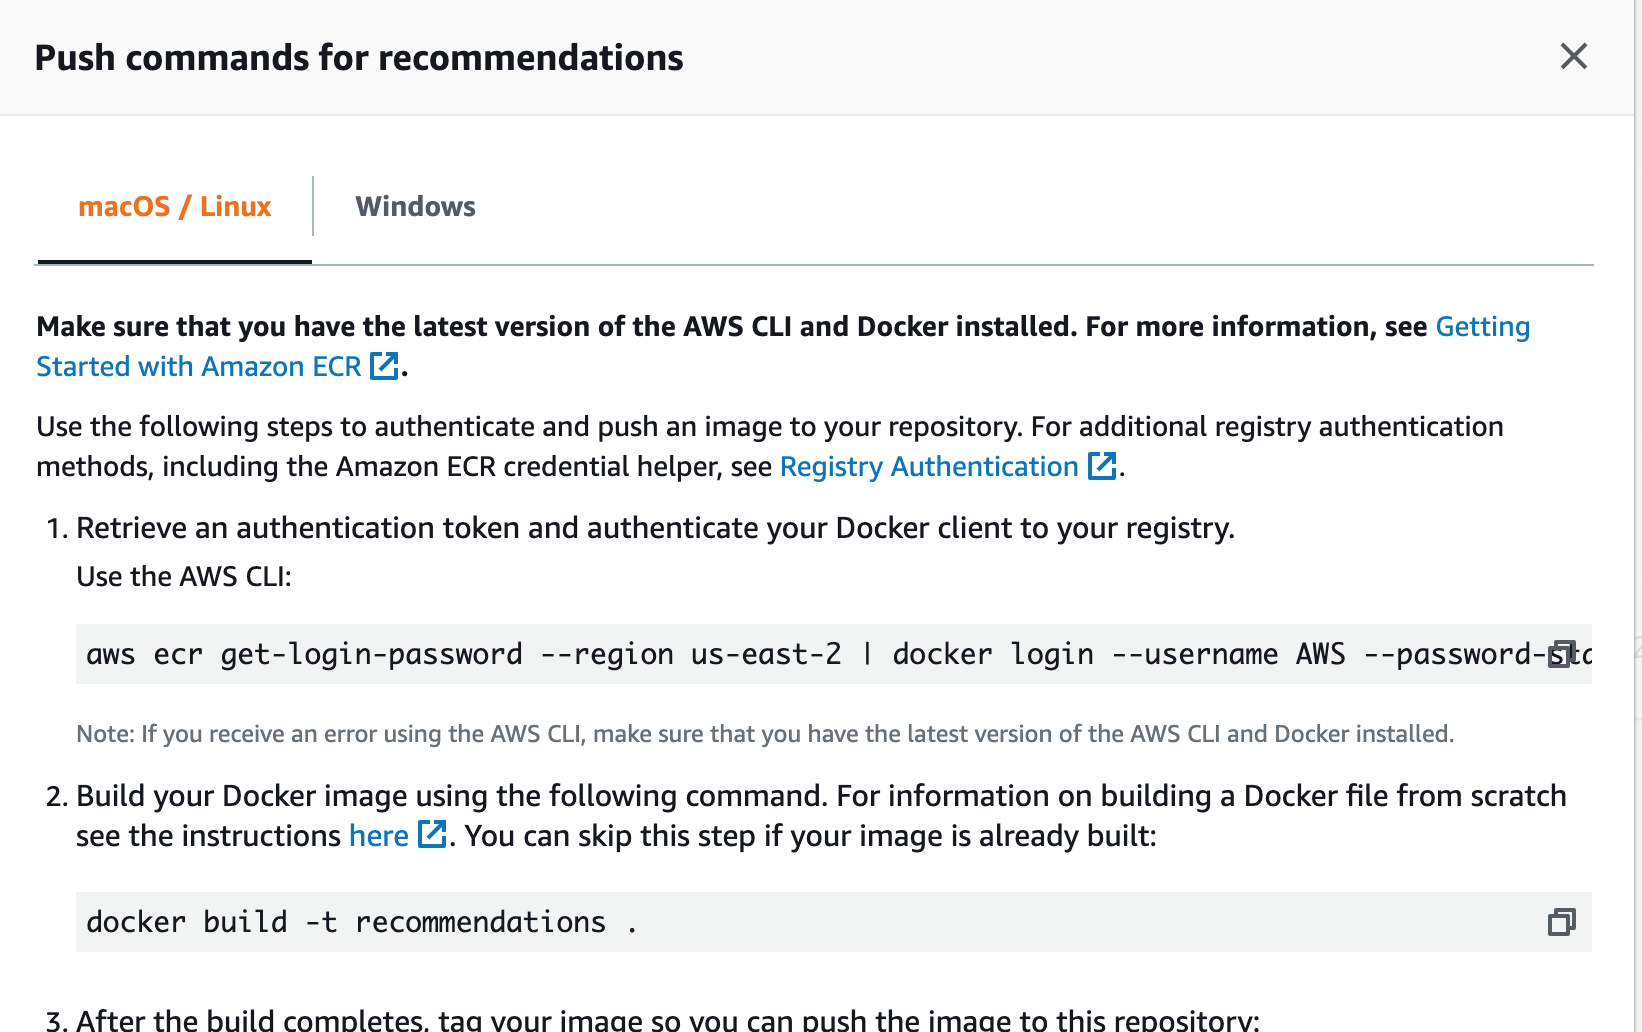
We will follow the instruction here to push our image to the repository we just created.
Assuming you have the aws CLI configured with the secret keys, run the following command:
aws ecr get-login-password --region region | docker login --username AWS --password-stdin aws_account_id.dkr.ecr.region.amazonaws.comSubstitute
regionwithus-east-1etc (check the URL on the ECR page) as well asaws_account_idwith the actual account id. We should get a prompt saying ‘Login Succeeded’.Lets tag our image before sending it to ECR (replace account id and region below as well):
(datasci-dev) ttmac:docker-prediction-service theja$ docker tag prediction_service aws_account_id.dkr.ecr.region.amazonaws.com/models:recommendations
(datasci-dev) ttmac:docker-prediction-service theja$ docker images
REPOSITORY                                            TAG                 IMAGE ID            CREATED             SIZE
aws_account_id.dkr.ecr.region.amazonaws.com/recommendations   pytorch_model       364179b27eb1        21 minutes ago      2.06GB
weather_service                                                latest              20d340f941c0        2 days ago          496MB
debian                                                         buster-slim         c7346dd7f20e        5 weeks ago         69.2MB
continuumio/miniconda3                                         latest              b4adc22212f1        6 months ago        429MB
hello-world                                                    latest              bf756fb1ae65        8 months ago        13.3kB
Pushing to ECR is achieved by the following:
docker push aws_account_id.dkr.region.amazonaws.com/recommendations:pytorch_modelYou should see the update progress (this is a large upload!)
The push refers to repository [aws_account_id.dkr.ecr.us-east-2.amazonaws.com/recommendations]
a5649bbe3e5f: Pushed
5c87fc4d582f: Pushed
e1e8d92205bf: Pushed
5c6c81390816: Pushing [=========================>                         ]  848.8MB/1.635GB
fcd8d39597dd: Pushed
875120aa853c: Pushed
f2cb0ecef392: Pushed
And the push conclusion:
(datasci-dev) ttmac:docker-prediction-service theja$ docker push aws_account_id.dkr.ecr.us-east-2.amazonaws.com/recommendations:pytorch_model
The push refers to repository [aws_account_id.dkr.ecr.us-east-2.amazonaws.com/recommendations]
a5649bbe3e5f: Pushed
5c87fc4d582f: Pushed
e1e8d92205bf: Pushed
5c6c81390816: Pushed
fcd8d39597dd: Pushed
875120aa853c: Pushed
f2cb0ecef392: Pushed
pytorch_model: digest: sha256:af5dfaf227cd96c4ca8ca952c511fb4274c59d76574726462137bc7c4230be07 size: 1793
On the ECR page, if we look at the images in the recommendations repository, it will contain our recently uploaded image.
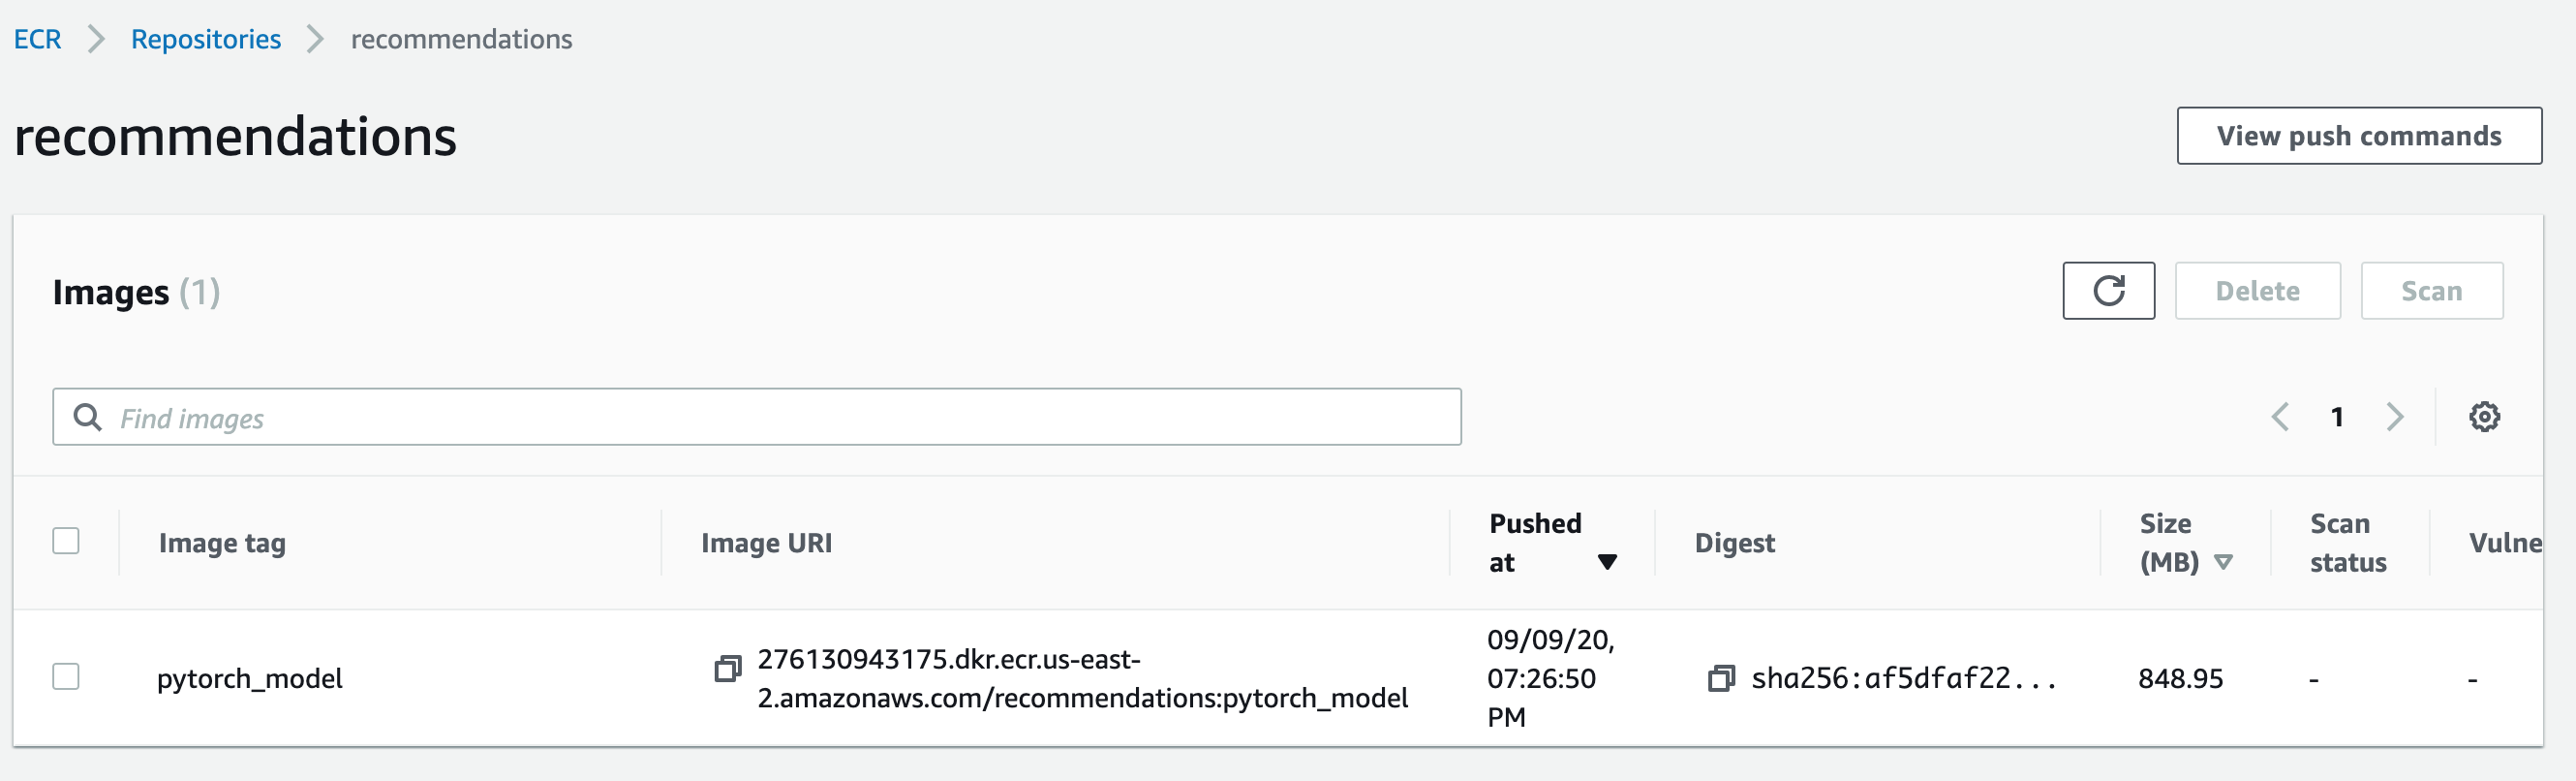
- There is a friendly help box that details specific (to your account) commands for pushing images to ECR on the above page as well. You could use that as a guiding reference, or the help page.