Cron Jobs
Cron expressions will be useful while looking at Apache Airflow scheduling system.
Docker Image of the Transient Pipeline
First, we will convert our notebook to a script (reduces dependency on Jupyter, try to find other packages you can get away with not installing). Running the py file locally updates the predictions on BigQuery as expected.
(datasci-dev) ttmac:lec05 theja$ jupyter nbconvert --to script recommend_lightfm.ipynb
[NbConvertApp] Converting notebook recommend_lightfm.ipynb to script
[NbConvertApp] Writing 4718 bytes to recommend_lightfm.py
(datasci-dev) ttmac:lec05 theja$ python recommend_lightfm.py
/Users/theja/miniconda3/envs/datasci-dev/lib/python3.7/site-packages/lightfm/_lightfm_fast.py:9: UserWarning: LightFM was compiled without OpenMP support. Only a single thread will be used.
warnings.warn('LightFM was compiled without OpenMP support. '
<943x1682 sparse matrix of type '<class 'numpy.int32'>'
	with 19048 stored elements in COOrdinate format>
<943x1682 sparse matrix of type '<class 'numpy.int32'>'
	with 2153 stored elements in COOrdinate format>
1it [00:03,  3.86s/it]
Second, we will create a simple bash script called
run_transient_pipeline.shwhich has the following content for ease of use:-
#!/bin/bash

export GOOGLE_APPLICATION_CREDENTIALS=/model-user.json
python recommend_lightfm.py
-
Next, we will repeat the steps covered in a previous section to quickly build a docker image. For this, we will need a Dockerfile that installs the appropriate dependencies beforehand.
-
FROM debian:buster-slim

MAINTAINER Theja Tulabandhula

RUN apt-get update \
&& apt-get install -y python3-pip python3-dev \
&& cd /usr/local/bin \
&& ln -s /usr/bin/python3 python

RUN pip3 install pandas-gbq lightfm==1.15 numpy

RUN pip3 install google-cloud-core==1.3.0 google-cloud-bigquery==1.20.0

COPY recommend_lightfm.py recommend_lightfm.py

COPY model-user.json model-user.json

COPY run_transient_pipeline.sh run_transient_pipeline.sh

RUN chmod +x run_transient_pipeline.sh

CMD ./run_transient_pipeline.sh
-
We can build the image and then run a container based on this image locally.
(datasci-dev) ttmac:lec05 theja$ docker image build -t "recommend_pipeline" . . . (truncated output) . . (datasci-dev) ttmac:lec05 theja$ docker images REPOSITORY TAG IMAGE ID CREATED SIZE recommend_pipeline latest 12a25accc725 36 seconds ago 758MB (datasci-dev) ttmac:lec05 theja$ docker run recommend_pipeline <943x1682 sparse matrix of type '<class 'numpy.int32'>' with 19048 stored elements in COOrdinate format> <943x1682 sparse matrix of type '<class 'numpy.int32'>' with 2153 stored elements in COOrdinate format> (datasci-dev) ttmac:lec05 theja$- Verify through the browser based BigQuery page that the predictions are indeed updated.
Cron (1975-)
As described on wikipedia,
cronis a command line service/daemon/program for time based scheduling of programs (python scripts in our case). Its present in many UNIX-like OSs including Ubuntu/CentOS etc.It is a very useful tool to automate system maintenance (e.g., taking backups) as well as for administration.
Its name originates from the greek word χρόνος (chronos) meaning time.
One of the greatest benefits of using cron is that:
- it has been widely used for several decades, and
- it is easy to use with limited ways to go wrong.
The key limitations of using a cron daemon for scheduling include:
- can run tasks on a single machine
- OS dependent
- need glue code (python, bash) to work with it
While cron has its issues with respect to how flexible it is in large scale production environments. But it is a great time-tested utility for individual level automation (e.g., scraping, training models repeatedly as we are planning to do etc).
crontabis the command line utility to set up the task schedule (as a user or by root). The task (our python script) is run on the system where cron itself is present, so it is good to ensure all dependencies and logging are in place.The tasks are run according to the privileges of the user who created the schedule.
We can edit/create a schedule by using the command
crontab -eon the commandline (linux/macOS).Task schedules are expressed in terms of corn expressions.
This is a sequence of 5 numbers that tell the scheduler to run your program periodically. Instead of numbers, characters such as
*,-,\and,are also used. Lets look at an example expression and understand what it does:1 2 3 4 5 /path/to/mycommand argument1 argument2In the above, the first entry is the minute index (varying between 0-59), 2nd is for hour (0-23), 3rd for day of the month (1-31), 4th for month (1-12) and 5th for day of week (0 or 7 is for Sunday).
If we need to run a job/task as a system service, then the username also features into the task expression. So the above becomes:
1 2 3 4 5 username /path/to/mycommand argument1 argument2Example 1: To run a task everyday at 12 minutes past 2pm, our specification would be:
12 14 * * * /path/to/mycommand argument1 argument2Example 2: If you want a task to be run every month at a certain date (say the 5th and 7th days), then the specification would be:
12 14 5,7 * * /path/to/mycommand argument1 argument2Example 3: If a task needs to be run every two hours after midnight, then:
12 0-23/2 * * * /path/to/mycommand argument1 argument2In the above,
*specifies all possible values for that field. and-spcifies a range. Similarly,/specifies the jump and,specifies a list.By default cron will try to email you the outcome of running the command. We can just redirect it to the commandline. For example:
1 2 3 4 5 /path/to/mycommand argument1 argument2 >/dev/null 2>&1Additional useful commands are:
crontab -lto list the current jobs, andcrontab -rto remove all current job specifications.
System jobs are typically listed in the file
/etc/crontabor/etc/cron.d/*folders. For example, if you open a terminal into the recommend_pipeline container and install cron, you can see the following output:root@27cf8d2b2681:/# cat /etc/crontab # /etc/crontab: system-wide crontab # Unlike any other crontab you don't have to run the `crontab' # command to install the new version when you edit this file # and files in /etc/cron.d. These files also have username fields, # that none of the other crontabs do. SHELL=/bin/sh PATH=/usr/local/sbin:/usr/local/bin:/sbin:/bin:/usr/sbin:/usr/bin # Example of job definition: # .---------------- minute (0 - 59) # | .------------- hour (0 - 23) # | | .---------- day of month (1 - 31) # | | | .------- month (1 - 12) OR jan,feb,mar,apr ... # | | | | .---- day of week (0 - 6) (Sunday=0 or 7) OR sun,mon,tue,wed,thu,fri,sat # | | | | | # * * * * * user-name command to be executed 17 * * * * root cd / && run-parts --report /etc/cron.hourly 25 6 * * * root test -x /usr/sbin/anacron || ( cd / && run-parts --report /etc/cron.daily ) 47 6 * * 7 root test -x /usr/sbin/anacron || ( cd / && run-parts --report /etc/cron.weekly ) 52 6 1 * * root test -x /usr/sbin/anacron || ( cd / && run-parts --report /etc/cron.monthly ) #Here are a couple of useful websites to interpret the expressions: https://crontab.guru/ and http://cron.schlitt.info/. And wikipedia does a good job laying out the details of expression design.
To get our hands dirty, we can run a simple cron job that appends a word to a file every minute with the specification:
* * * * * echo "hello" >> /Users/theja/cds/mlops/crontest.logAnd check that the log file is indeed being written to. (Don’t forget to delete the job after checking this.)
We can run our transient pipeline container (although it is not fetching new data, it is easy to see how it can be integrated with something like BigQuery to read updated training data) every hour using the following entry:
# run every hour on the dot
0 * * * * docker run recommend_pipeline
Note that an application started via cron has no connected terminal, so printing to terminal does not work. So to check that your job is indeed working, you can write something to disk (such as to a log file).
Running Cron on the Cloud
Cron is provided as a managed option by AWS, Google Cloud and others. We can look at GKE for an example of this.
Note that the key difference between previous docker images and the image we created above is that the former was a web server (a flask app) that used a pretrained model/predictions, whereas the latter is only focused on training and generating predictions. Both are complimentary to each other. In fact, the previous container can be triggered to update its predictions/model for serving after the transient training pipeline is completed. And this can be done in a periodic manner.
Lets come back to scheduling the transient training pipeline as a job on GCP.
To do so, lets repeat the steps to upload our docker image to the container registry. This involves the following steps.
First we login via docker using our credentials so that docker can push to the Google container registry.
(datasci-dev) ttmac:lec05 theja$ cat model-user.json | docker login -u _json_key --password-stdin https://us.gcr.io
Login Succeeded
Next we tag our image appropriately to reflect the registry URL and repository name.
(datasci-dev) ttmac:lec05 theja$ docker tag recommend_pipeline us.gcr.io/authentic-realm-276822/recommend_pipeline
(datasci-dev) ttmac:lec05 theja$ docker images
REPOSITORY                                                     TAG                 IMAGE ID            CREATED             SIZE
recommend_pipeline                                             latest              12a25accc725        13 hours ago        758MB
us.gcr.io/authentic-realm-276822/recommend_pipeline            latest              12a25accc725        13 hours ago        758MB
Finally, lets push the image to the container registry. Here is a snapshot when its still uploading.
(datasci-dev) ttmac:lec05 theja$ docker push us.gcr.io/authentic-realm-276822/recommend_pipeline
The push refers to repository [us.gcr.io/authentic-realm-276822/recommend_pipeline]
4e9c256172e5: Pushed
8f8a170d6a46: Pushed
d84f1396f776: Pushed
ae965efd348c: Pushed
0978afbb1068: Pushed
3c1ec82efa99: Pushing [>                                                  ]  3.315MB/269.1MB
21b00e3fe1bb: Pushing [>                                                  ]  8.079MB/418.4MB
d0f104dc0a1f: Layer already exists
And here is the final result.
(datasci-dev) ttmac:lec05 theja$ docker push us.gcr.io/authentic-realm-276822/recommend_pipeline
The push refers to repository [us.gcr.io/authentic-realm-276822/recommend_pipeline]
4e9c256172e5: Pushed
8f8a170d6a46: Pushed
d84f1396f776: Pushed
ae965efd348c: Pushed
0978afbb1068: Pushed
3c1ec82efa99: Pushed
21b00e3fe1bb: Pushed
d0f104dc0a1f: Layer already exists
latest: digest: sha256:9df0d99623e6408d187736c2b82a748ed30eeb773dffb70dfffe03aaa7113173 size: 1995
We can verify that the container is uploaded by checking the container registry page in the browser.
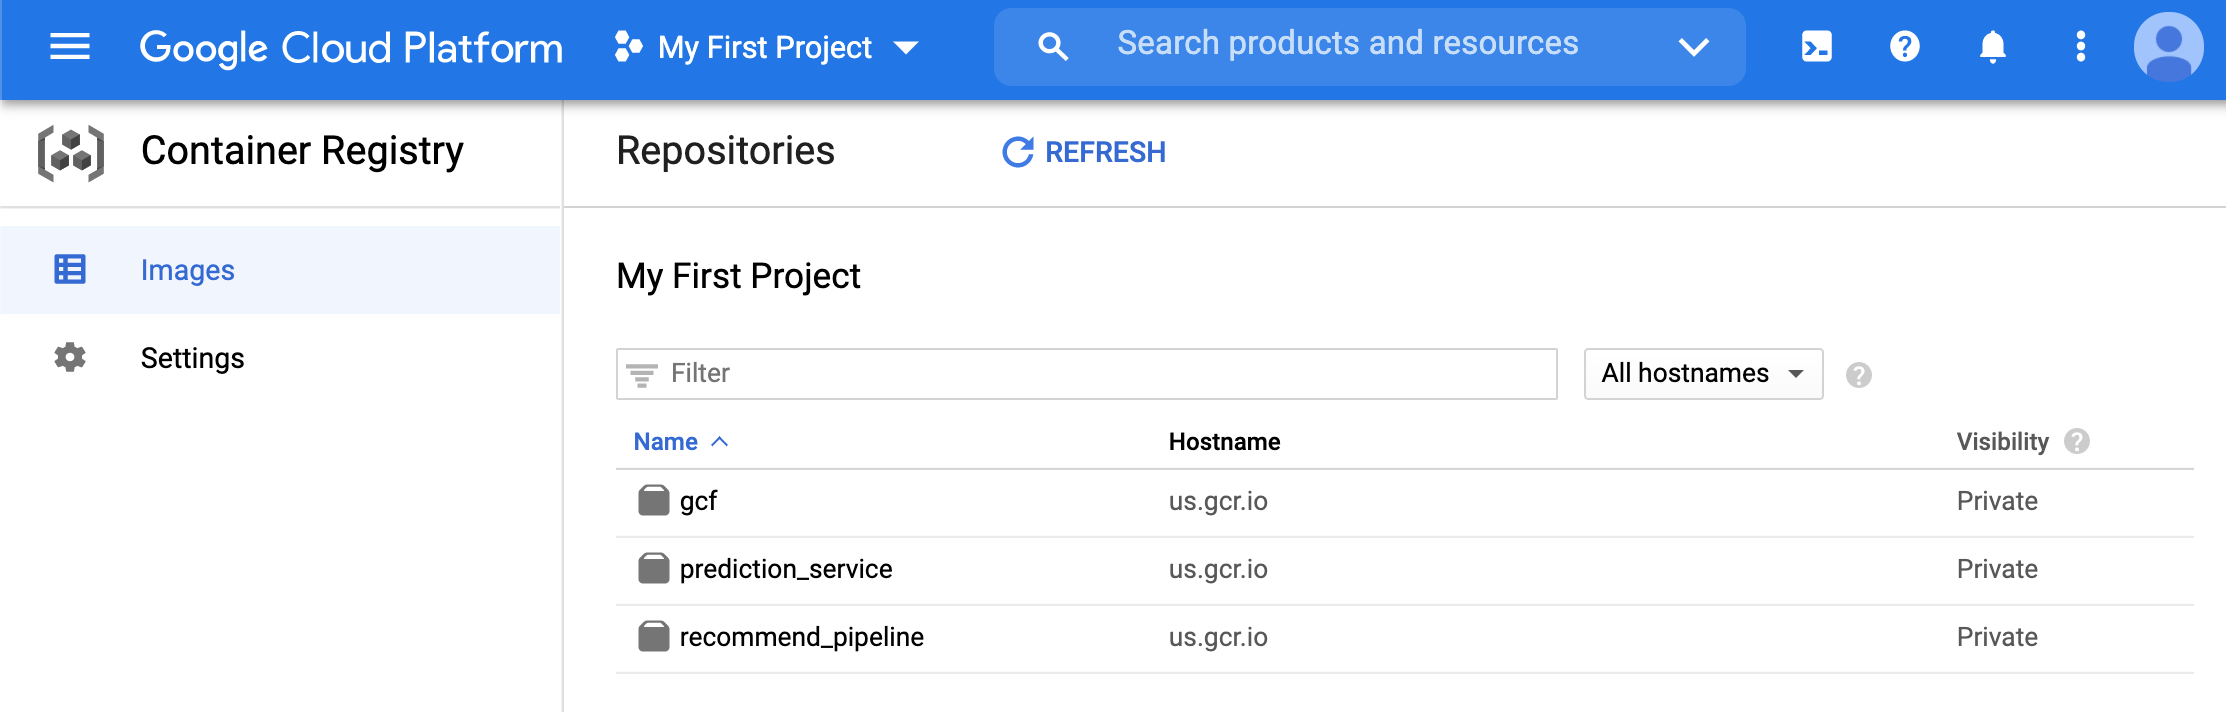
- We will need the image URL shown below.
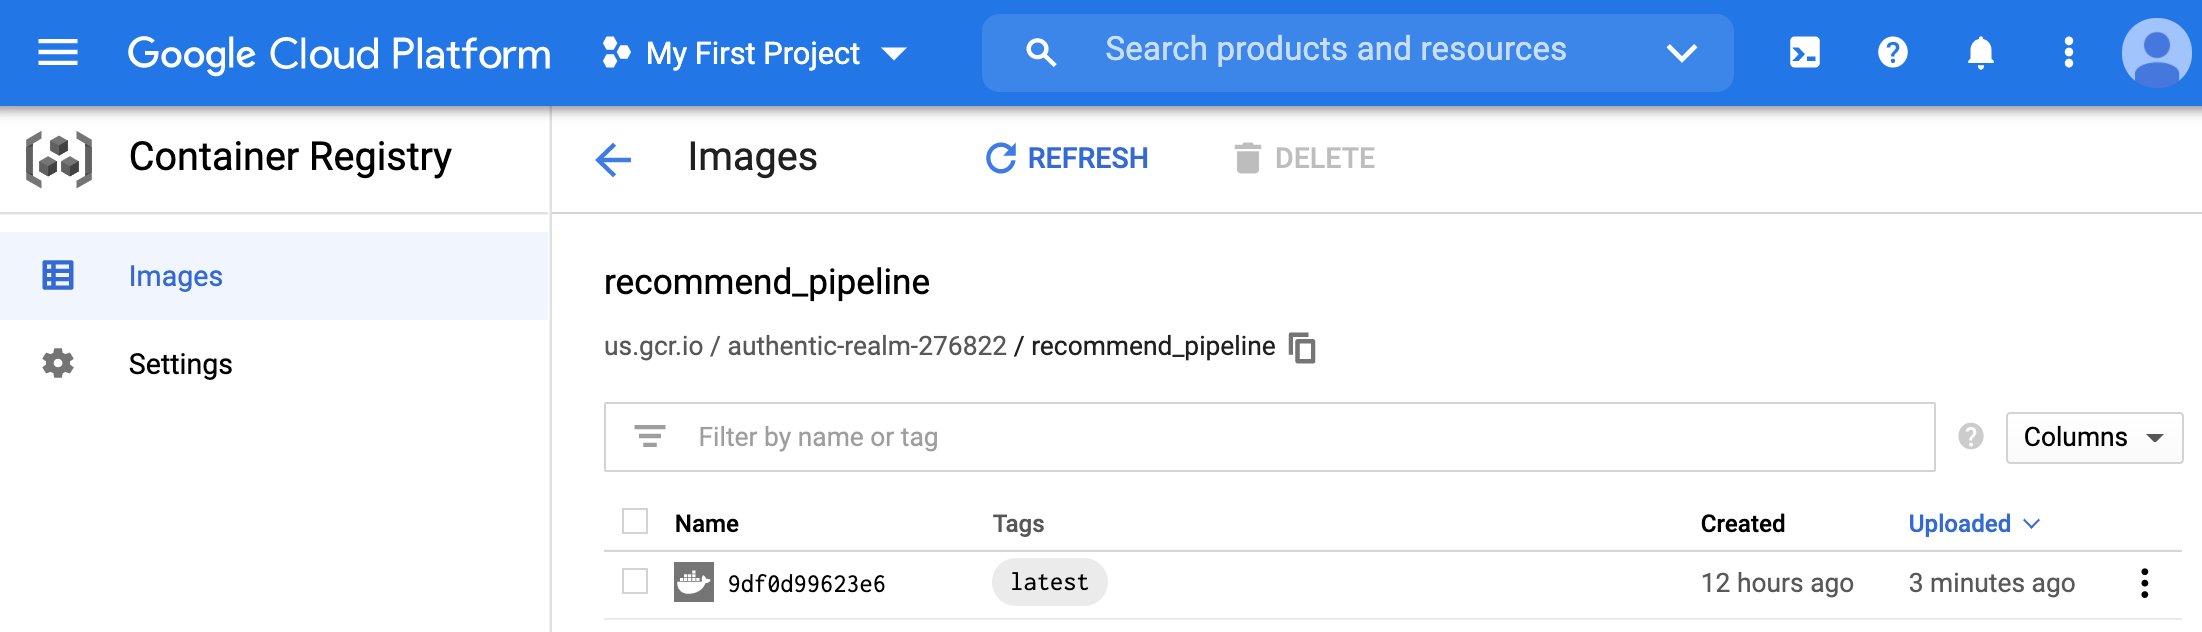
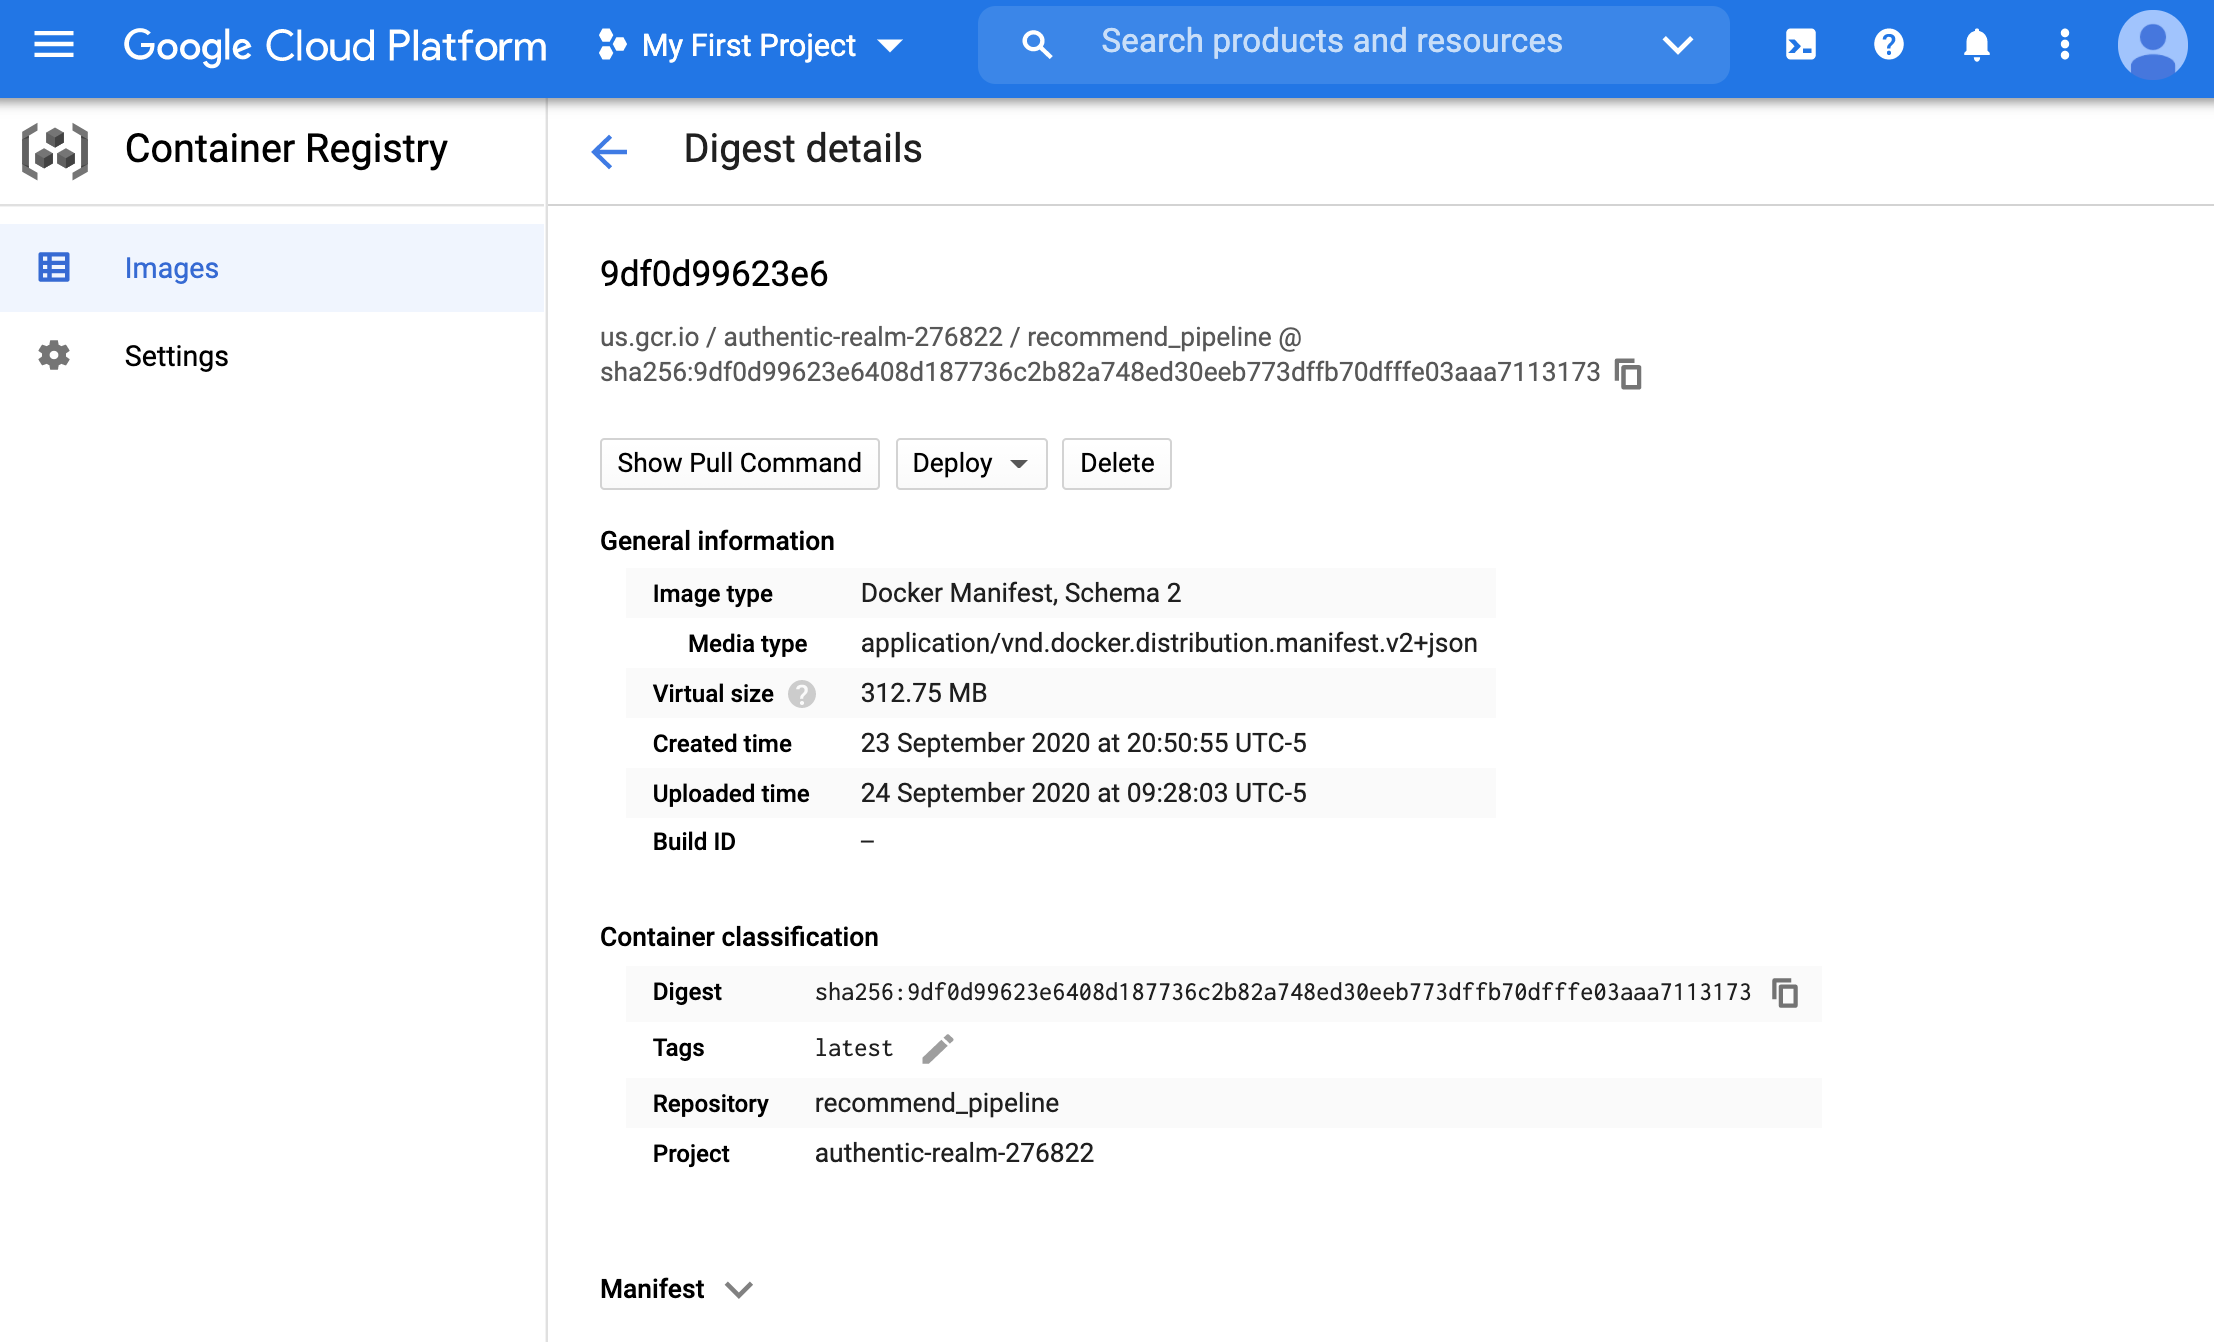
- More details about this image are available once you click on the image id. We will not be needing this information further, but its a good practice to check it (you can also see how to pull or deploy the image directly from this page).
We will now use K8s (GKE) to schedule the image to run periodically.
Note that we are not triggering the python script to run periodically, but creating a new container every time.
This container is downloading the same data in our running example (but it is conceivable how it can be modified to use updated training data).
- Hint: there is no need to modify the image in our example. We only need to have updated data at the URL from which the data is being read.
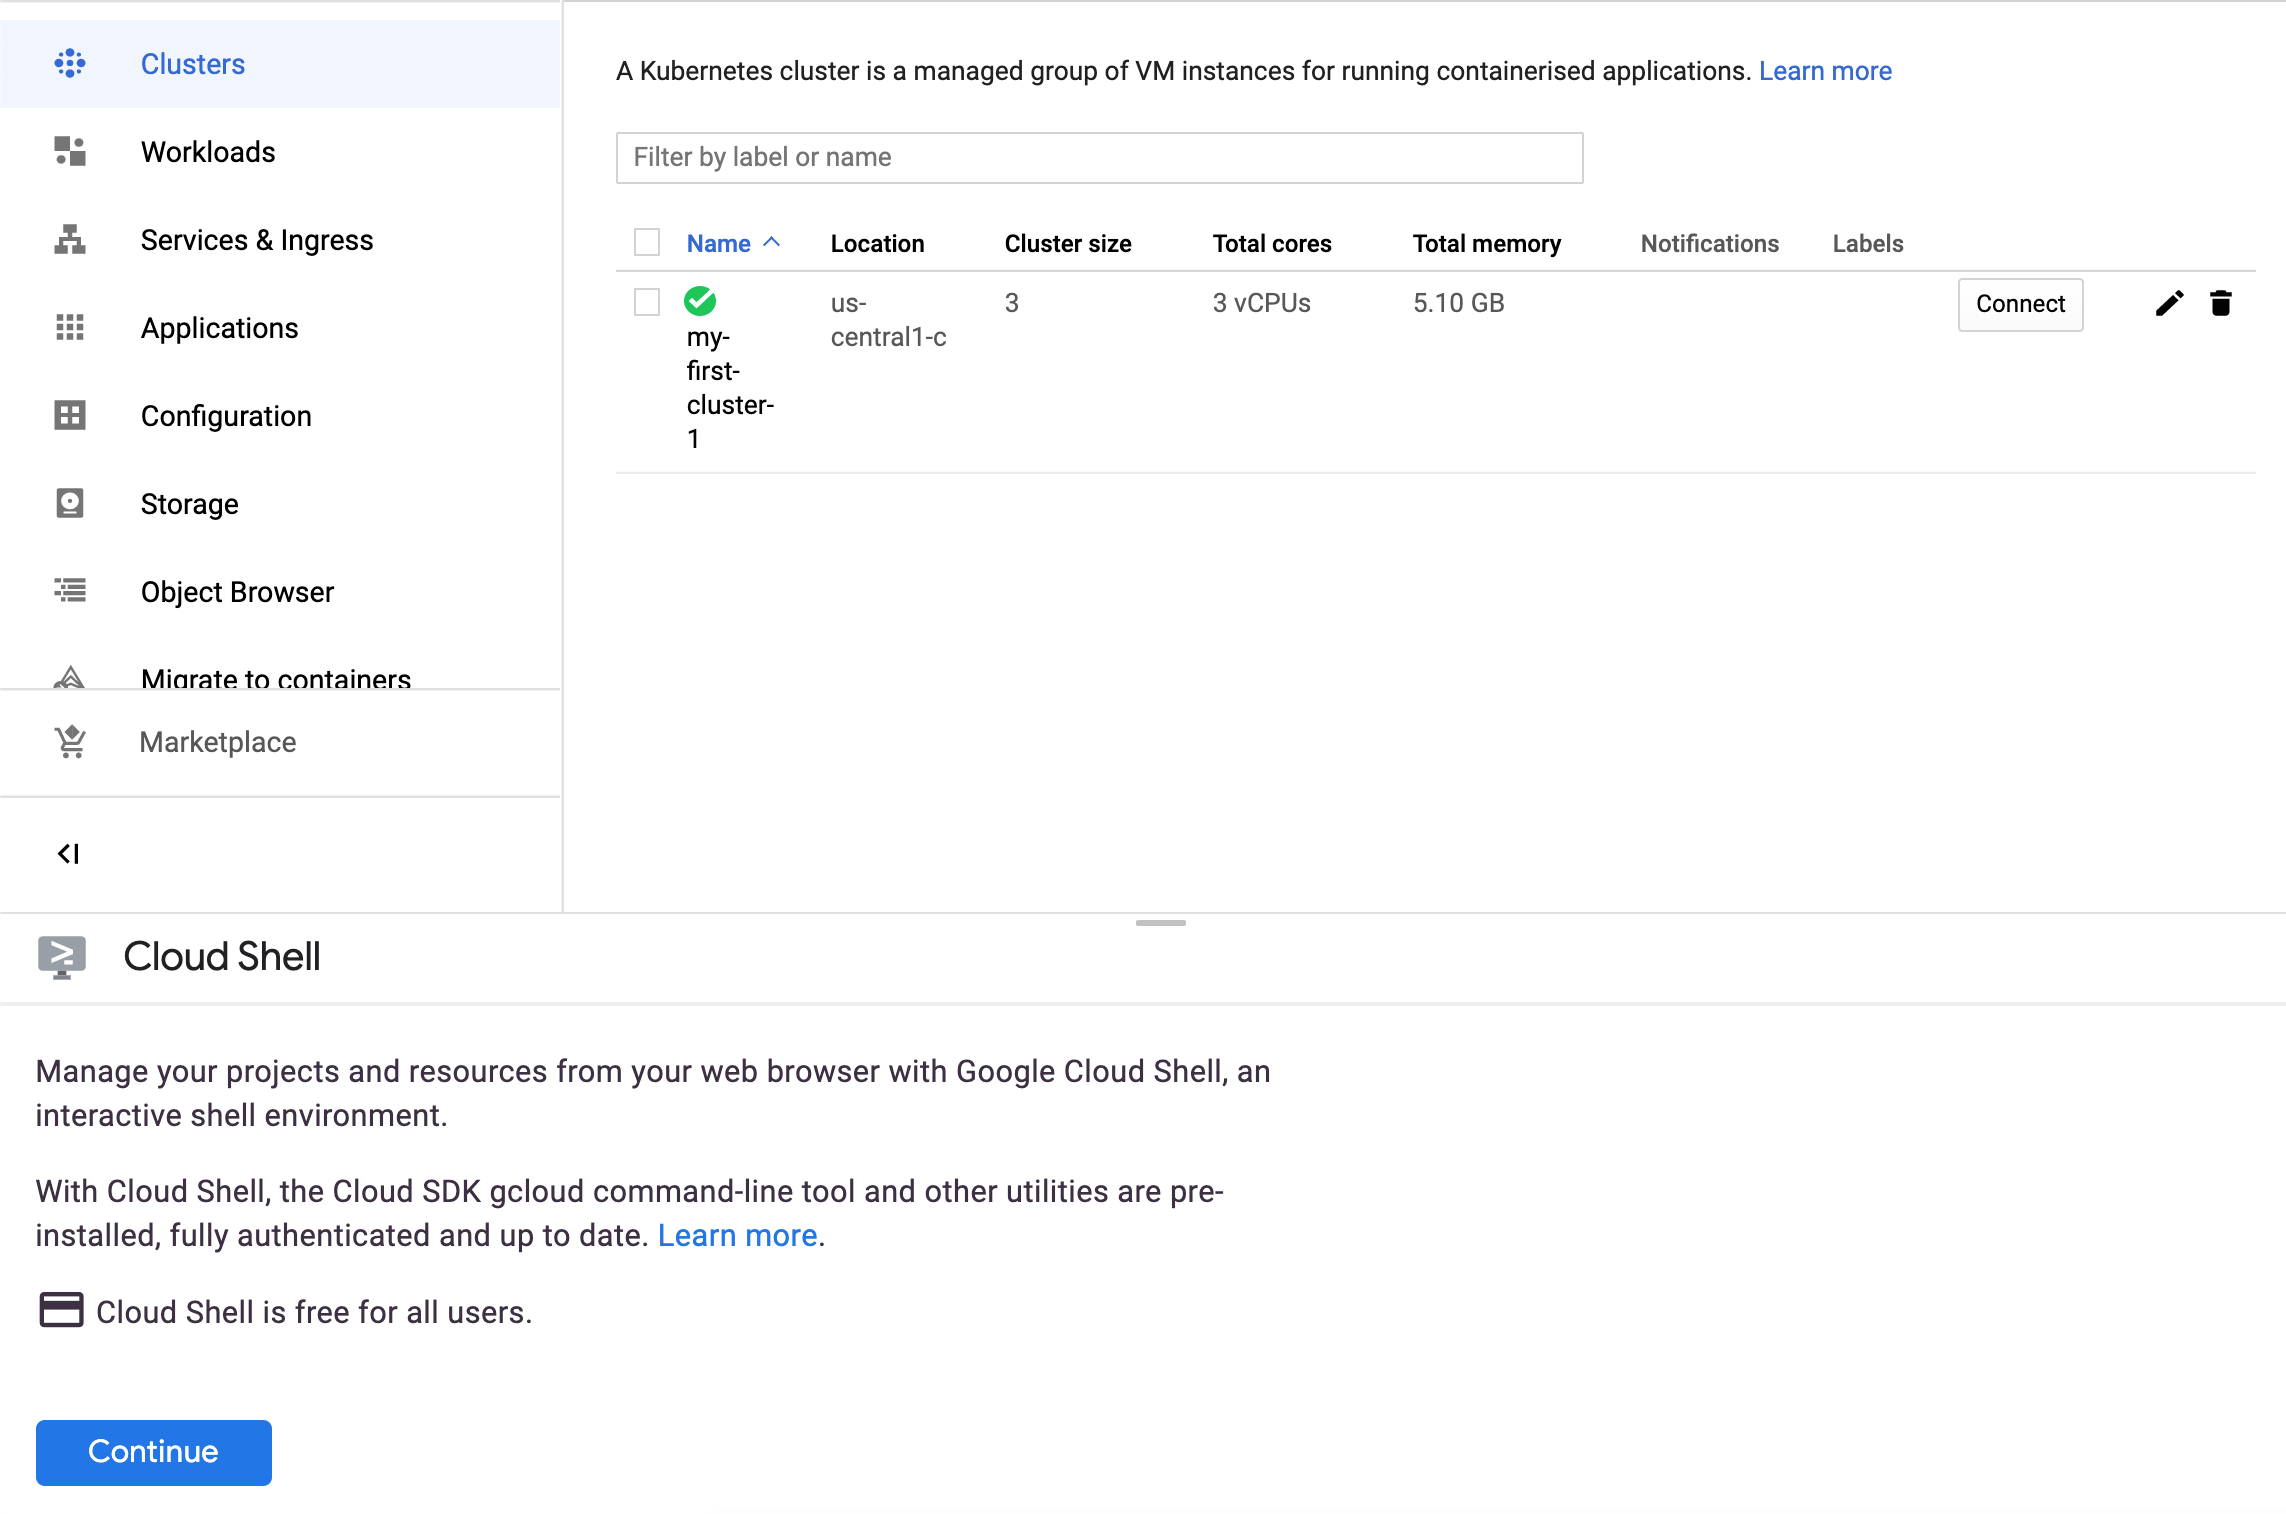
Lets set up a K8s cluster next. Navigate to the GKE page.
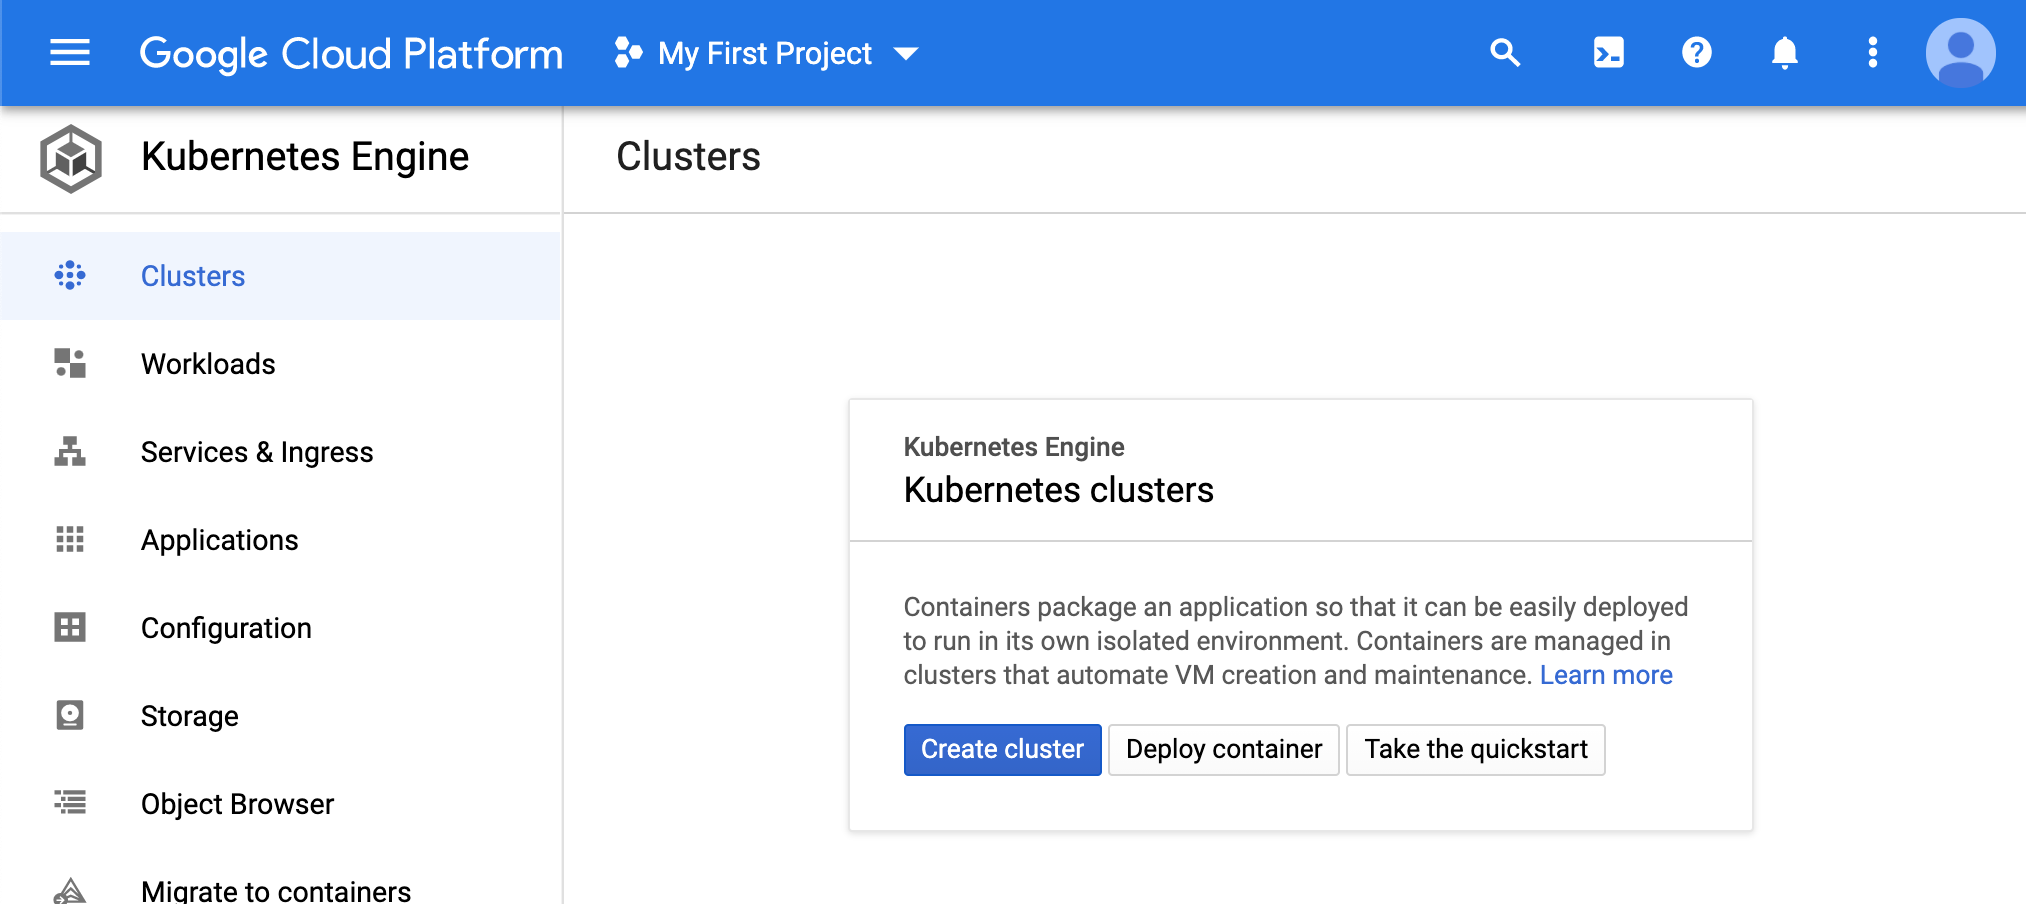
- Click ‘create a cluster’.
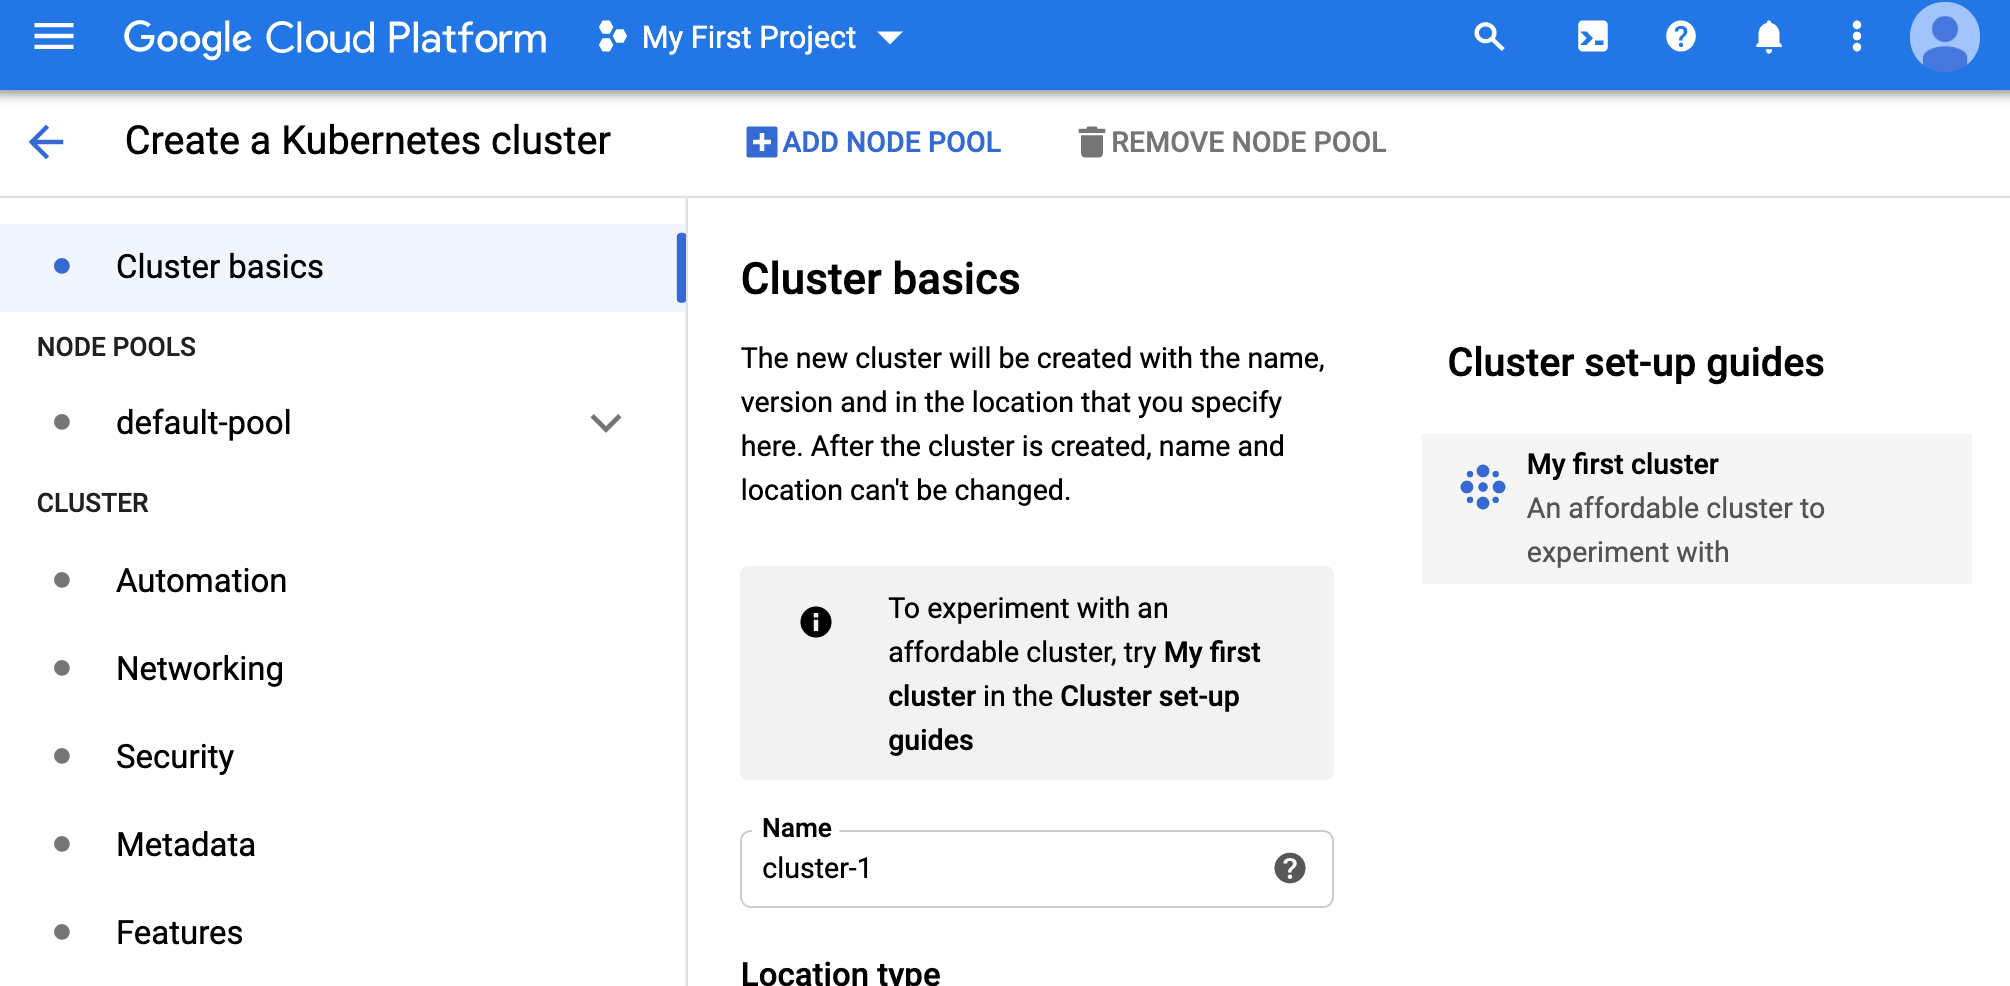
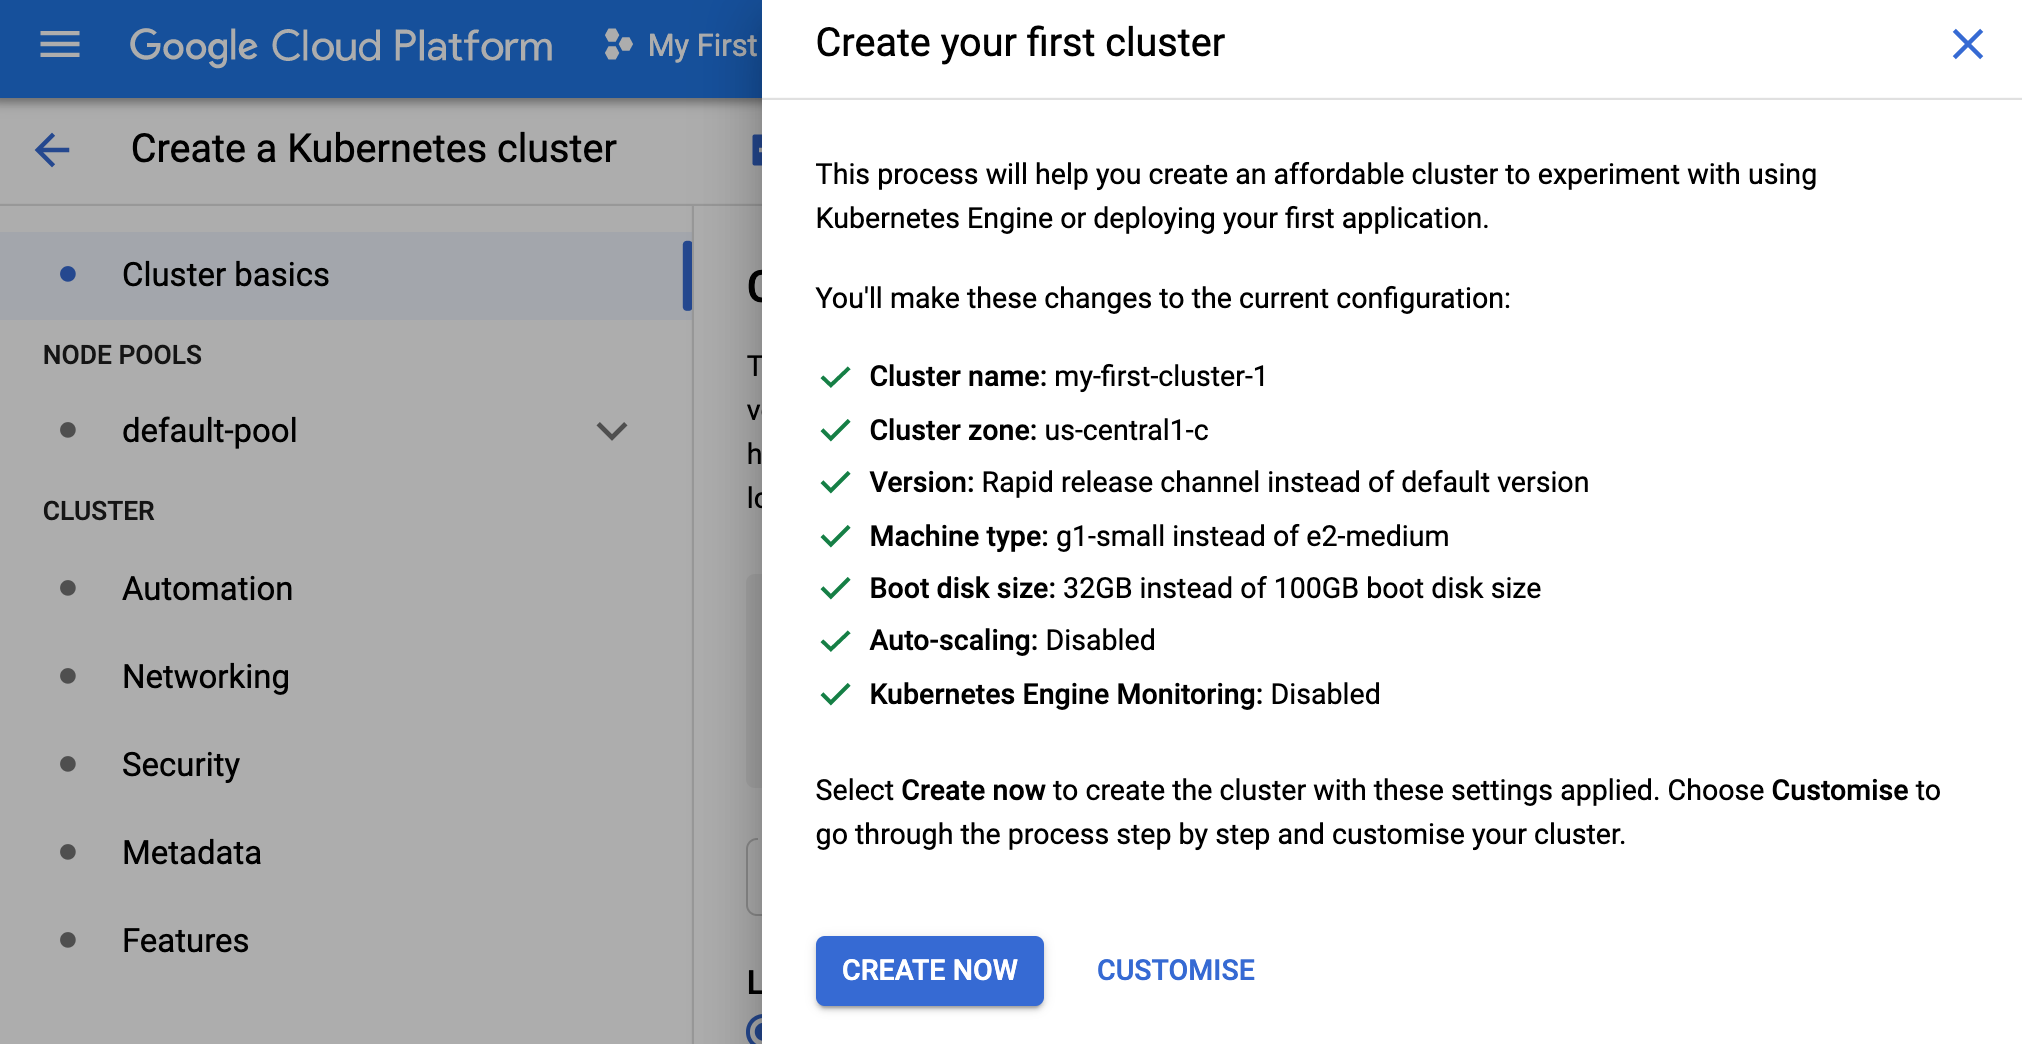
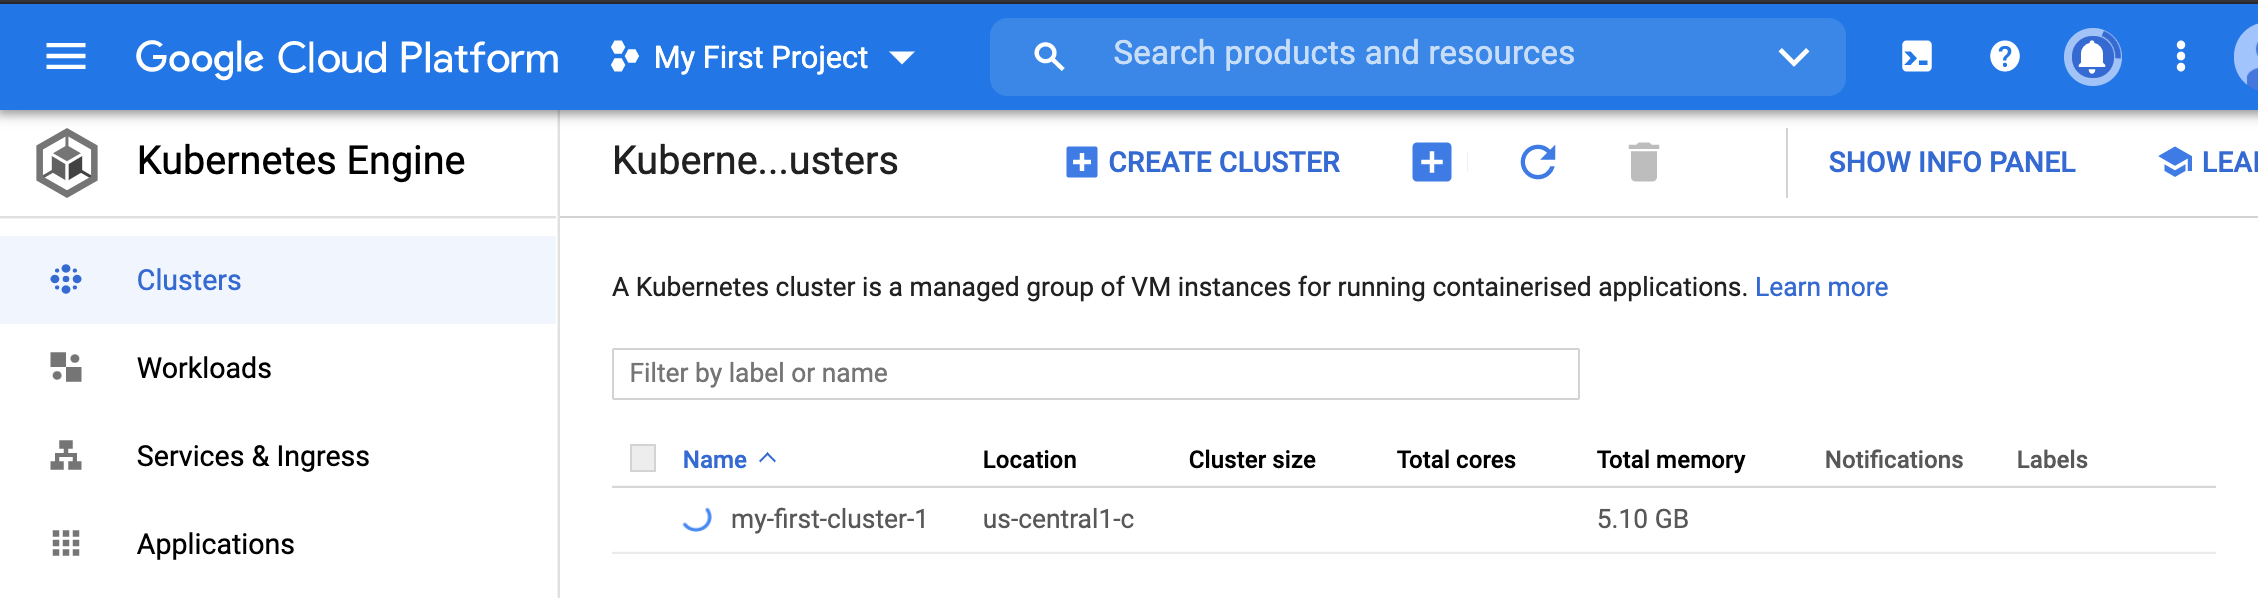
- We will choose the ‘cluster setup guide’ option on the right and choose ‘my first cluster’ (this uses lower end underlying machines). We can see the spec below.
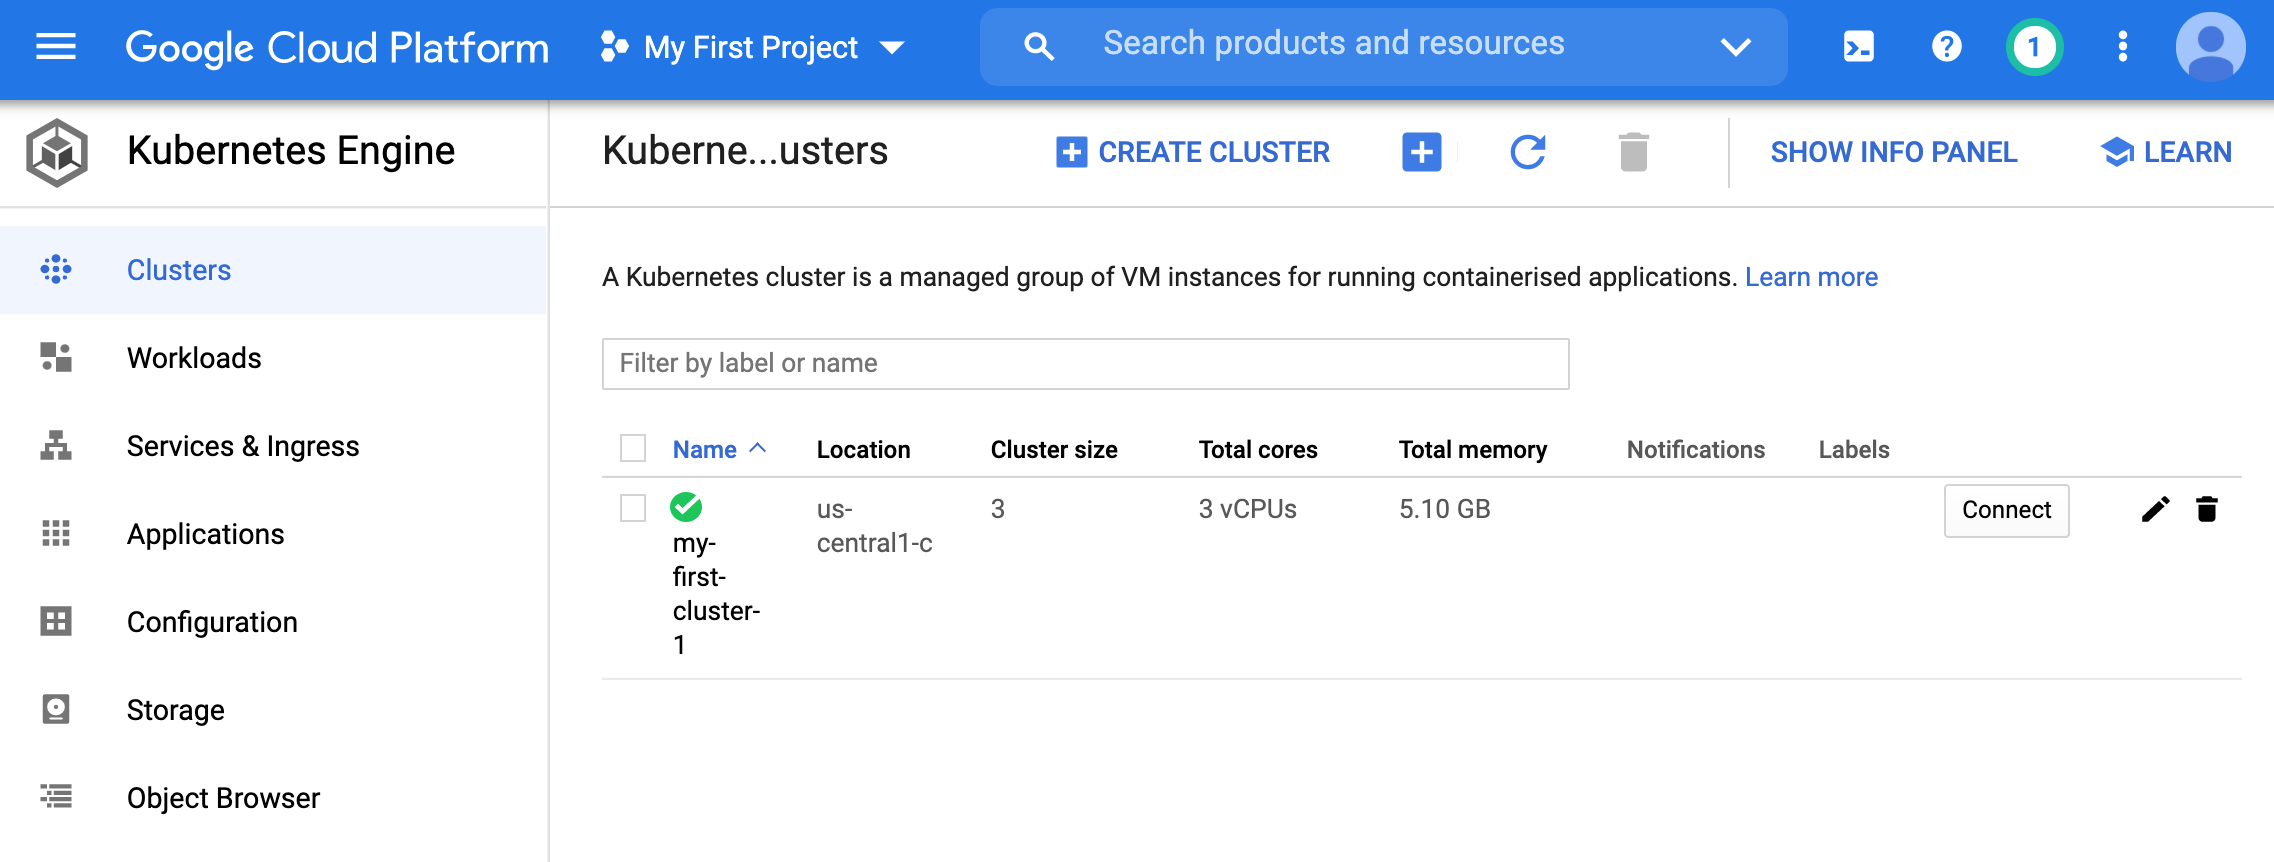
- Once the cluster is created, we can view it in the GKE homepage.
We will use
kubectlto manage this cluster (just like we managed theminikubesingle node cluster).In particular, we will create a YAML file which will have cron scheduling instructions.
Lets connect to the cluster on the homepage. We can get information of how to connect bu clicking the connect link.
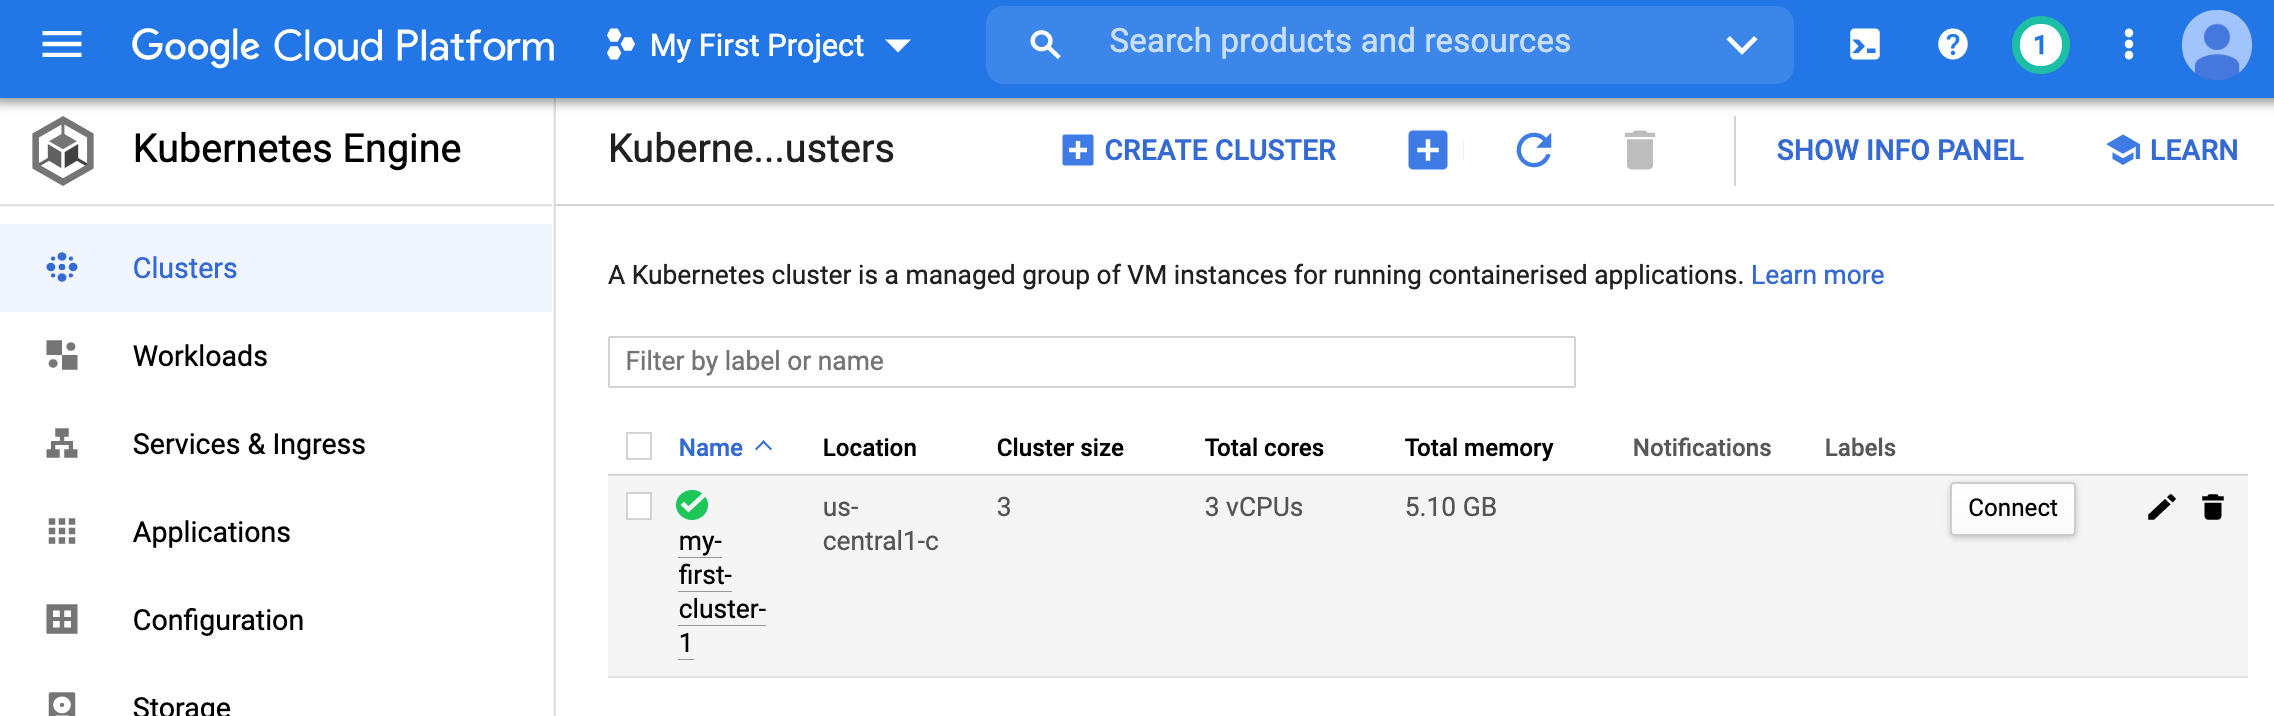
- Lets choose the ‘Run in cloud shell’ option.
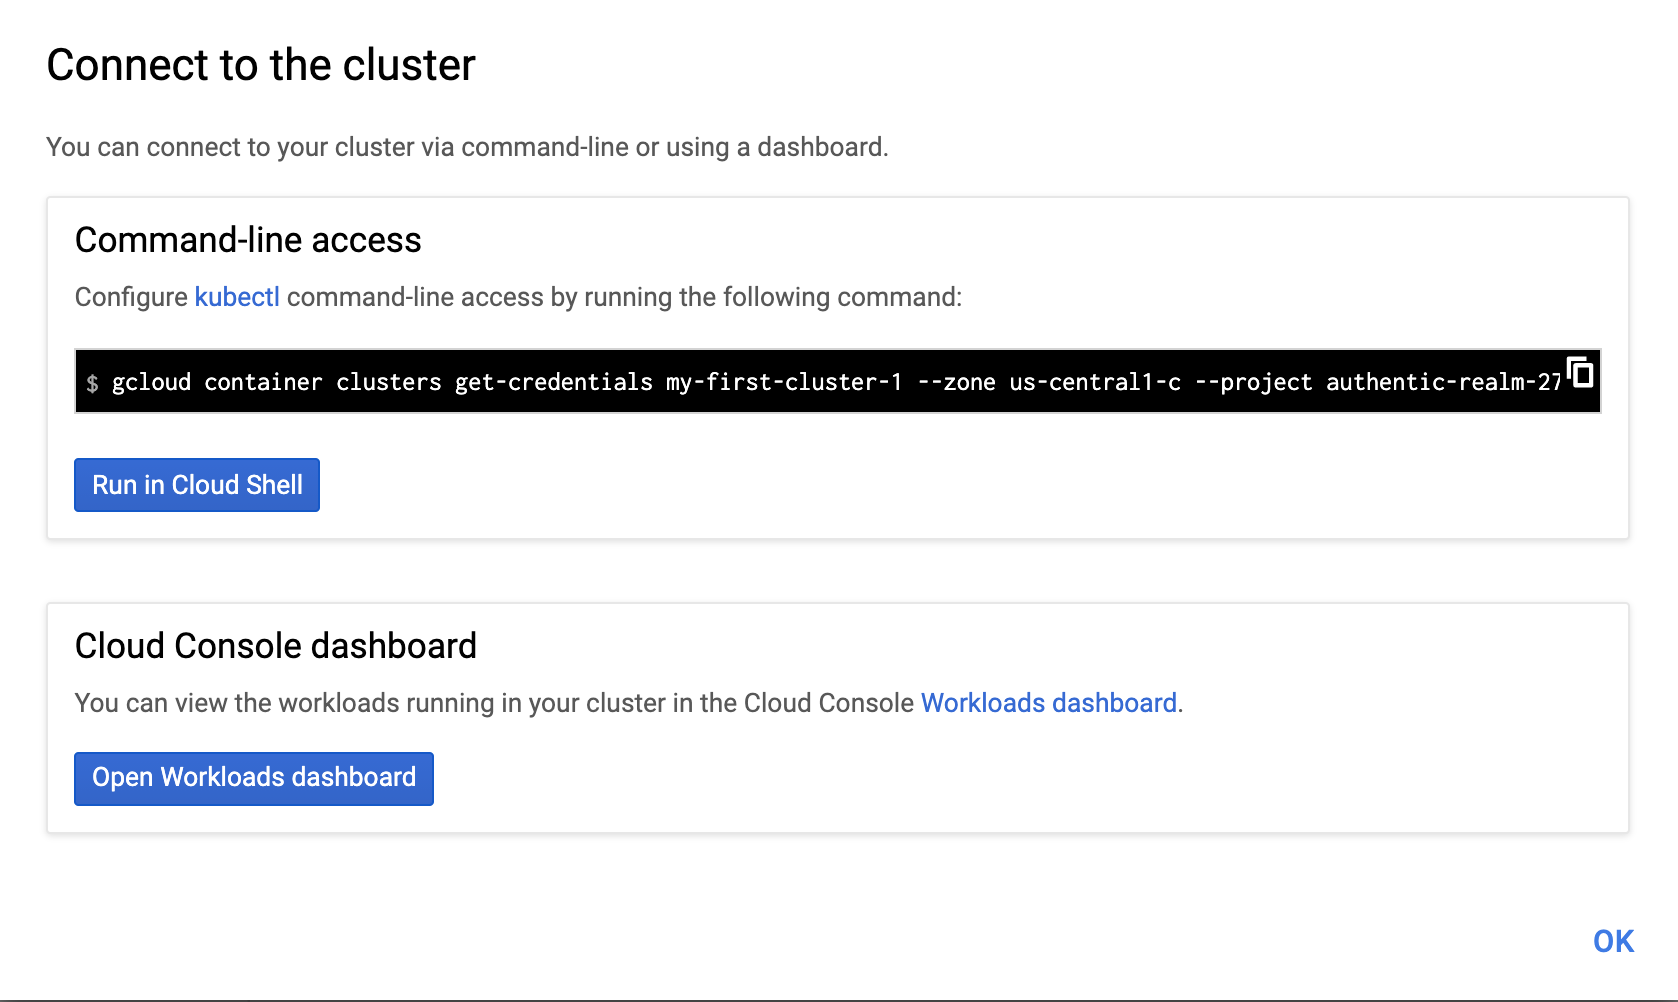
- If its the first time, it will instantiate a machine to run the shell.
- Once instantiated, it will show the command we wanted to run to be able to start using the
kubectlutility to deploy our recommend_pipeline image.
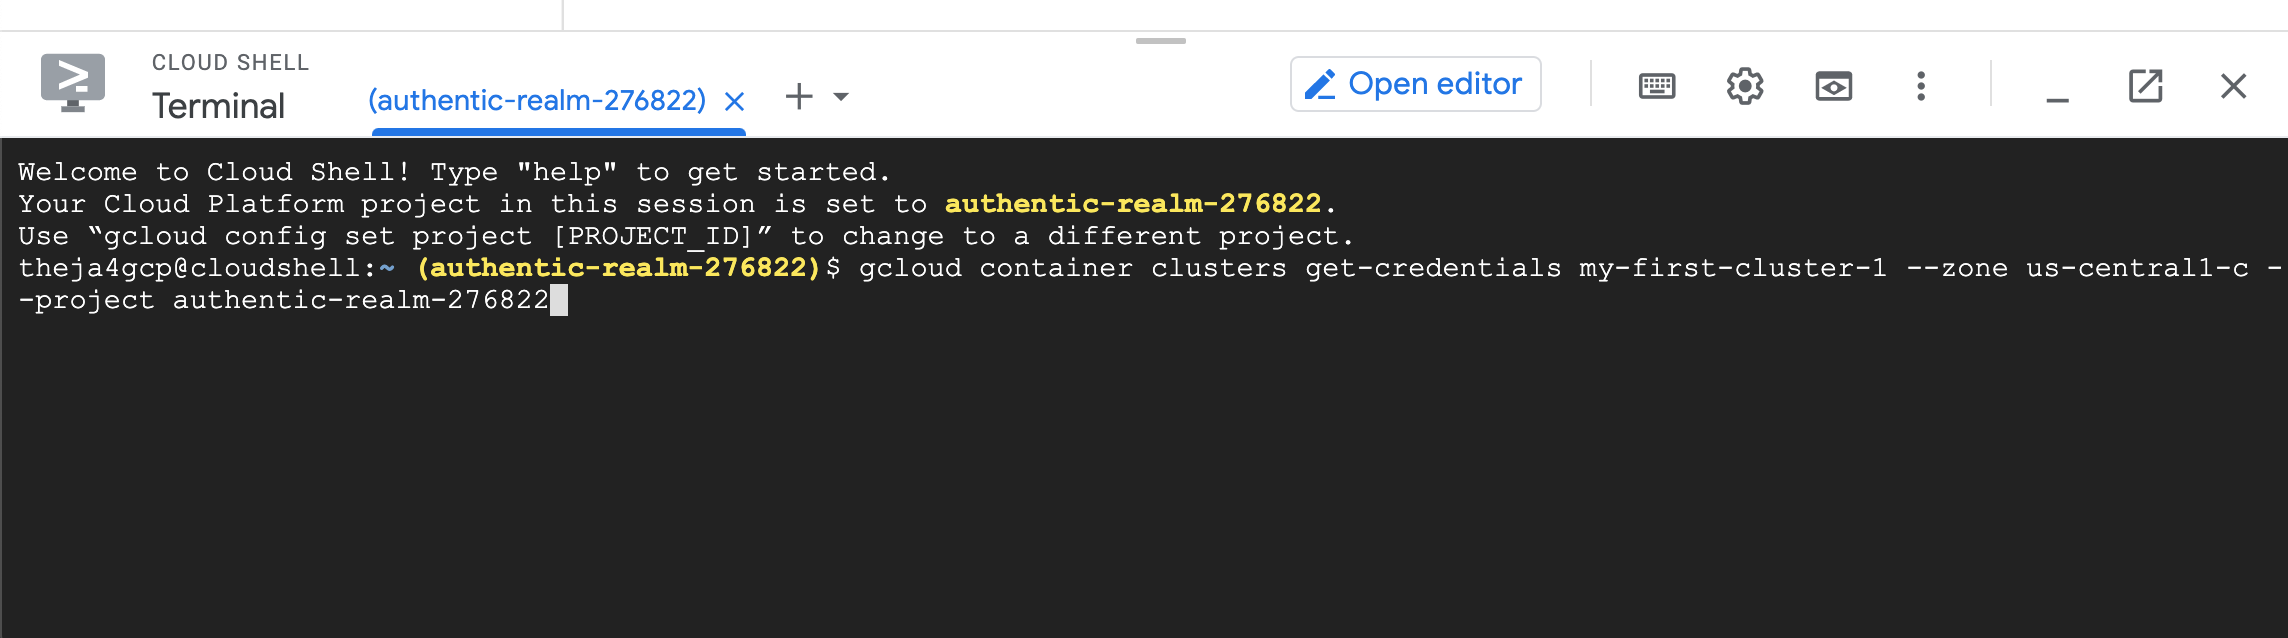
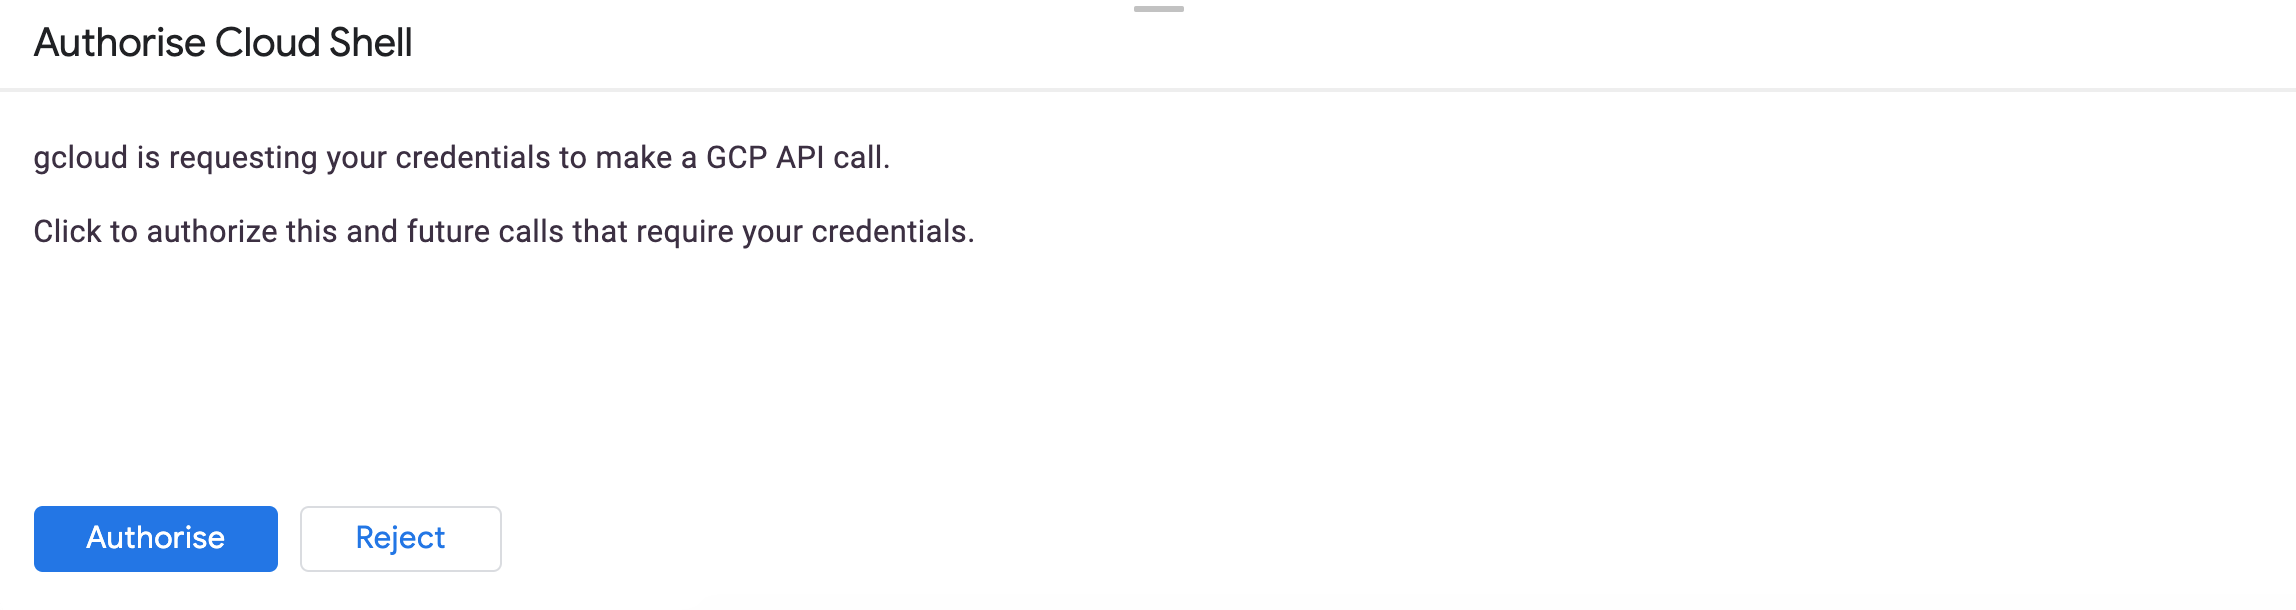
- You may run into an authorization issue (gcloud utility does not have the credentials on this machine to access any of the cloud services in our account).
theja4gcp@cloudshell:~ (authentic-realm-276822)$ gcloud container clusters get-credentials my-first-cluster-1 --zone us-central1-c -
-project authentic-realm-276822
ERROR: (gcloud.container.clusters.get-credentials) You do not currently have an active account selected.
Please run:
  $ gcloud auth login
to obtain new credentials.
If you have already logged in with a different account:
    $ gcloud config set account ACCOUNT
to select an already authenticated account to use.
The cloud shell may then complain about the following when you run
gcloud auth login:theja4gcp@cloudshell:~ (authentic-realm-276822)$ gcloud auth login Go to the following link in your browser: https://accounts.google.com/o/oauth2/auth?client_id=32555940559.apps.googleusercontent.com&redirect_uri=urn%3Aietf%3Awg%3Aoauth% 3A2.0%3Aoob&scope=openid+https%3A%2F%2Fwww.googleapis.com%2Fauth%2Fuserinfo.email+https%3A%2F%2Fwww.googleapis.com%2Fauth%2Fcloud-pl atform+https%3A%2F%2Fwww.googleapis.com%2Fauth%2Fappengine.admin+https%3A%2F%2Fwww.googleapis.com%2Fauth%2Fcompute+https%3A%2F%2Fwww .googleapis.com%2Fauth%2Faccounts.reauth&code_challenge=Vb_NeTDzREqrM34Aiv-64YwhY44vnz9ahbu0idZ0gQM&code_challenge_method=S256&acces s_type=offline&response_type=code&prompt=select_account Enter verification code:You will use the code generated as below into the cloud shell.
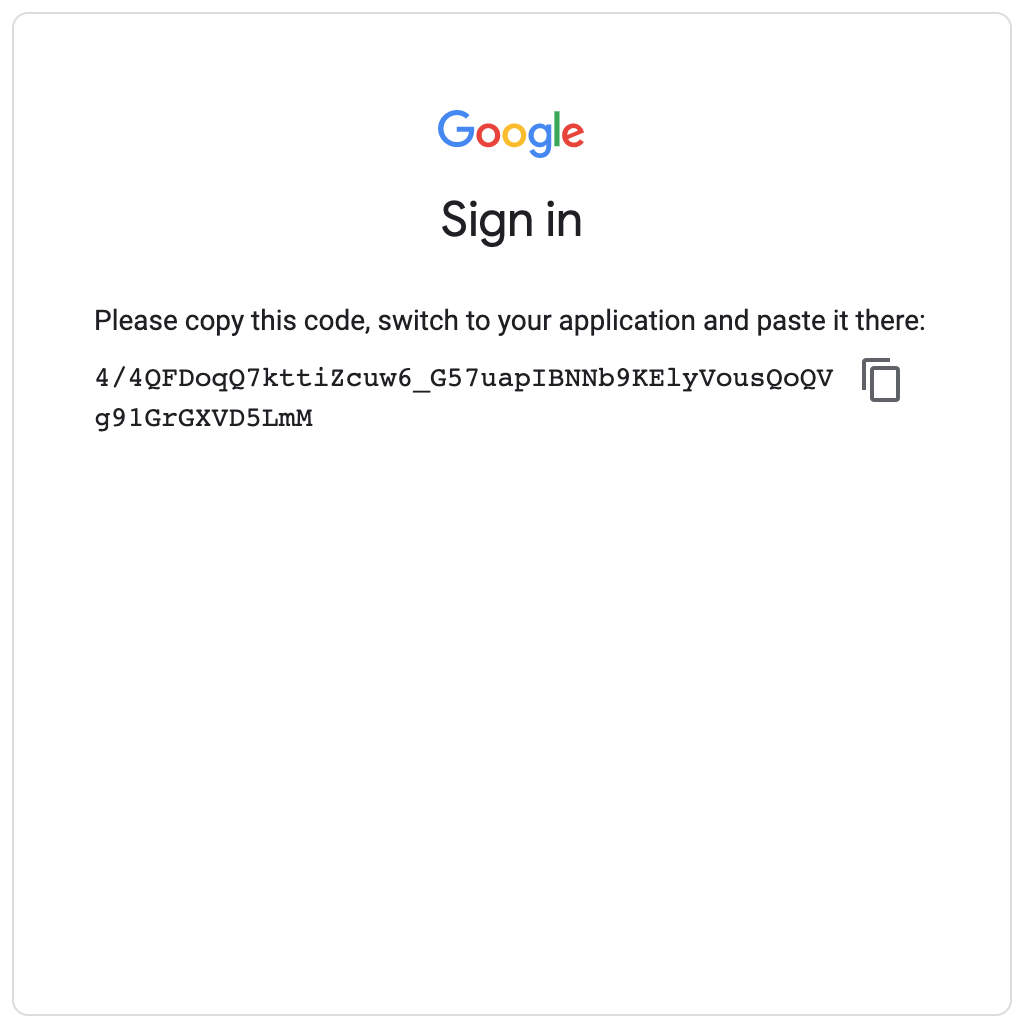
Once entered, you will see the following success message:
You are now logged in as [theja4gcp@gmail.com].
Your current project is [authentic-realm-276822].  You can change this setting by running:
$ gcloud config set project PROJECT_ID
Lets run the original gcloud command that was trying to get the credentials for
my-first-clusteragain:theja4gcp@cloudshell:~ (authentic-realm-276822)$ gcloud container clusters get-credentials my-first-cluster-1 --zone us-central1-c - -project authentic-realm-276822 Fetching cluster endpoint and auth data. kubeconfig entry generated for my-first-cluster-1.We can check the
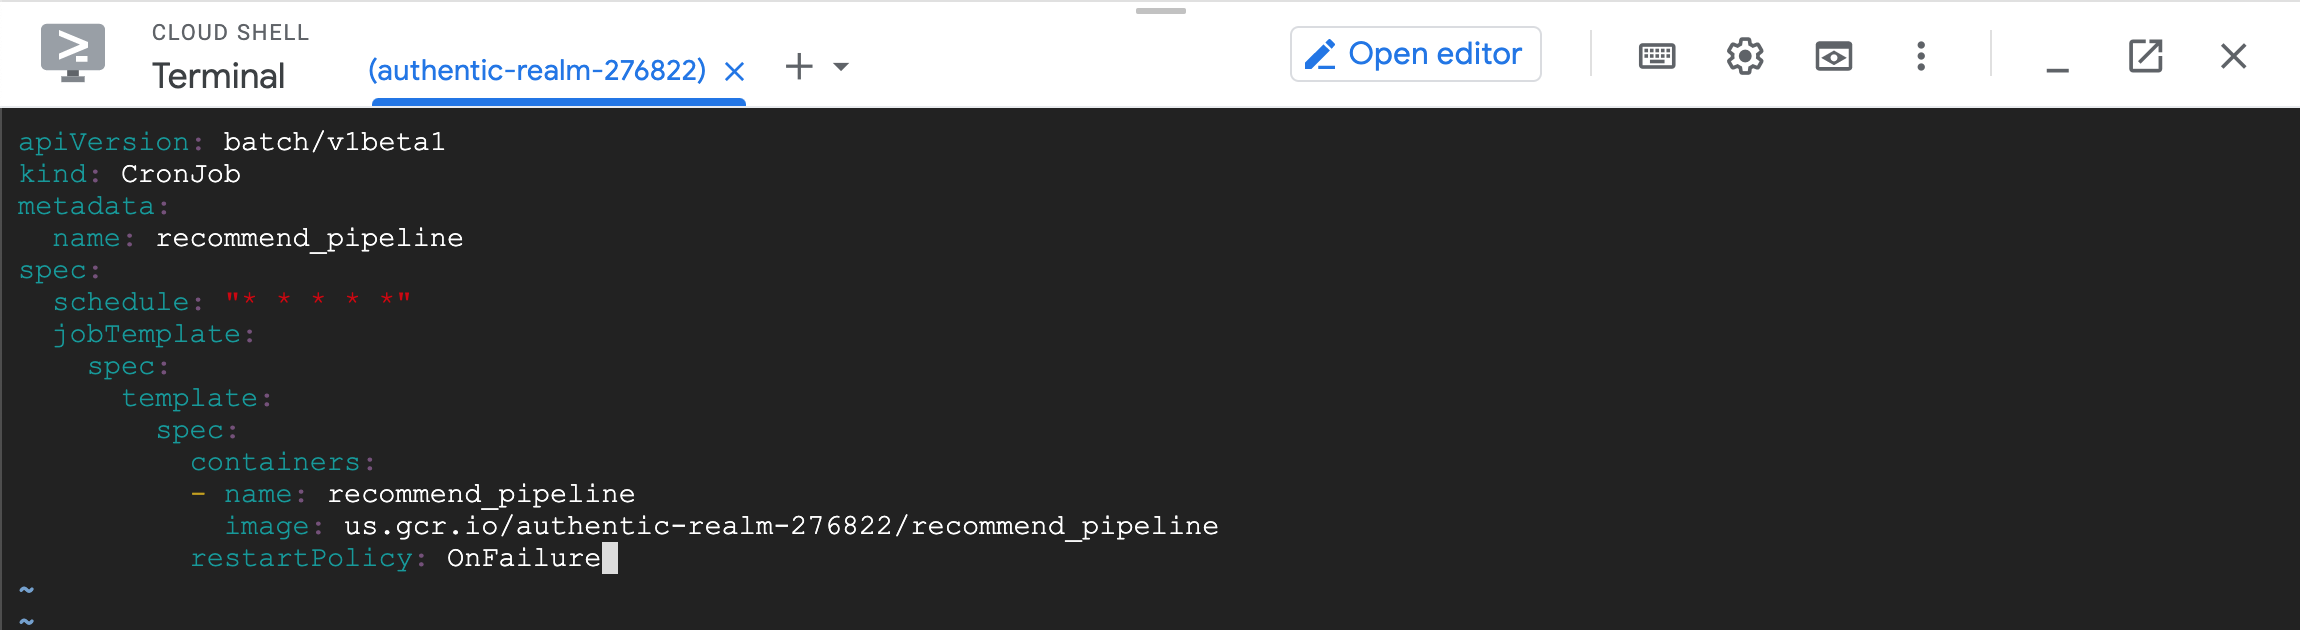
kubectlversion:theja4gcp@cloudshell:~ (authentic-realm-276822)$ kubectl version Client Version: version.Info{Major:"1", Minor:"19", GitVersion:"v1.19.2", GitCommit:"f5743093fd1c663cb0cbc89748f730662345d44d", GitT reeState:"clean", BuildDate:"2020-09-16T13:41:02Z", GoVersion:"go1.15", Compiler:"gc", Platform:"linux/amd64"} Server Version: version.Info{Major:"1", Minor:"18+", GitVersion:"v1.18.6-gke.3504", GitCommit:"ebdafa7ed3984f94e1ab914221bf04b62a5cd 1b8", GitTreeState:"clean", BuildDate:"2020-09-09T02:49:12Z", GoVersion:"go1.13.9b4", Compiler:"gc", Platform:"linux/amd64"}Next we will create a yaml file in the current directory (using the
vimtext editor) in the cloud shell. The file contents are shown below.apiVersion: batch/v1beta1 kind: CronJob metadata: name: recommend-pipeline-deployment spec: schedule: "* * * * *" jobTemplate: spec: template: spec: containers: - name: recommend-pipeline image: us.gcr.io/authentic-realm-276822/recommend_pipeline restartPolicy: OnFailureVim specific keys to use are (i for insert, esc to escape from insert mode, ‘wq’ to write and quit, and ‘q!’ to quit without any modifications if needed).
Once the yaml file is created as shown below, we can deploy the image:
theja4gcp@cloudshell:~ (authentic-realm-276822)$ vim recommend_pipeline.yaml
theja4gcp@cloudshell:~ (authentic-realm-276822)$ ls
README-cloudshell.txt  recommend_pipeline.yaml
theja4gcp@cloudshell:~ (authentic-realm-276822)$ kubectl get all
NAME                 TYPE        CLUSTER-IP   EXTERNAL-IP   PORT(S)   AGE
service/kubernetes   ClusterIP   10.108.0.1   <none>        443/TCP   56m
theja4gcp@cloudshell:~ (authentic-realm-276822)$ kubectl apply -f recommend_pipeline.yaml
cronjob.batch/recommend-pipeline-deployment created
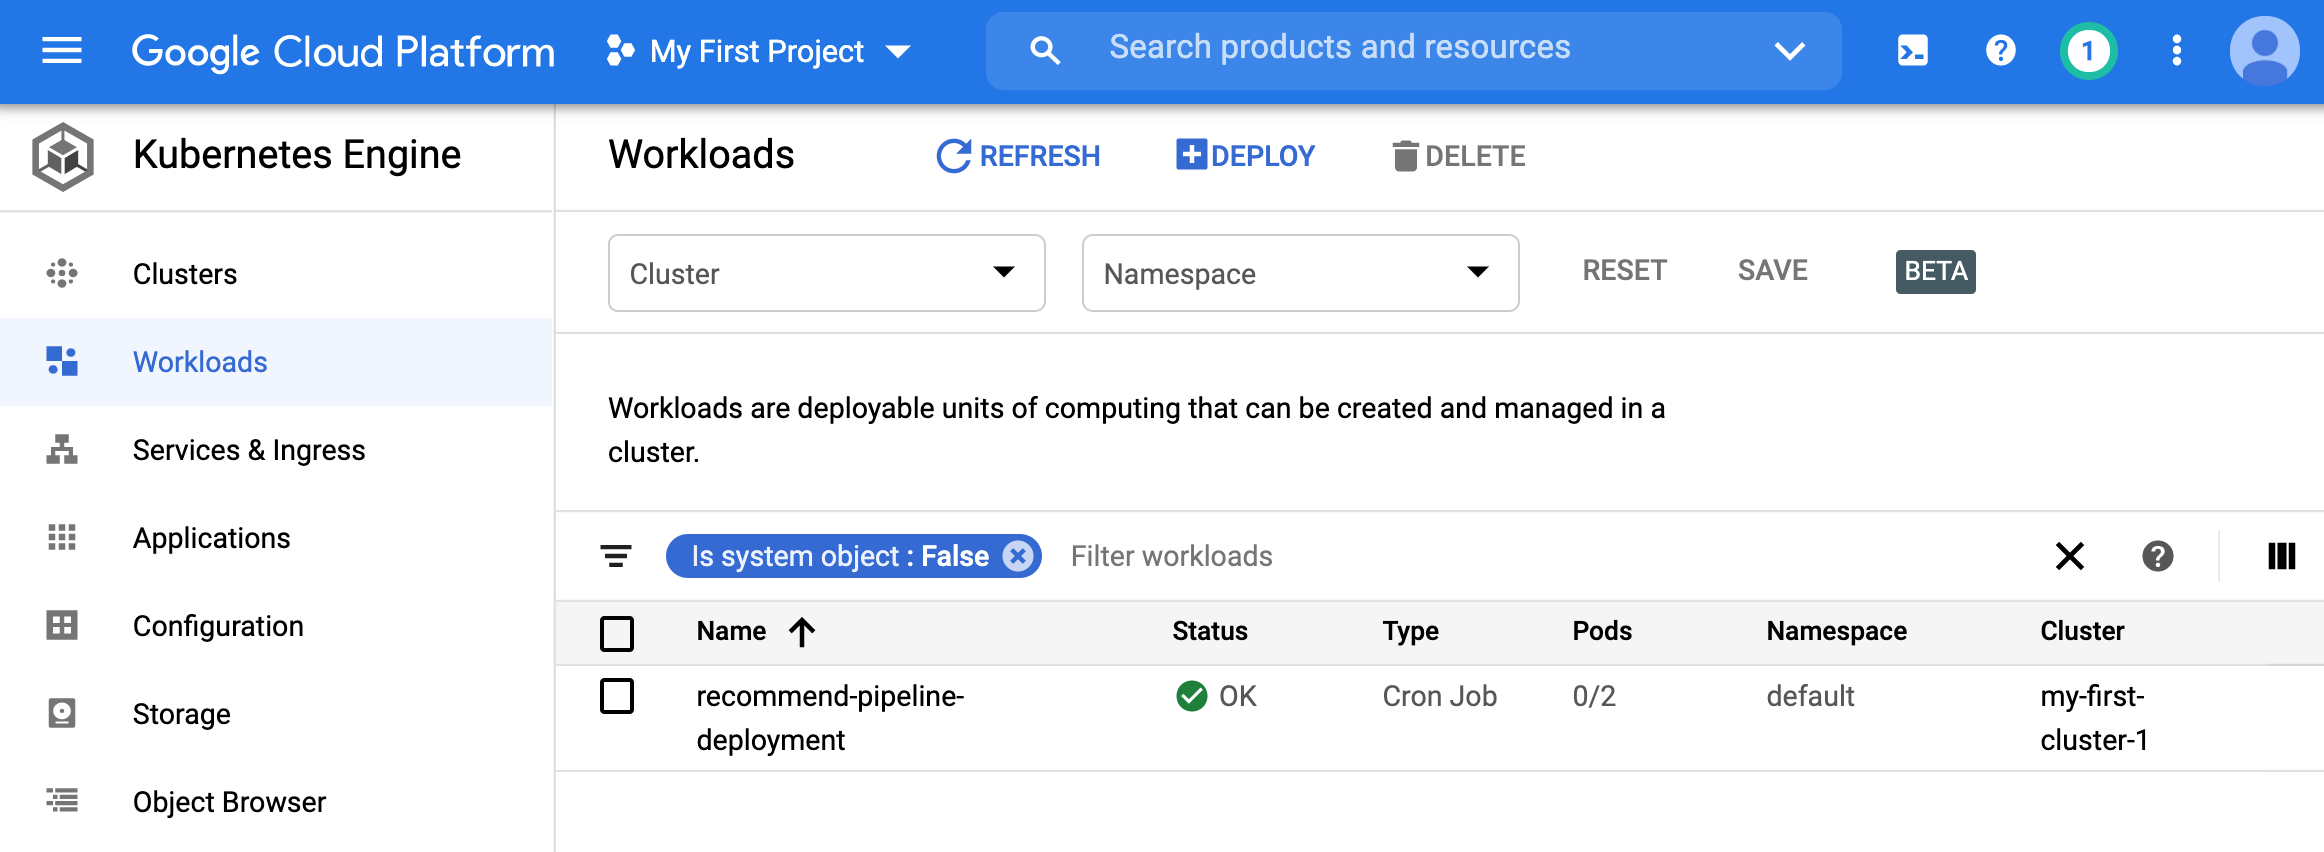
- We can now go to the workloads page of GKE and view the deployment.
- Clicking on it gives more information.
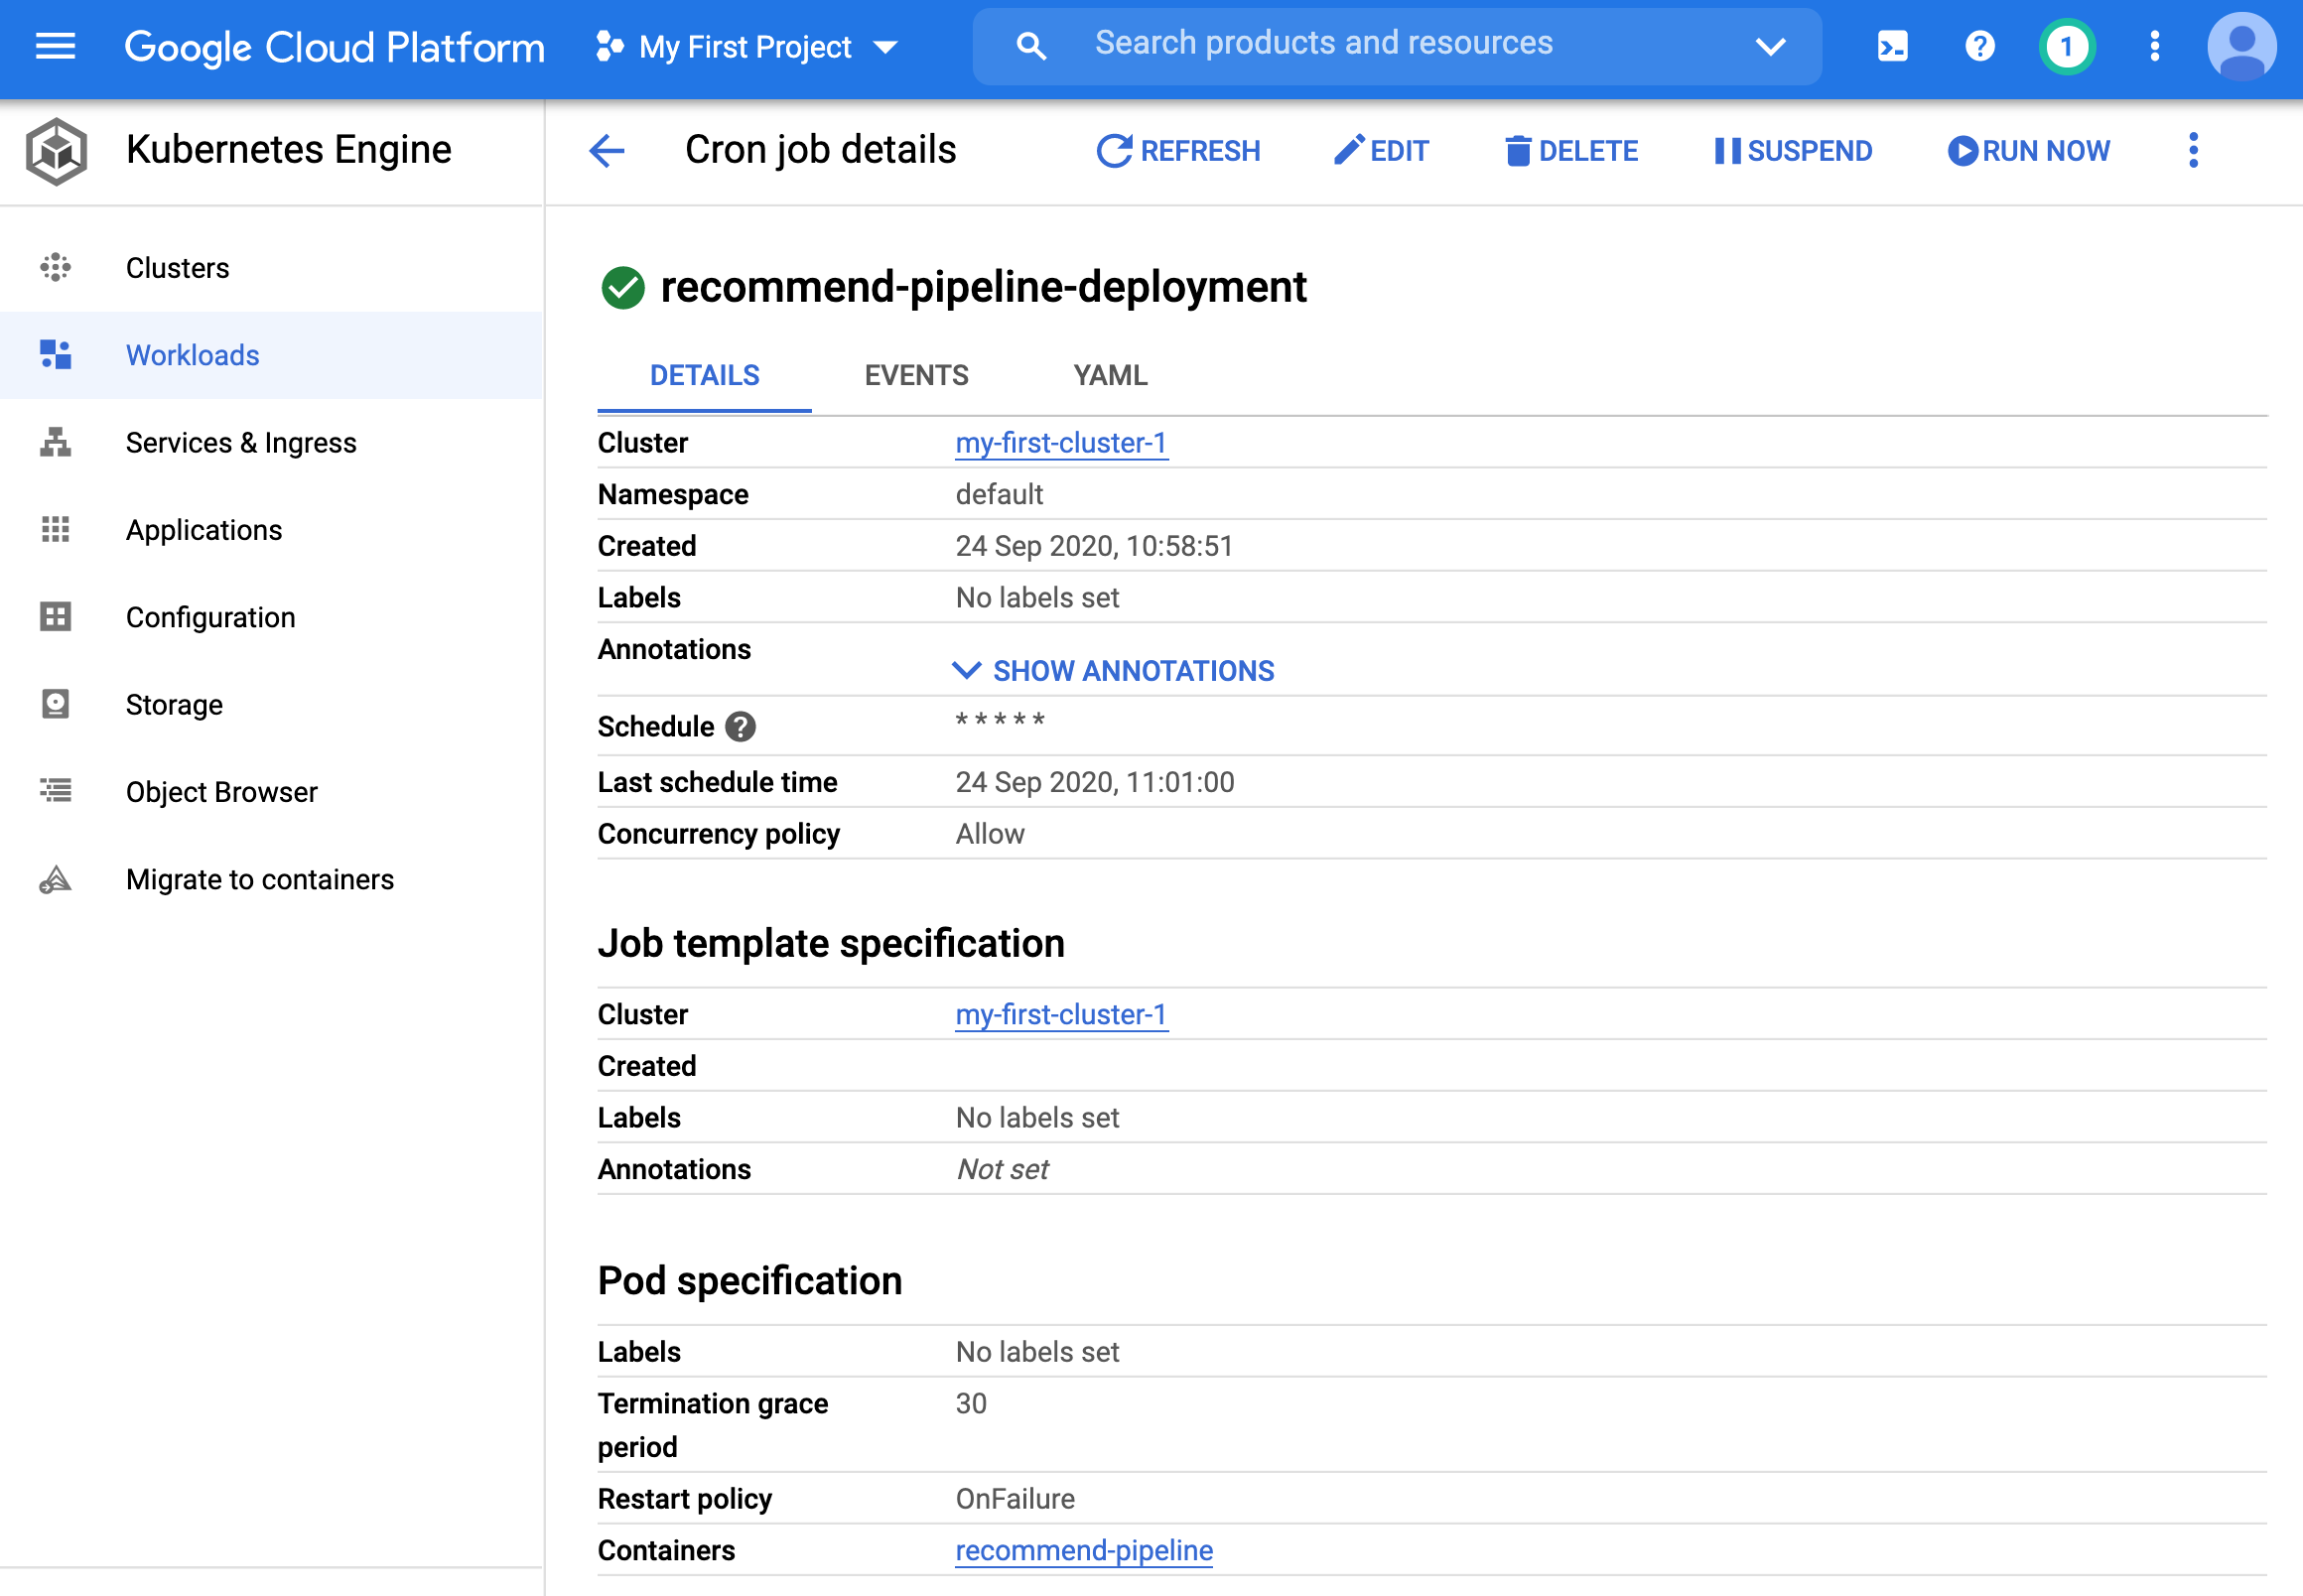
- You can see at the bottom that it is a 3 node cluster.
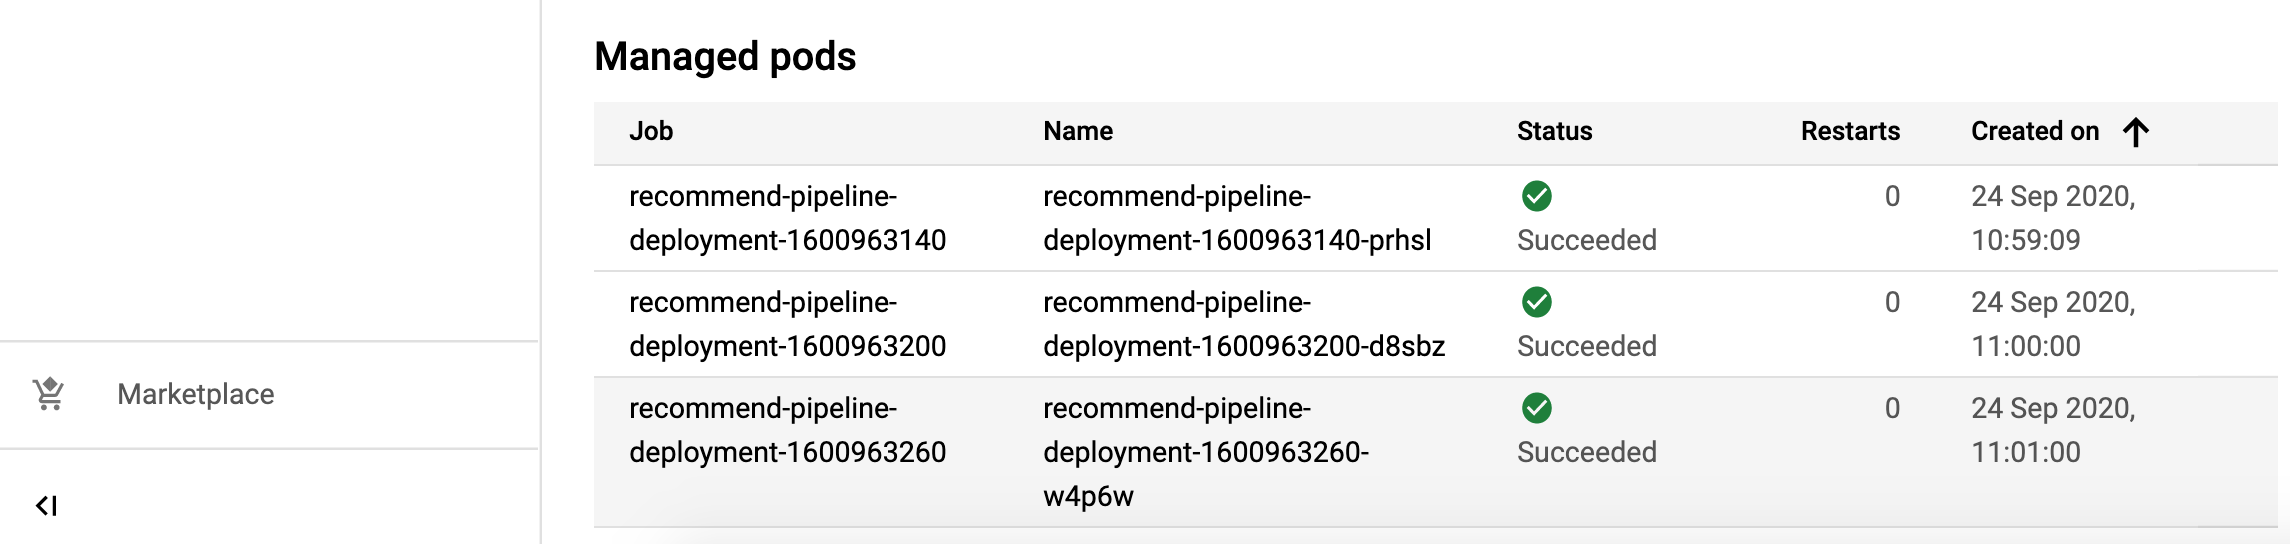
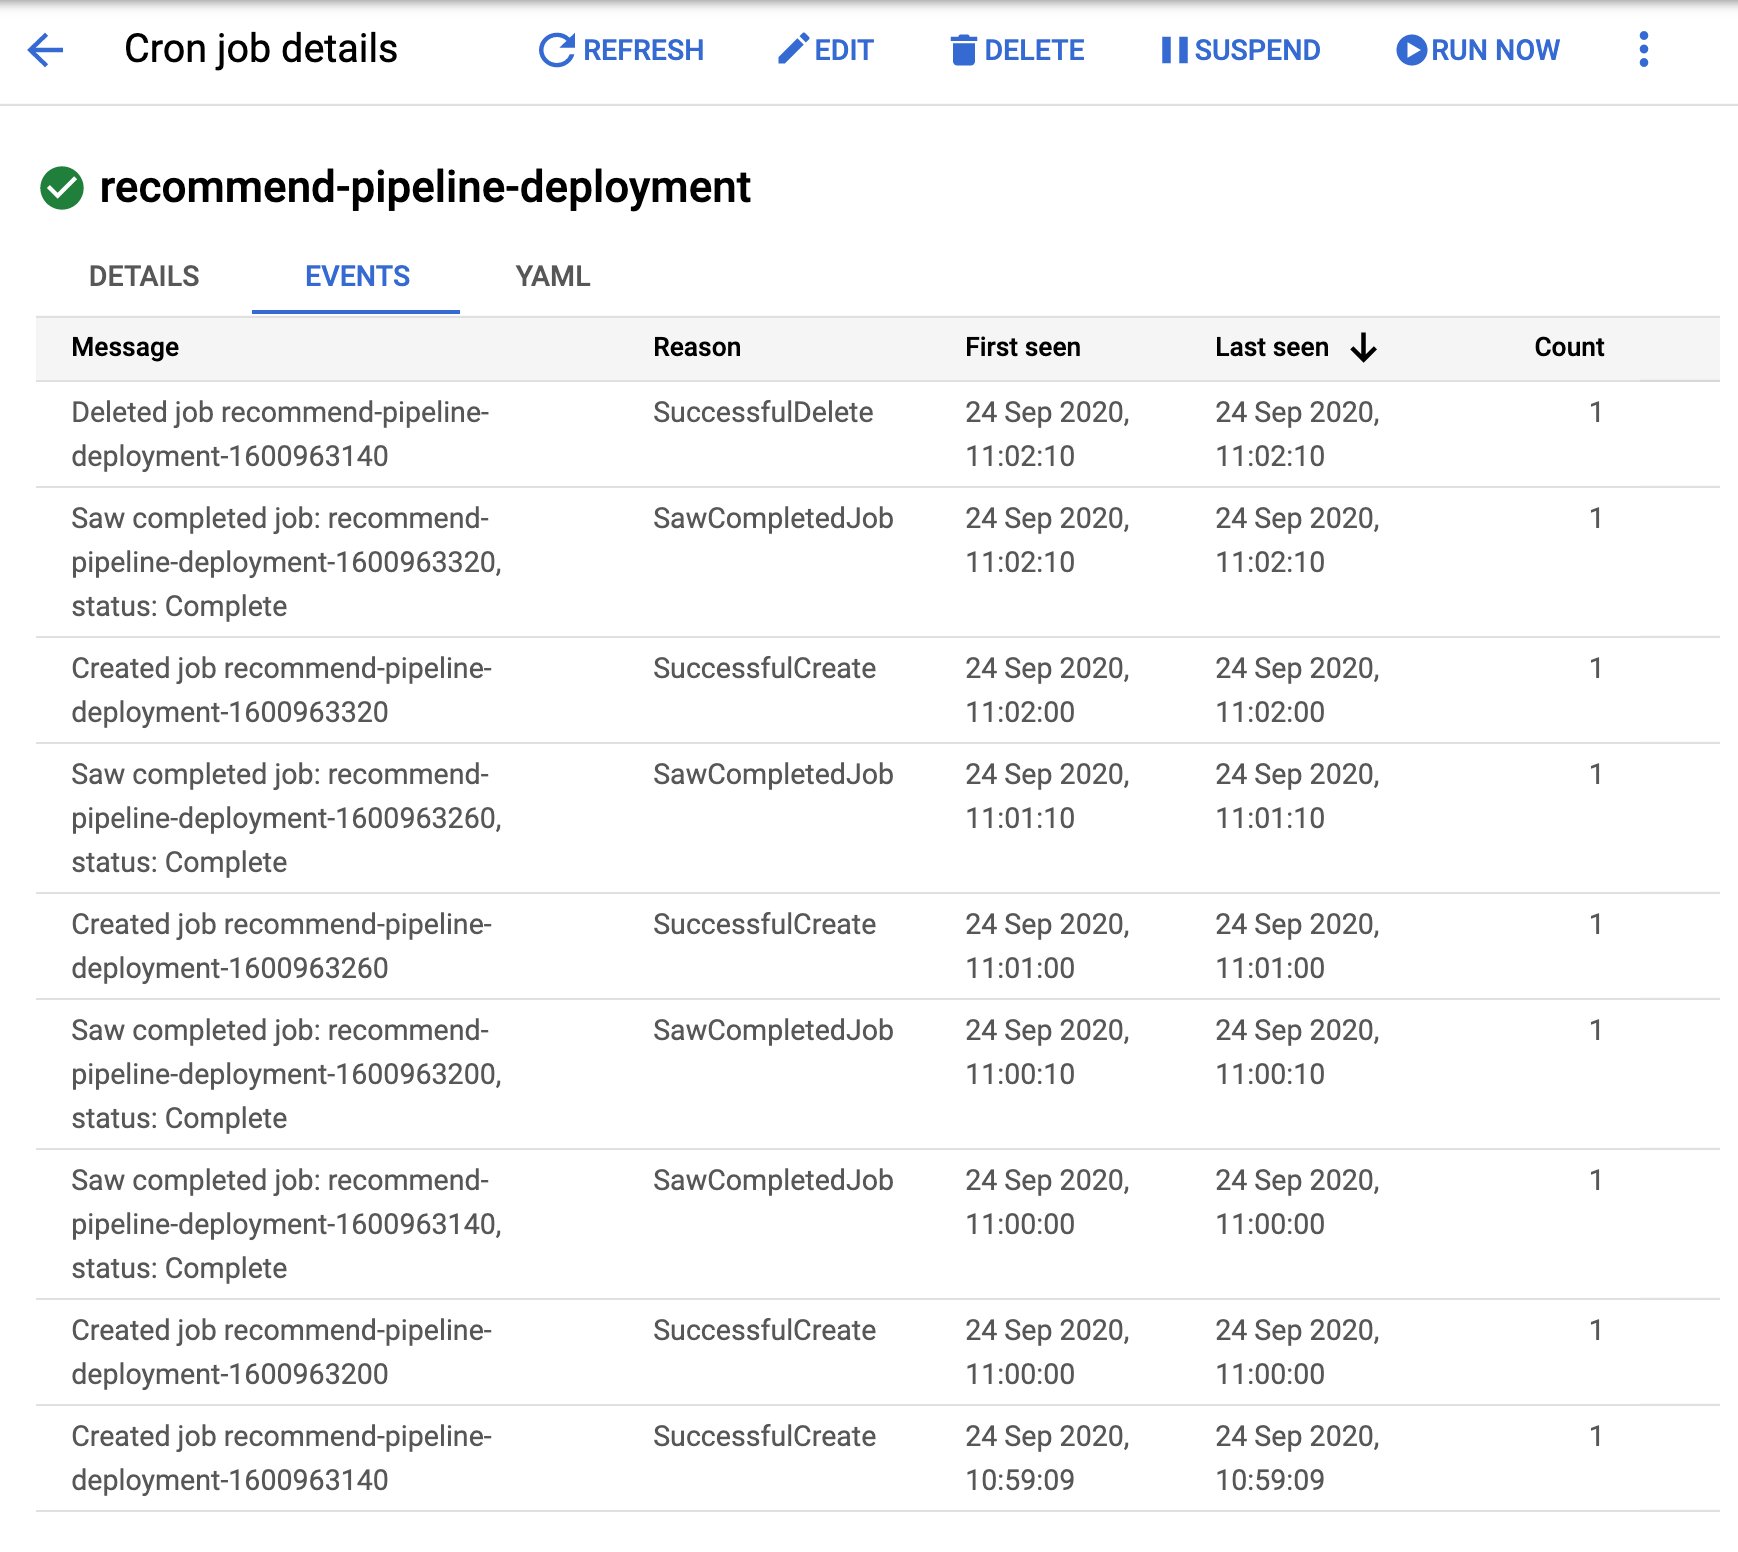
- Switching to the events tab shows how the cronjob is being run every minute:
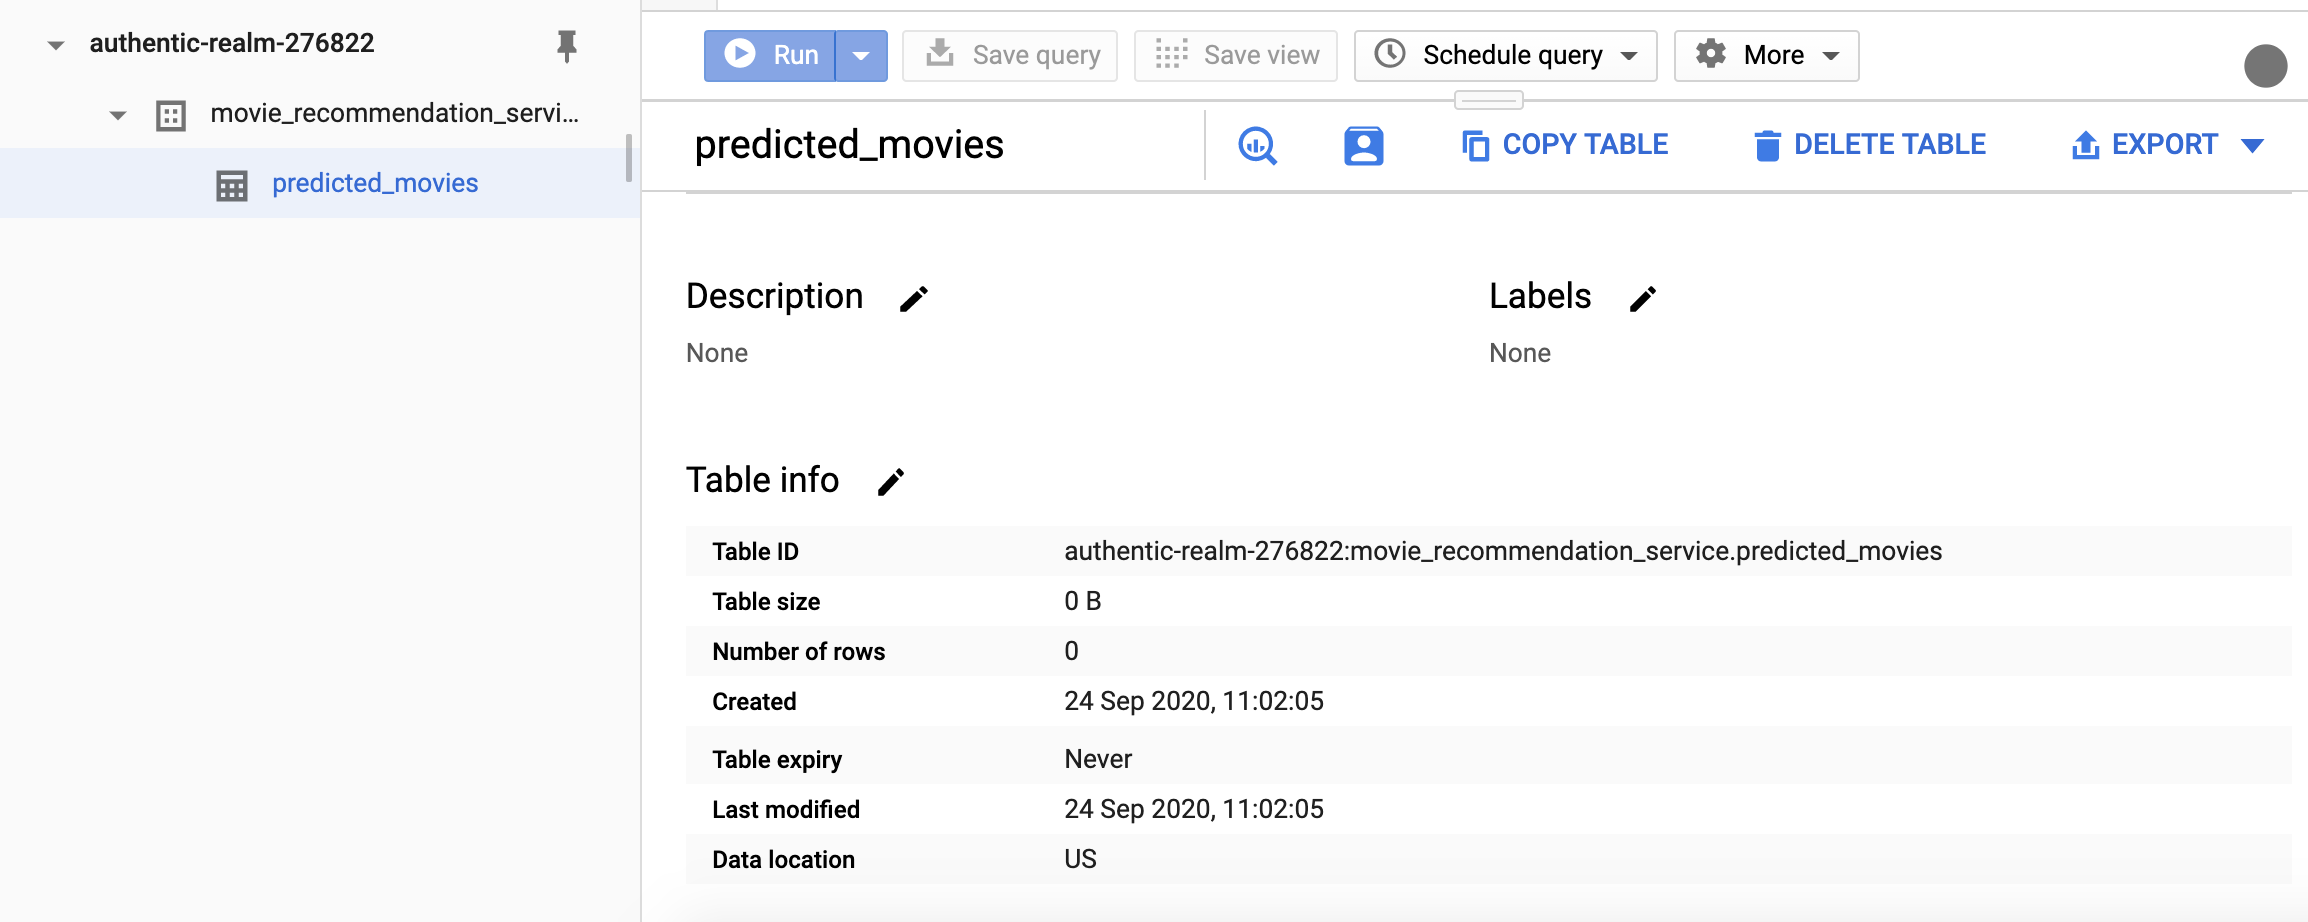
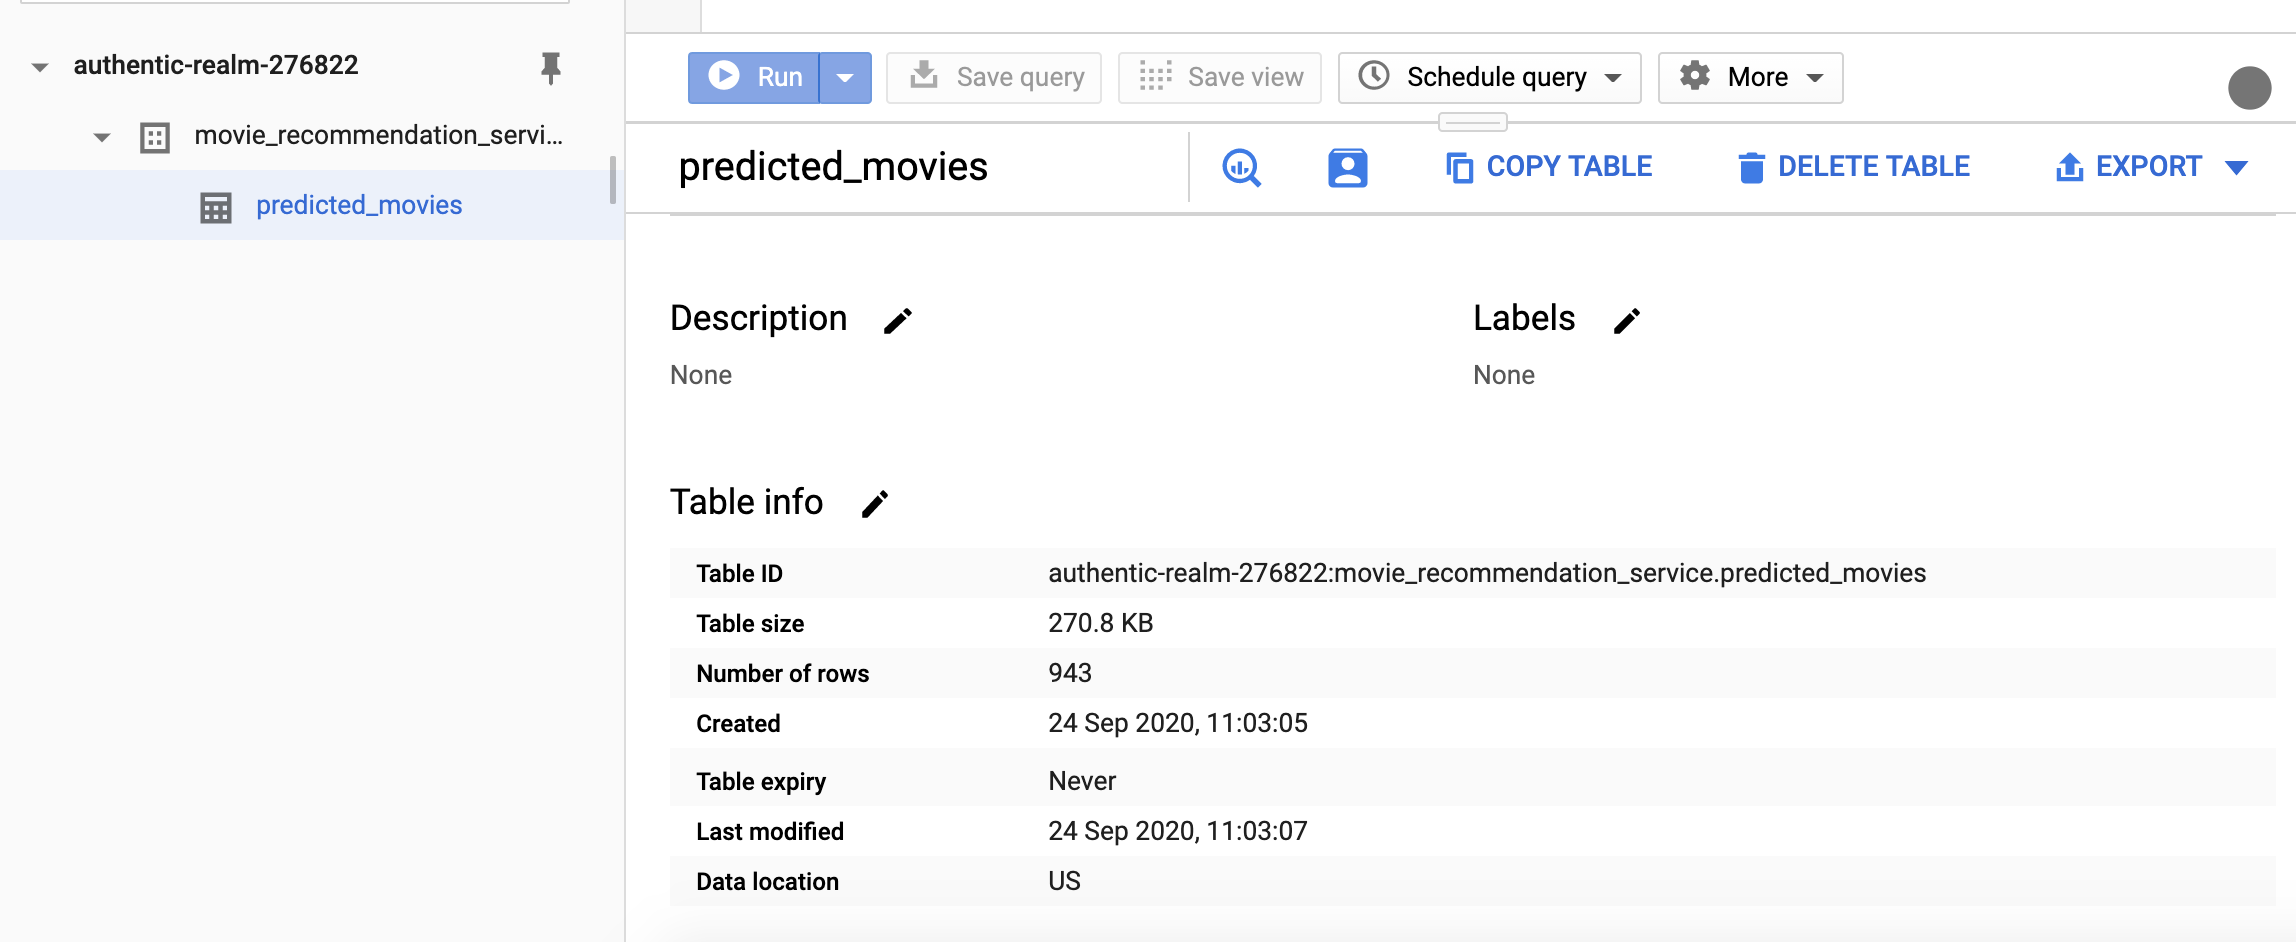
- We can also inspect the BigQuery table details page. Here are two screenshots about 1 minute apart from each other:
Great, so we have run a cron job on the cloud. A key benefit of doing this on the cloud is fault tolerance.
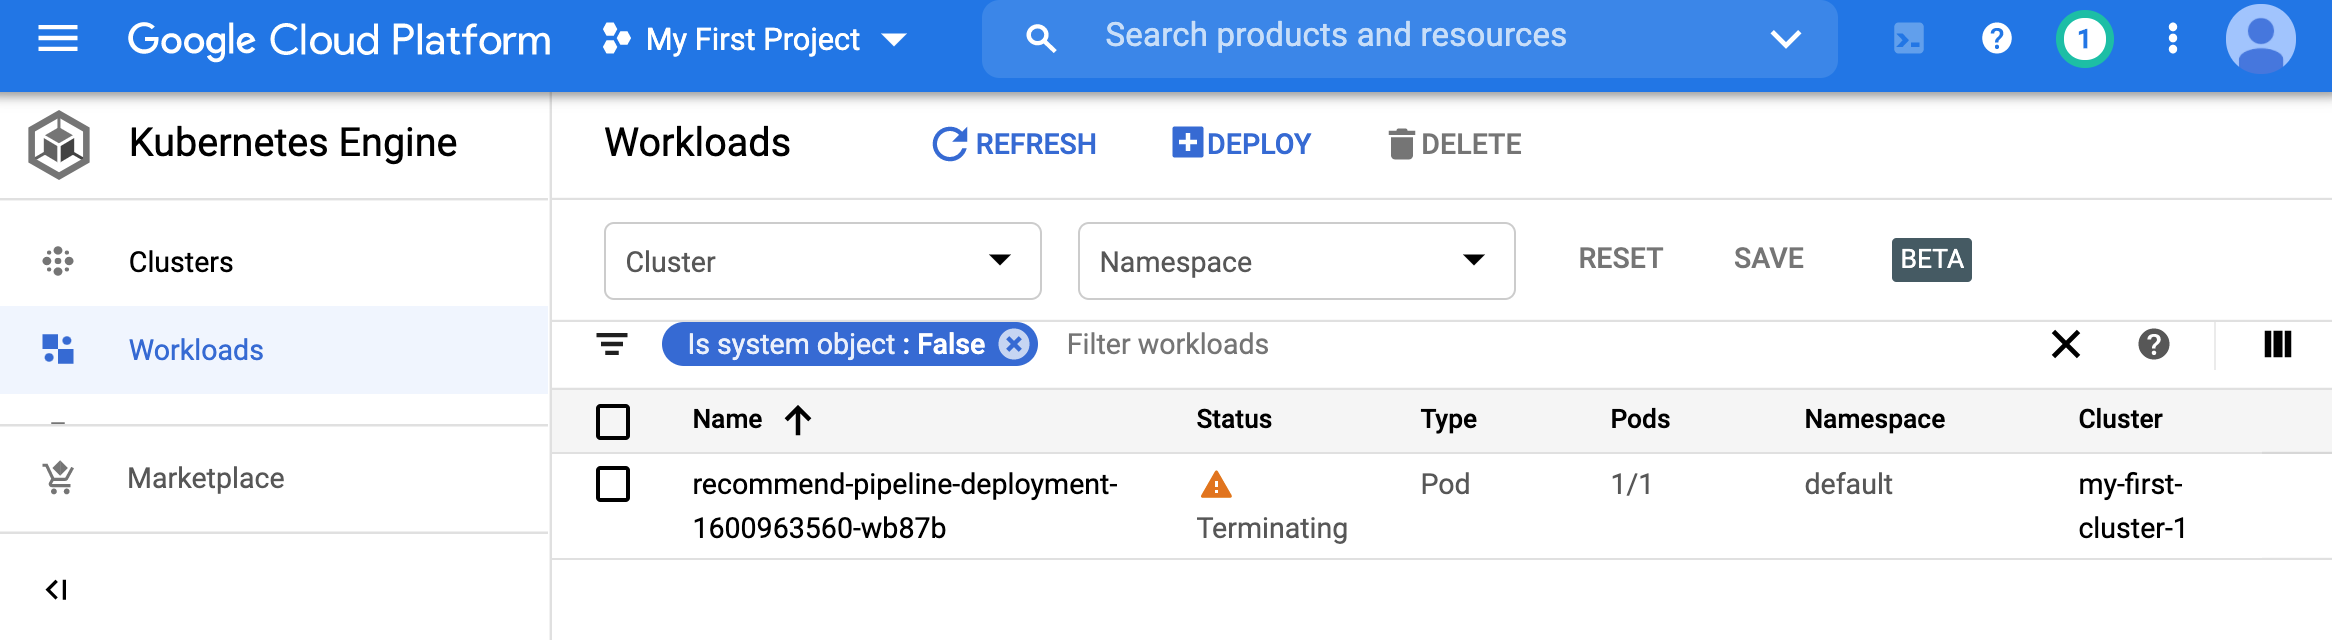
To wrap up things, we can delete the deployment using the following command:
theja4gcp@cloudshell:~ (authentic-realm-276822)$ kubectl delete -f recommend_pipeline.yaml
cronjob.batch "recommend-pipeline-deployment" deleted
theja4gcp@cloudshell:~ (authentic-realm-276822)$ kubectl get all
NAME                 TYPE        CLUSTER-IP   EXTERNAL-IP   PORT(S)   AGE
service/kubernetes   ClusterIP   10.108.0.1   <none>        443/TCP   73m
You can see the deployment getting terminated in the browser as well.
- Finally, we can also terminate the cluster.
- We have only scratched the surface of scheduled jobs. Both cron on a self-hosted instance as well as K8s scheduling are very powerful for automation. It is worthwhile delving deeper into these using the resources linked throughout this section.